Managing users is one of those Linux skills that becomes important as soon as you start working with servers. In AlmaLinux, user management gives you control over who can access the system, what they can do, which files they can use, & what level of permissions they have.
Whether you’re working on a personal server, a development environment, or a production system, having a good understanding of users, groups, permissions, & administrative access will make your job much easier.
In this guide, we’ll walk through the practical side of Linux user management in AlmaLinux.
Table of Contents
Why User Management Matters in AlmaLinux?
A Linux server can have several users, & each person may need a different level of access. Giving everyone unrestricted access isn’t a good idea. It can lead to accidental changes, security problems, and difficulty tracking who did what.
Good user management helps you:
- Control access to system resources
- Keep users’ files separate
- Assign the right permissions
- Manage administrative privileges
- Improve overall system security
- Organize users into groups
- Disable or remove accounts that are no longer needed
The basic idea is straightforward: give each user only the access they actually need.
Let’s look at the steps of creation of groups and the users:
Steps for Creation of Groups & Users
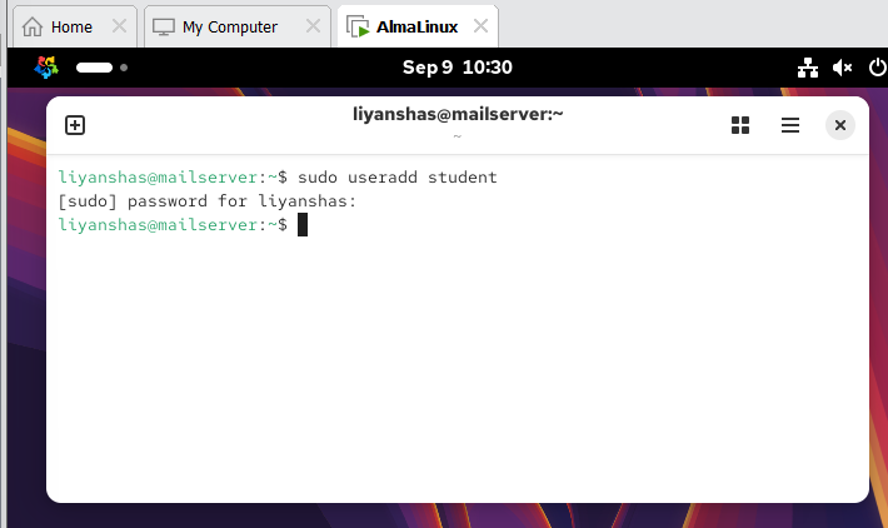
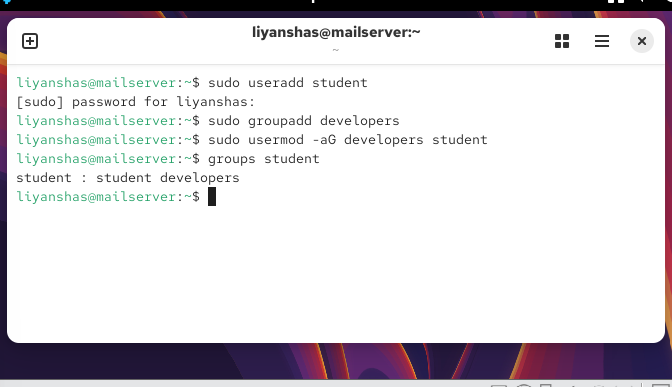
- Create a new user
Create a user named student:
sudo useradd student
- Set a password
Set a password for the new user:
sudo passwd student
Enter the password when prompted.
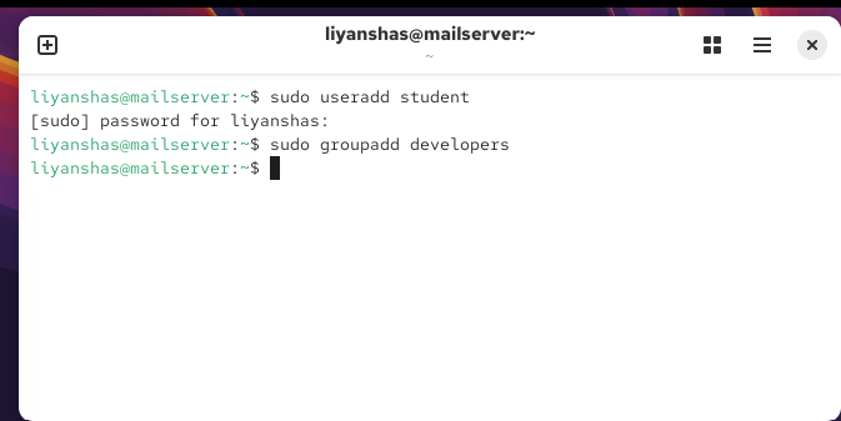
- Create a group
Create a group named developers:
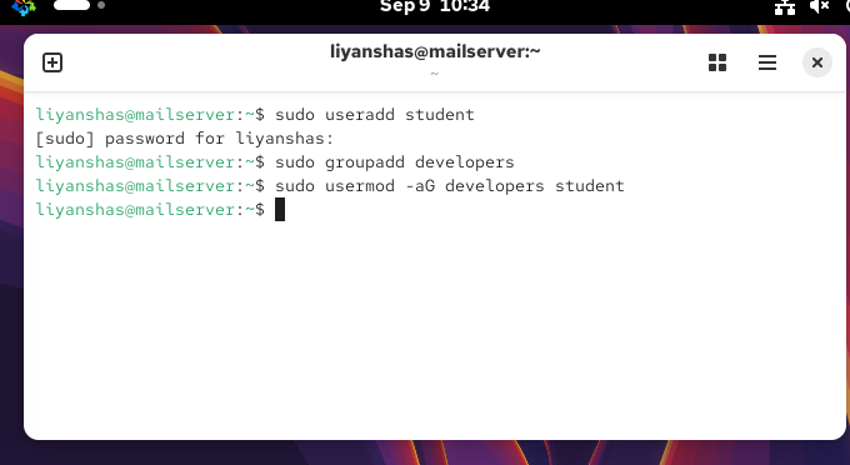
- Add the user to the group
Add student to the developers group:
sudo usermod -aG developers student
- Check the user’s group
Verify that the user was added:
groups student
You should see something similar to:
student : student developers
- Switch to the new user
su – student If it shows failure
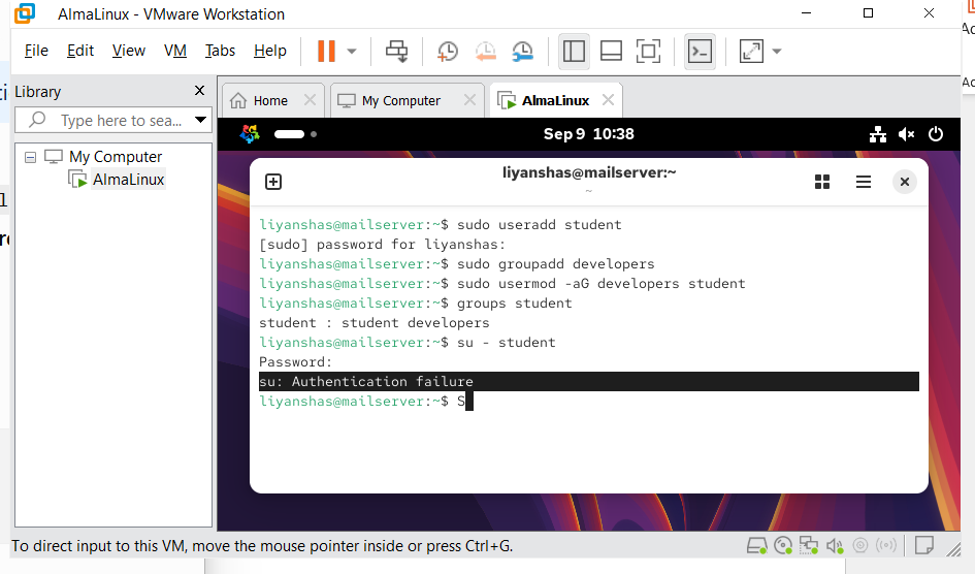
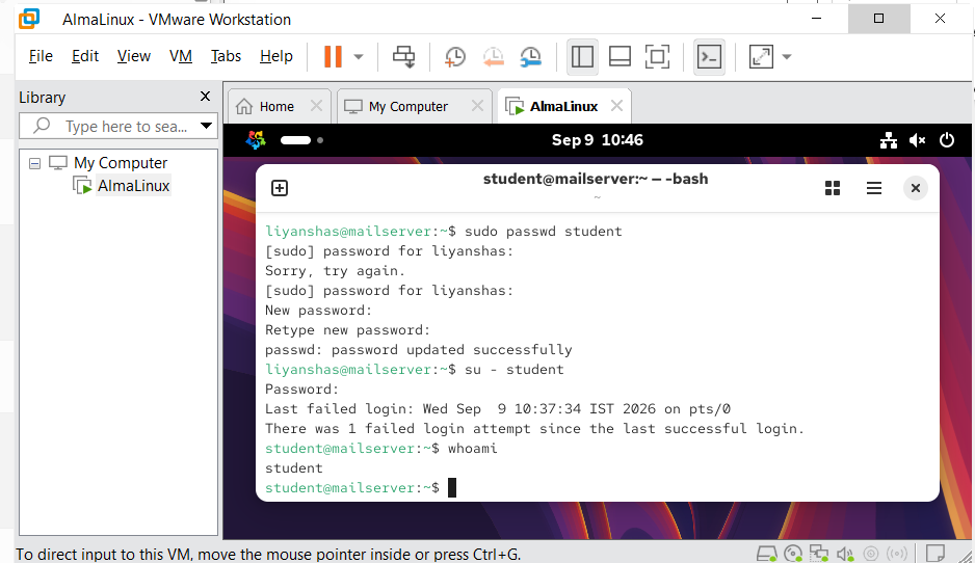
Reset the password for that type the below:
sudo passwd student
Check which user you are logged in as:
whoami
Output:
student
Steps for Adding and Removing Users from the Group
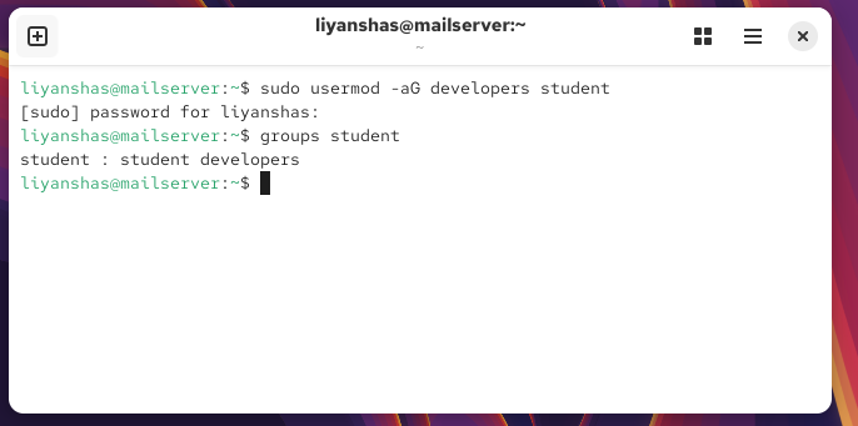
Run:
sudo usermod -aG developers student
Check that it worked:
groups student
You should see:
student : student developers
This confirms that student is a member of developers.
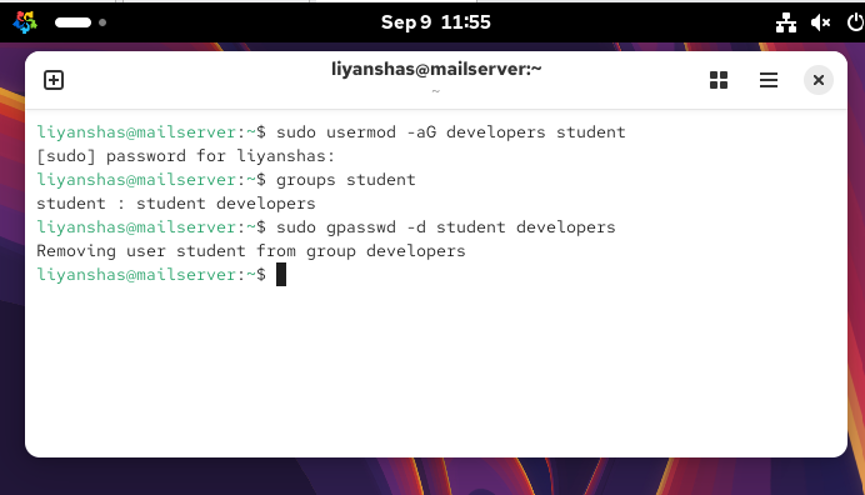
- Remove a user from a group
Remove student from developers:
sudo gpasswd -d student developers
You should get a message similar to:
Removing user student from group developers
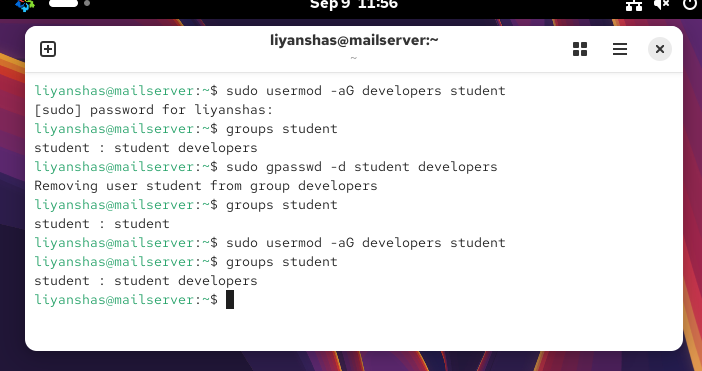
Now verify:
groups student
developers should no longer appear.
- Add the user again for your final test
If you want to leave your lab in the original state:
sudo usermod -aG developers student
Then:
groups student
Steps for Usermod Command and Useful Options
The usermod command is used to modify an existing Linux user account.
1. Add a user to a group — -aG
You already used this:
sudo usermod -aG developers student
- -G → specifies the group
- -a → adds the group without removing existing group memberships
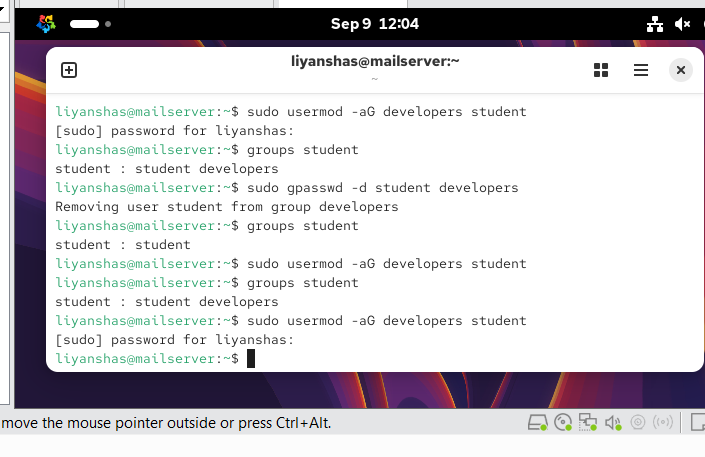
Verify:
groups student
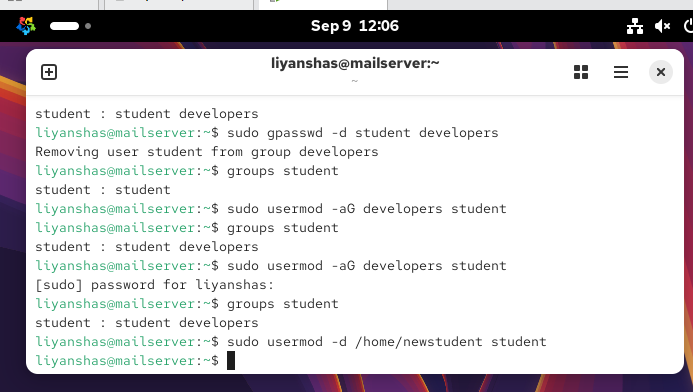
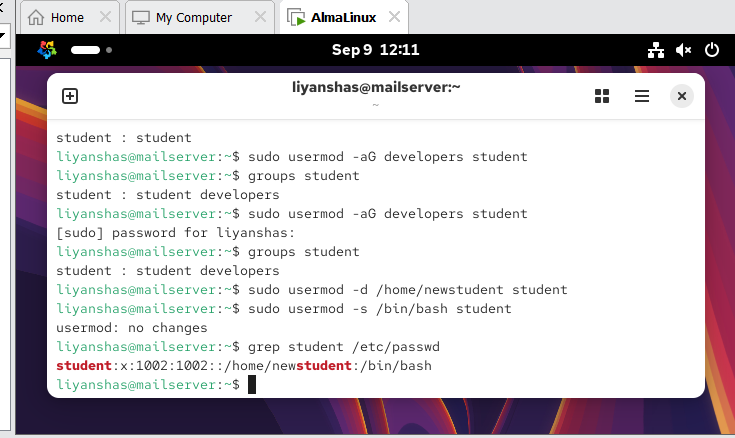
2. Change the user’s home directory — -d
For example:
sudo usermod -d /home/newstudent student
This changes the configured home directory for student.
3. Change the user’s login shell — -s
For example:
sudo usermod -s /bin/bash student
This sets Bash as the user’s login shell.
Check it with:
grep student /etc/passwd
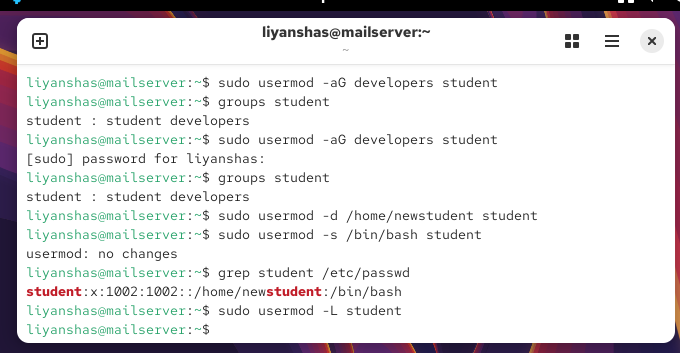
4. Lock a user account — -L
sudo usermod -L student
This locks the user’s password-based login.
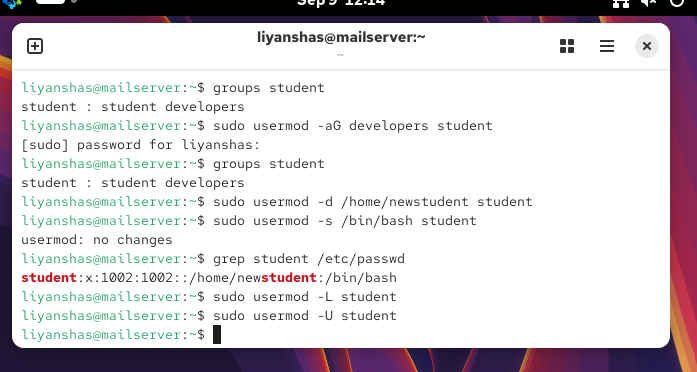
5. Unlock a user account — -U
sudo usermod -U student
This unlocks the account again.
Best Practices for AlmaLinux User Management
Knowing the Alma Linux commands is only part of effective user management. How you use those commands matters just as much.
1. Give Users Their Own Accounts
Avoid having multiple people share one account. Individual accounts make it easier to manage permissions and determine who performed an action.
2. Follow the Principle of Least Privilege
Don’t give users more access than they need. If someone only needs to read files, there’s usually no reason to give them write or administrative access.
3. Review Group Memberships
Keep an eye on important groups, especially administrative groups such as wheel.
You can check the group with:
getent group wheel4. Disable Unused Accounts
If an account isn’t currently needed, consider locking it instead of leaving it available.
5. Protect Administrative Access
Administrative privileges should be limited to trusted users. Avoid using root access when a more restricted sudo permission is enough.
6. Monitor Login Activity
Commands such as who, w, and last can help you keep track of user sessions and login activity.
7. Think Before Deleting Accounts
Before running:
sudo userdel -r usernamemake sure important files have been backed up or moved somewhere safe.
Conclusion
User management is a core AlmaLinux administration skill, and AlmaLinux provides all the tools you need to manage accounts, groups, passwords, permissions, and administrative access effectively.
Commands such as useradd, usermod, userdel, groupadd, passwd, chage, chmod, chown, and sudo may seem simple individually, but together they give you powerful control over a multi-user Linux system.
The key is to manage access thoughtfully. Create only the accounts you need, give users appropriate permissions, review privileges regularly, and follow the principle of least privilege.
Once these basics become familiar, managing users on AlmaLinux becomes much more straightforward—and you’ll have a solid foundation for handling more advanced Linux administration tasks.
FAQs
Below are the AlmaLinux 2026: Master Linux User Management with Powerful Skills FAQs:
Q. How do I create a new user in AlmaLinux?
Creating a new user in AlmaLinux is simple with the useradd command. For example, you can run sudo useradd -m john to create a user along with a home directory. After creating the account, set a password using sudo passwd john. You can then use id john to verify that the account was created successfully. The -m option is useful because it creates a dedicated home directory where the user can store personal files and configuration settings.
Q. How can I add a user to a group in AlmaLinux?
Groups make it easier to manage permissions when several users need similar access. To add a user to a group, use the usermod command with the -aG options. For example, sudo usermod -aG developers john adds John to the developers group. You can confirm the change with groups john or id john. Remember that the user may need to start a new login session before the updated group membership becomes active.
Q. How do I give a user administrative privileges in AlmaLinux?
AlmaLinux commonly uses the wheel group for administrative access through sudo. To add a user, run sudo usermod -aG wheel username. After the user starts a new session, they can use sudo to run authorized administrative commands. You can test the access with sudo whoami. If the configuration is correct, the command should return root. Administrative privileges should be given only to users who genuinely need them.
Q. How do I lock or disable a user account in AlmaLinux?
If you want to temporarily prevent a user from logging in without deleting the account, you can lock the account with sudo passwd -l username. When access is needed again, use sudo passwd -u username to unlock it. This approach is useful when an account is temporarily inactive because it preserves the user’s files and account information while preventing normal password-based login.
Q. How do I delete a user and their home directory in AlmaLinux?
You can remove a user with the userdel command. To delete the account while keeping its home directory, use sudo userdel username. If you also want to remove the user’s home directory and its contents, use sudo userdel -r username. Be careful with the -r option because files in the home directory can be permanently deleted. Before removing an account, check whether any important files need to be backed up or transferred.
Discover more from Root Learning
Subscribe to get the latest posts sent to your email.