When Windows 11 starts, some applications can launch automatically in the background. This can be useful when you regularly need those applications, but too many startup programs may make the computer take longer to become ready after sign-in. Managing startup applications allows users to decide which programs should launch automatically. Windows 11 provides a built-in way to control these applications through Task Manager. You do not need to install additional software or use complicated commands. This guide explains how to view startup applications, check their status, disable an application, and enable it again in windows 11.
Table of Contents
Why Manage Startup Applications in Windows 11?
Applications configured to start with Windows can run automatically every time the computer boots. Some programs may be useful at startup, while others may not need to run until the user opens them.
Managing startup applications can help you:
- Reduce the number of programs launched during startup.
- Keep unnecessary applications from running automatically.
- Understand which applications are enabled at startup.
- Control applications without uninstalling them.
- Restore an application to its previous startup setting when required.
Disabling an application from startup does not normally uninstall it. The application can still be opened manually when needed.
Prerequisites
Before starting, make sure you have:
- A Windows 11 computer.
- Access to Task Manager.
- An application listed under the Startup section.
For this demonstration, Google Chrome is used as the example application.
Step 1: Open Task Manager
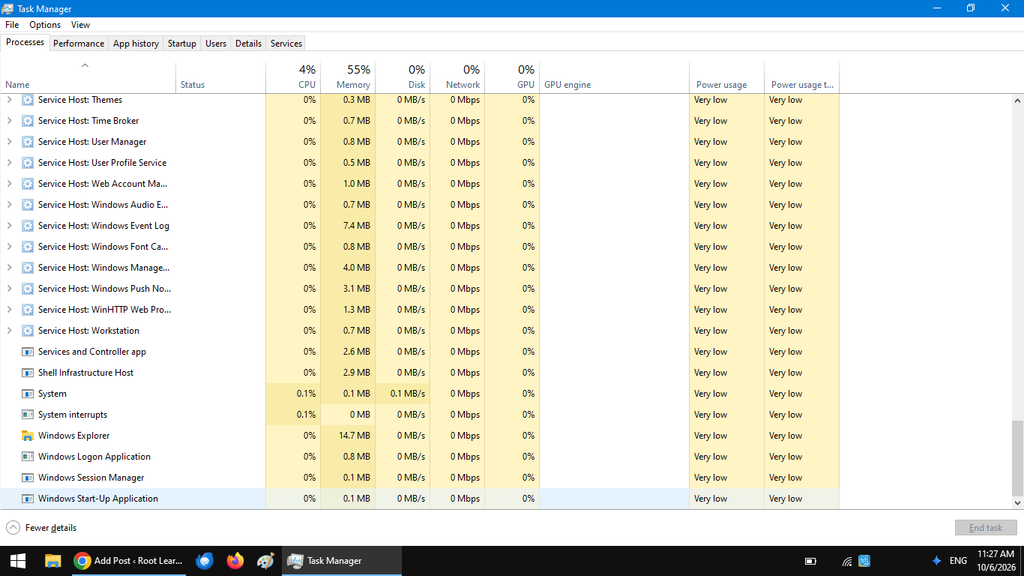
First, open Windows 11 Task Manager. The quickest method is to press Ctrl + Shift + Esc on the keyboard.
Windows opens the Task Manager window. Depending on the Windows 11 version, the available sections may appear as Processes, Performance, App history, Startup, Users, Details, and Services.
In this procedure, the Startup section is the area used to manage applications that can launch when Windows 11 starts.
Step 2: Open the Startup Section
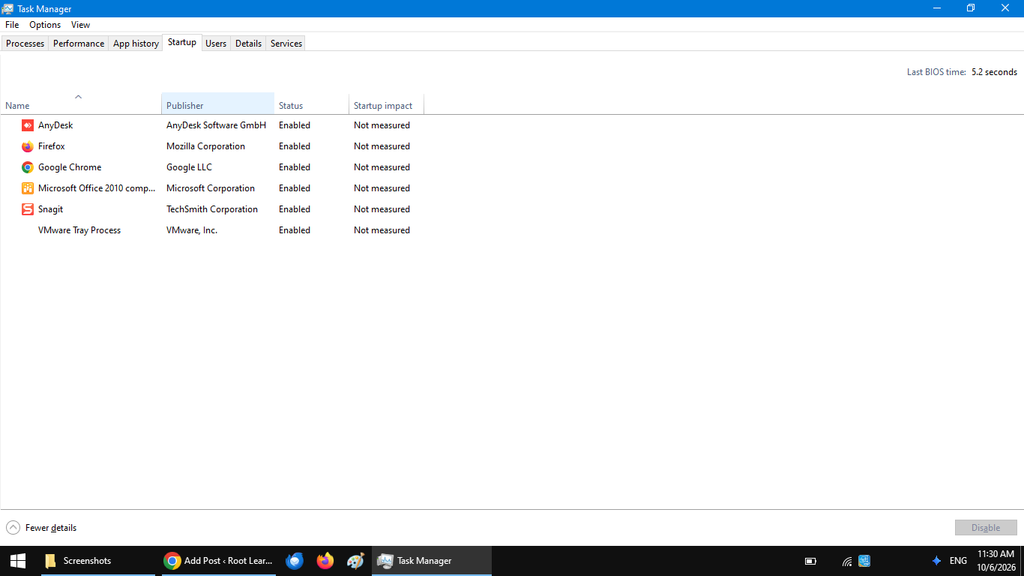
After opening Task Manager in windows 11, locate Startup in the navigation menu.
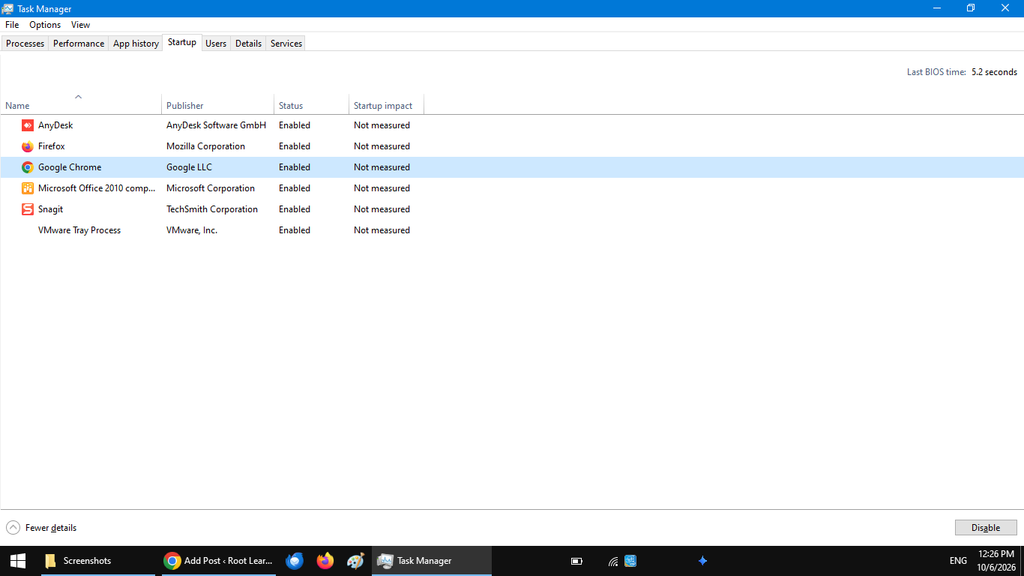
Click Startup to display the applications configured to run when Windows starts. The list can contain different programs installed on the computer.
The Startup page may include information such as the application’s name, its current status, and startup impact. The available information can vary depending on the Windows version and application.
Step 3: Check the Application Status
Before changing an application’s startup setting, check its current status.
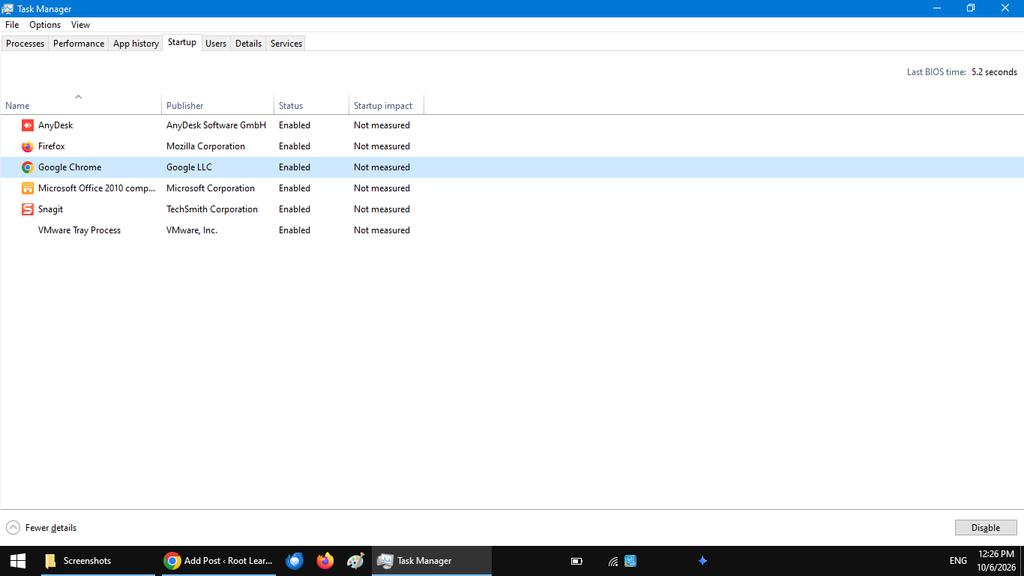
In this demonstration, Google Chrome was selected from the Startup list. Its status was displayed as Enabled, meaning Windows was allowed to launch Chrome automatically during startup.
The Startup impact for Google Chrome was shown as Not measured. This does not necessarily indicate a problem. Windows may not have enough measurement data available for a particular application.
Checking the status before making a change is useful because it gives you a reference point for the procedure.
Step 4: Disable the Startup Application
After confirming the current setting, select Google Chrome from the Startup list.
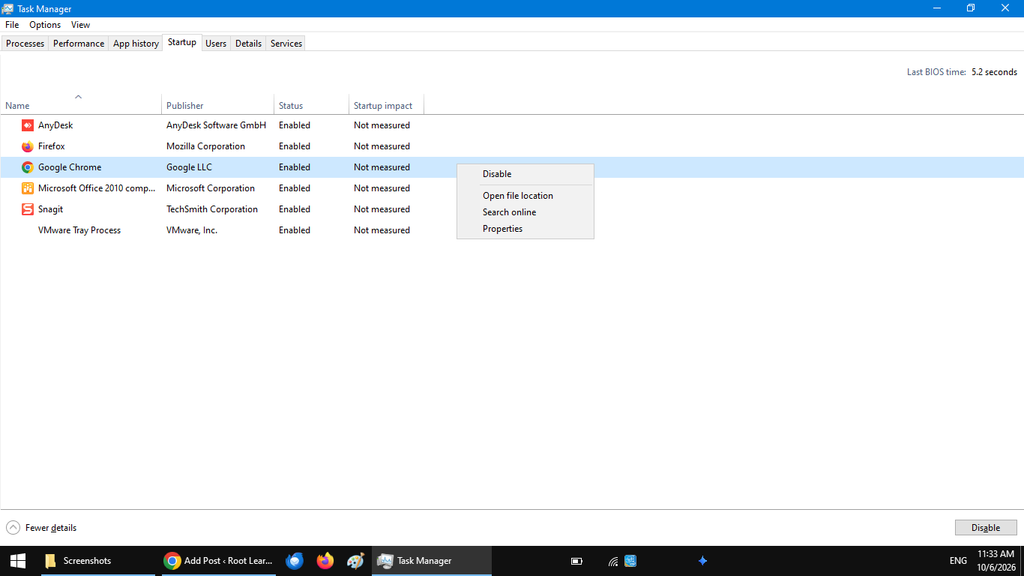
With the application selected, choose the Disable option in Task Manager.
Windows changes the startup setting for the selected application. The application remains installed on the computer, but Windows will no longer automatically launch it as part of the startup process.
This distinction is important. Disabling startup behavior is different from uninstalling an application. You can still open Google Chrome normally from the Start menu, desktop shortcut, or another available shortcut.
Step 5: Verify the Disabled Status
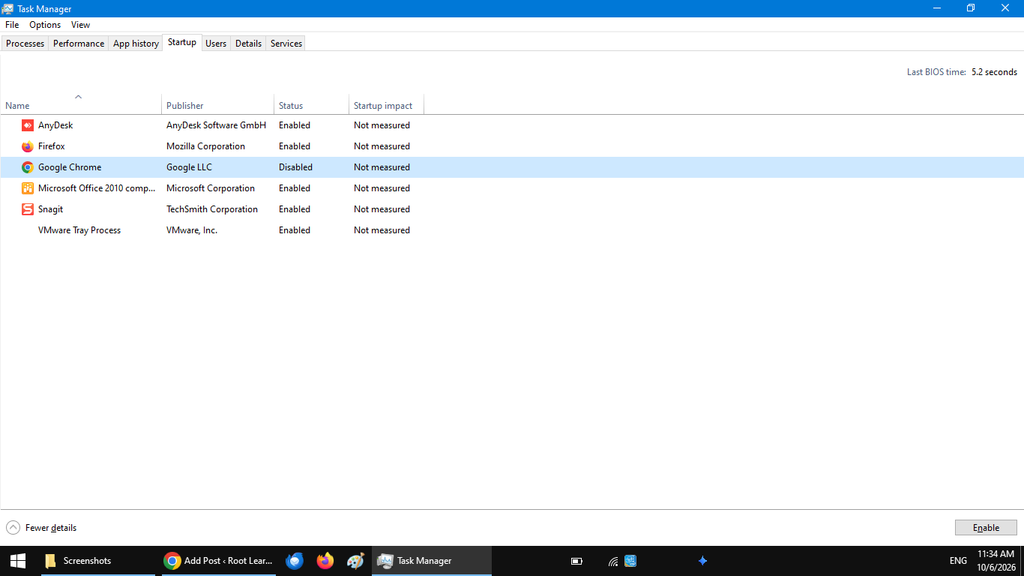
After selecting Disable, check the application’s entry again.
The status for Google Chrome should now display Disabled. This confirms that the startup setting was changed successfully.
Verification is an important part of a technical procedure because it confirms that the requested configuration change actually took place.
Step 6: Enable the Application Again
For this demonstration, Google Chrome was enabled again so that the original startup configuration could be restored.
To do this, select Google Chrome in the Startup section and choose Enable.
Check the Status column after making the change. The status should return to Enabled.
This final step demonstrates that the startup setting can be changed in either direction without reinstalling the application.
Final Verification
The complete procedure can now be verified by checking the Google Chrome entry in Task Manager.
The workflow was:
Task Manager → Startup → Select Google Chrome → Disable → Verify Disabled → Enable → Verify Enabled
The final status should be Enabled, which means the demonstration has returned Google Chrome to its original startup setting.
There is no need to uninstall Chrome or make changes to other applications after completing the demonstration.
Important Precautions
Startup applications should be managed carefully. Not every application listed in Task Manager should be disabled.
Before changing a setting:
- Identify the application and its publisher.
- Avoid disabling Windows components or unfamiliar system-related entries.
- Disable only applications you understand and do not need to start automatically.
- If an application is required for a specific workflow, leave it enabled.
- Remember that disabling startup does not remove the application from the computer.
If you are unsure about an entry, it is safer to leave it unchanged rather than disabling it.
Troubleshooting
Startup section is not visible
Make sure Task Manager is fully opened. If the window is showing a limited view, look for an option such as More details and select it.
The application still opens manually
This is expected. Disabling a startup application only prevents it from launching automatically with Windows. It does not prevent the user from opening the application manually.
Startup impact says “Not measured”
This can happen when Windows does not have enough information to calculate the application’s startup impact. It does not automatically mean that the application is malfunctioning.
Disable option is unavailable
Select the application from the Startup list first. The available actions depend on the selected item and its current status.
Conclusion
Windows 11 makes startup management straightforward through Task Manager. Users can view startup applications, examine their current status, disable programs they do not want to launch automatically, and enable them again when necessary.
In this demonstration, Google Chrome was initially Enabled, then temporarily changed to Disabled, and finally returned to Enabled. The process required no additional software and provided a simple way to understand how Windows startup application settings work.
For users who want better control over which applications launch when Windows starts, the Startup section in Task Manager is a convenient built-in tool. However, startup entries should always be reviewed carefully before making changes, especially when the application or its purpose is unfamiliar.
FAQs
1. What are startup apps in Windows 11?
Startup apps are programs configured to launch automatically when you sign in to Windows. They can include browsers, cloud-storage tools, communication apps, and other installed software.
2. How can I view startup apps in Windows 11?
Open Task Manager by pressing Ctrl + Shift + Esc, then select Startup. You can view applications that are configured to run during Windows startup.
3. How do I disable a startup app in Windows 11?
Open Task Manager → Startup, select the application you want to change, and click Disable. Its status should change to Disabled.
4. Does disabling a startup app uninstall the application?
No. Disabling a startup app only prevents it from launching automatically when Windows starts. You can still open the application manually.
5. Can I enable a startup app again after disabling it?
Yes. Select the disabled application in Task Manager → Startup and click Enable. Its status should change back to Enabled.
6. What does “Startup impact” mean in Task Manager?
Startup impact indicates how much an application may affect the Windows startup process. Depending on the application, Windows may display values such as Low, Medium, High, or Not measured.
7. Is it safe to disable every startup application?
No. Some applications or system-related components may be important. Before disabling an entry, make sure you understand what the application does.
8. Will disabling startup apps make Windows 11 faster?
It can help reduce the number of applications that launch during startup, particularly when several unnecessary programs are configured to start automatically. The improvement depends on the applications and computer.
9. What does “Not measured” mean under Startup impact?
It generally means Windows does not currently have enough information to calculate the application’s startup impact. It does not necessarily indicate an error.
10. Do I need to restart my computer after changing a startup app?
A restart is useful if you want to observe the application’s behavior during the next Windows startup. However, you can verify the configuration change immediately by checking its status in Task Manager.
Discover more from Root Learning
Subscribe to get the latest posts sent to your email.