Introduction of AWS cloud
Cloud makes it possible to use operating systems without installing in your laptop or computer. One of the best option to practice Linux is Amazon Web service (AWS). AWS provides virtual servers through Amazon Elastic Compute Cloud (Amazon EC2). EC2 works like a virtual computer where you can install, configure, and manage a Linux operating system . Amazon Linux 2023 is best option for beginners who just started using operating system.
AWS provides an official Amazon Machine Image (AMI) for it. On EC2 instance AWS describes an AMI as a template which contains the software needed to run an operating system. This guide explains how to create a Linux server in AWS and connect to it, perform basic configuration, and safely terminate the instance when your work is complete.
Table of Contents
Prerequisites
Before starting installation, prepare following points:
- A computer,laptop or mobile device with modern web browser
- An active AWS account
- Stable internet connection
- Knowledge of Linux commands
- Key pair for secure access to the Linux server
Linux operating system will run on an AWS EC2 server rather than directly on your laptop, computer or mobile device. You do not need a powerful computer of operating system. If your computer has limited RAM or storage because the main computing environment is hosted in AWS cloud.
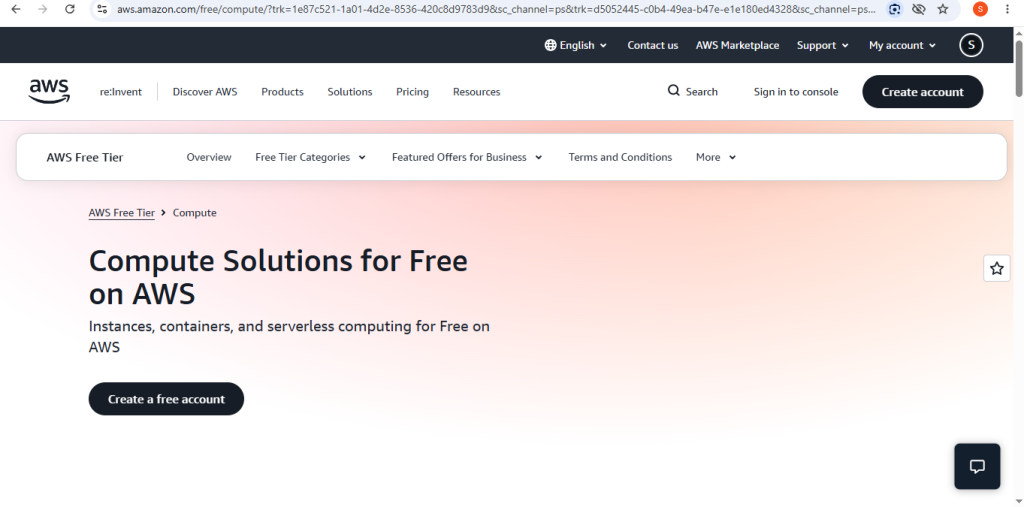
1. Sign in to AWS
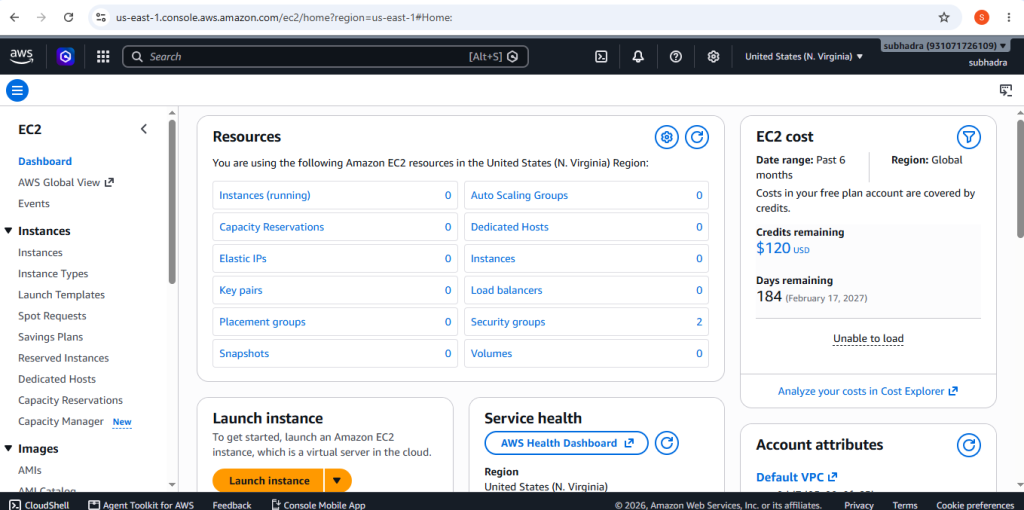
For sign in you have to open AWS cloud from its official website. Open the AWS Management Console and sign in to your AWS account. After sign in follow below points:
- Open the AWS management Console.
- Search EC2 in search bar.
- Select EC2 – Virtual Servers in the cloud.
- At top right of the page check the AWS Region.
- If necessary then choose as suitable region.
Choosing a region is reasonably close to your location is to help reduce network latency.
2. Launch an EC2 Instance
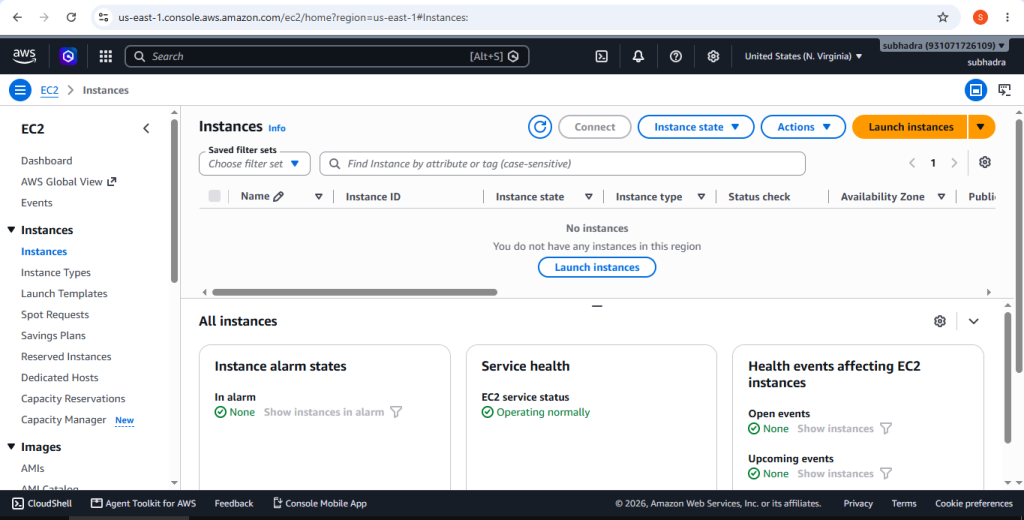
Select EC2 dashboard and select Launch instance. you will see many configuration options then,
1. Enter Instance Name
In Name and tags, enter a descriptive name such as:
Linux-Cloud-server
This will help to identify and makes it easier, especially if you create multiple EC2 instances.
2. Select a Linux AMI
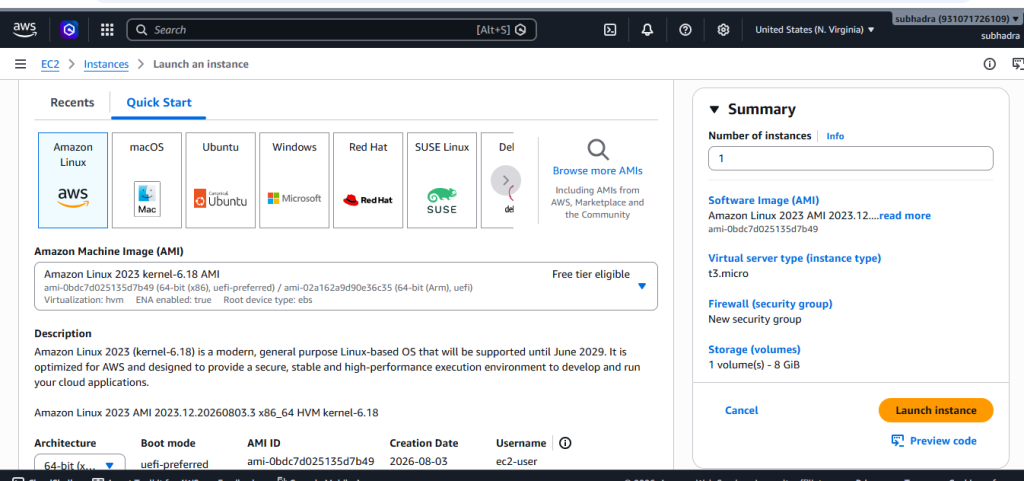
Find the available operating system under Application and OS Images.
Select Amazon Linux 2023 for this tutorial.
AMI is used as the template from which the EC2 instance is created. AWS provides Amazon Linux 2023 AMIs that can be launched through the EC2 console.
3. Select the Instance Type
The virtual hardware assigned to your Linux server in AWS cloud will determines the Instance type, it includes CPU and memory also. If you practising first time on AWS Cloud, choose a small instance type which is eligible for pricing. You should always check pricing details in AWS Cloud for launching Instance. For simple tasks such as practising Linux commands, installing packages, and learning server administration, a small instance is good.
4.Select a Key Pair
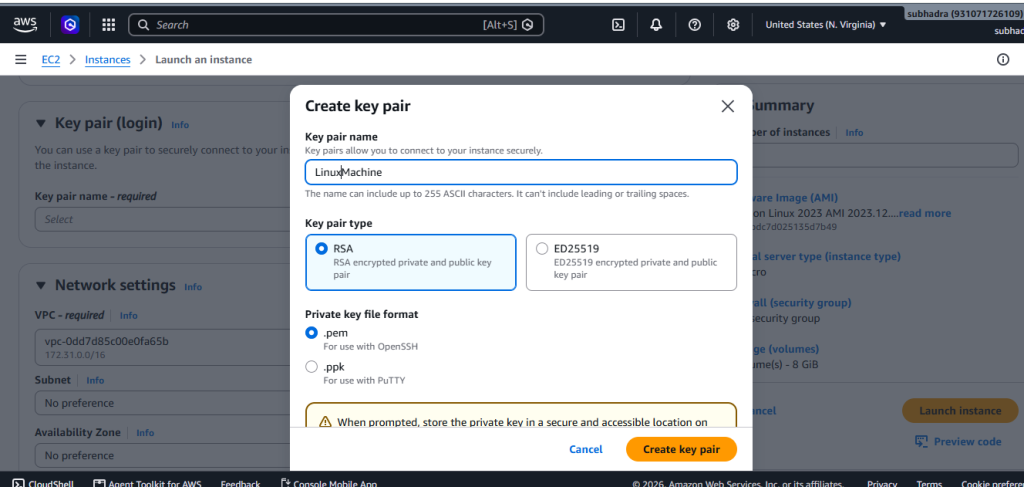
Key pair is important security component of EC2 Linux instance. If you do not have key pair then choose Create new key pair. Enter a name such as:
Linux-cloud-key
Select appropriate key pair format for and download it when AWS Cloud provide it.Keep it in secure location. It is requires for SSH access to Linux instances. AWS cloud do not keep copy of your private key.
Important: Do not share your private key with anyone or upload it publically.
5.Configure Network and Security settings
A security group act as a virtual firewall for EC2 instance. If you plan to connect through SSH, SSH access must be permitted, SSH traffic from your IP address rather than opening SSH access to internet unnecessarily is AWS recommend. Select MY IP when console provides options such as Allow SSH traffic from. You have to avoid unrestricted SSH access for a real production server.
6. Configure Storage
AWS Cloud automatically provides storage for EC2 instance. The default storage may be sufficient for basic Linux practice. Before launching the instance you should have to review the storage.. always remember storage and other AWS recources may incur charges.
7. Launch the Linux Instance
For launch check the configuration given below:
- Instance type
- Instance name
- Key pair
- Security group
- Storage
- Region
Select Launch Instance
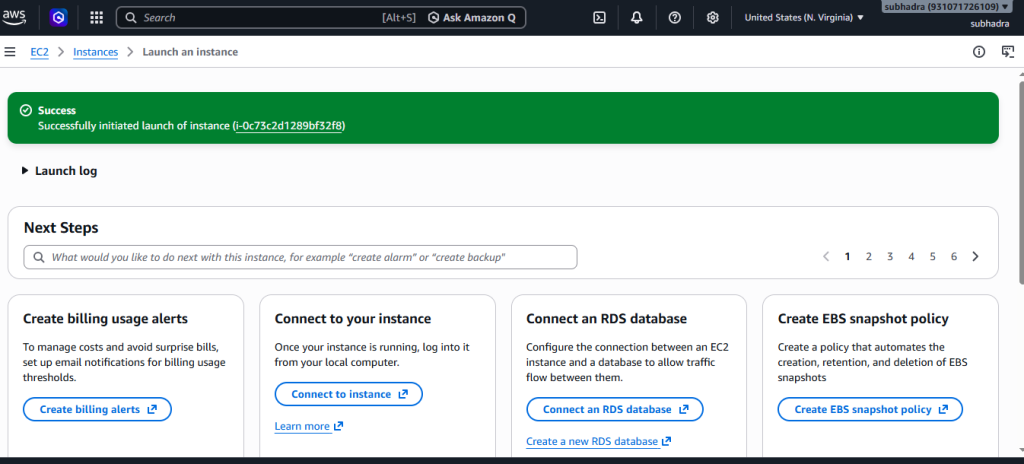
AWS will create the virtual machine and start the Linux operating system.
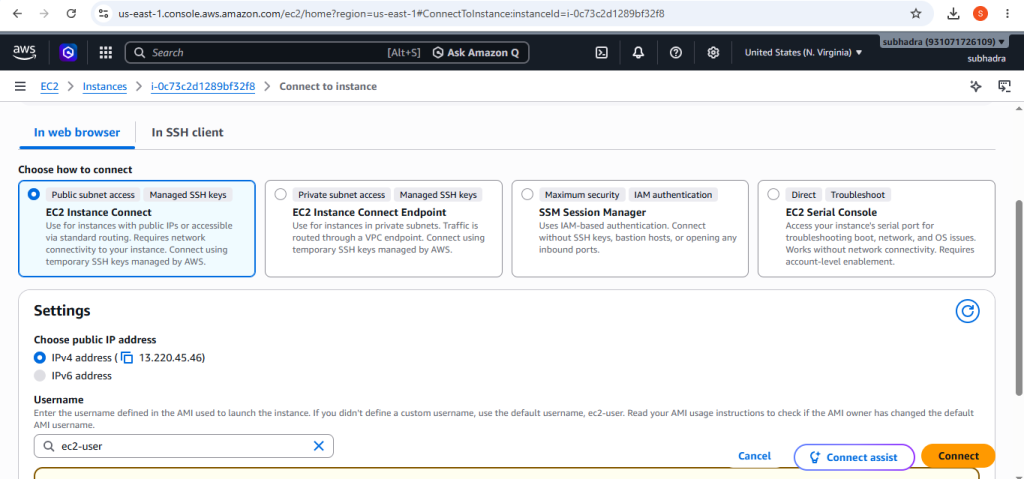
8. Connect to Linux using EC2 Instance Connect
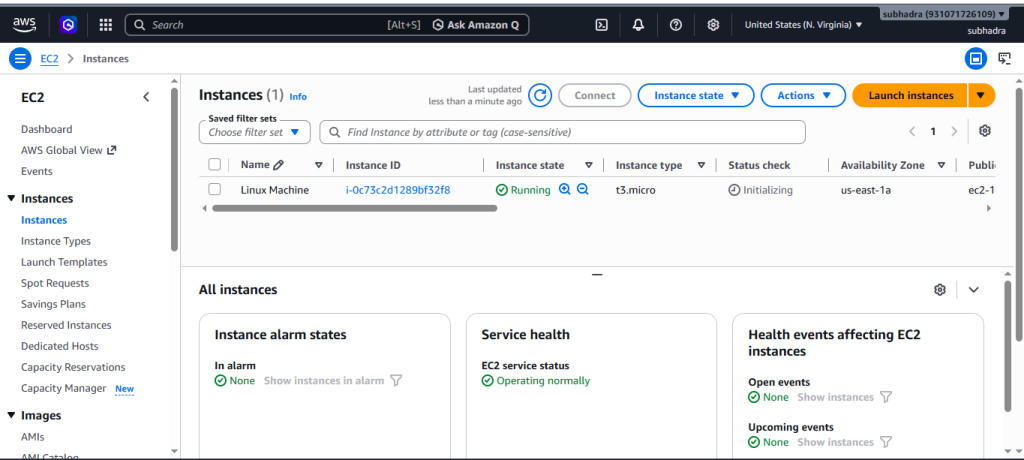
select the Linux instance and click Continue.
Look for the EC2 Instance Connect option and follow the instructions provided by AWS. This process can provide browser-based shell access, so you need not to configure an external SSH application. AWS cloud also provides other connection methods including SSH and Systems Manager session Manager.
9. Connect Using SSH
The method SSH is another important part to connect instance, if you are using computer to connect with an SSH client, open a terminal or PowerShell window, using the general command:
ssh -i “path-to-your-key .pem”ec2-user@your-public-dns
For Amazon Linux ec2-user. this is the default username used commonly. AWS documentation lists different usernames for different Linux distributions.
replace the following values:
- path-to-your-key .pem with the location of your private key.
- your-public-dns with the public DNS name of your EC2 instance.
If you connect first time SSH may ask whether you want to continue to connecting the host. Verify the information and continue.
10.Update the Linux System
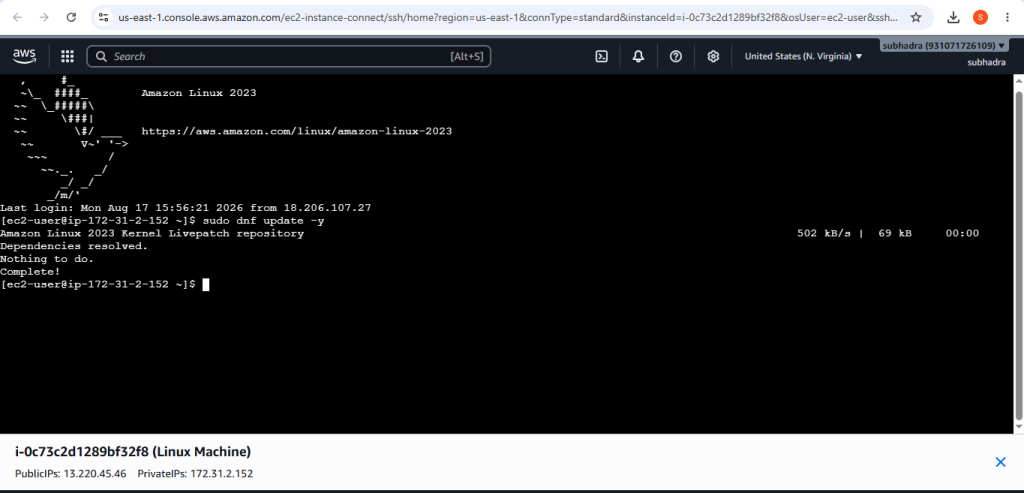
Install the packages when connecting successfully to the Linux server, also update the package. You can use for Amazon Linux 2023 this:
sudo dnf update -y
This will check for available package updates and install them. updated server is important part because updates can include bug fixes, improvements, and security fixes.
11. Test Basic Linux Commands
Practice this basic commands.
To display the current user:
whoami
to display the current directory:
pwd
To list files:
ls
To display system information:
uname -a
To check available disk space:
df -h
To check memory information:
free -h
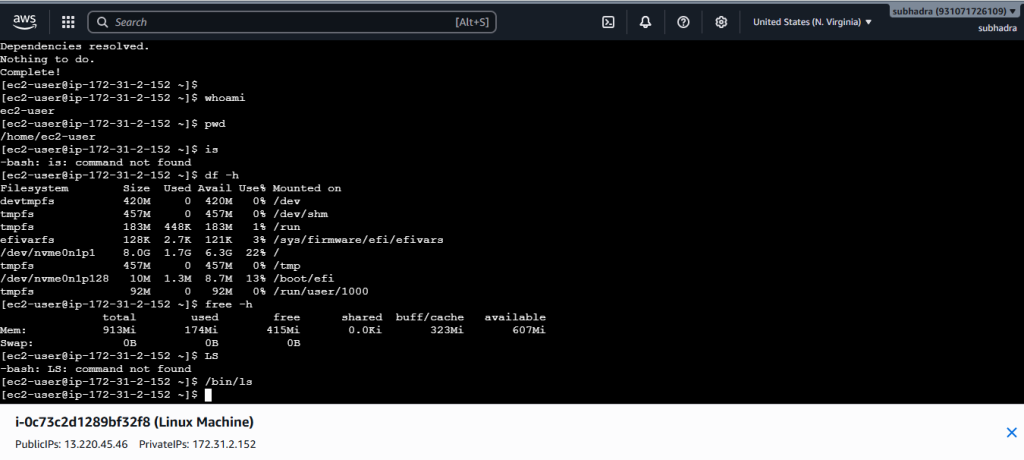
These commands will help beginners to understand the Linux environment and verify that the cloud server is working or not.
12. Install a Package
you can test package installation. For example,
Install Apache web server:
sudo dnf install httpd -y
Start the service:
sudo systemctl start httpd
Check its status:
sudo systemctl status httpd
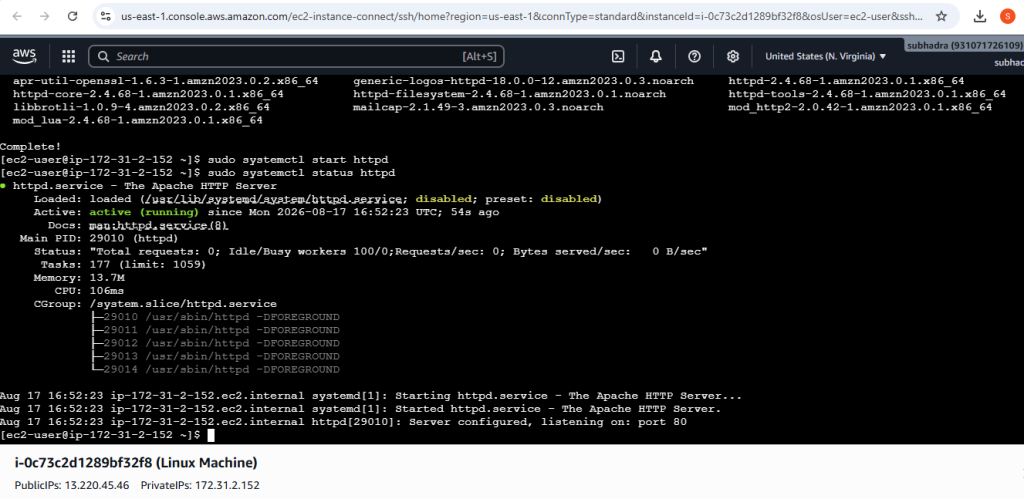
One of the most important advantage of using Linux on AWS cloud is you can create a virtual server and install without changing the operating system.
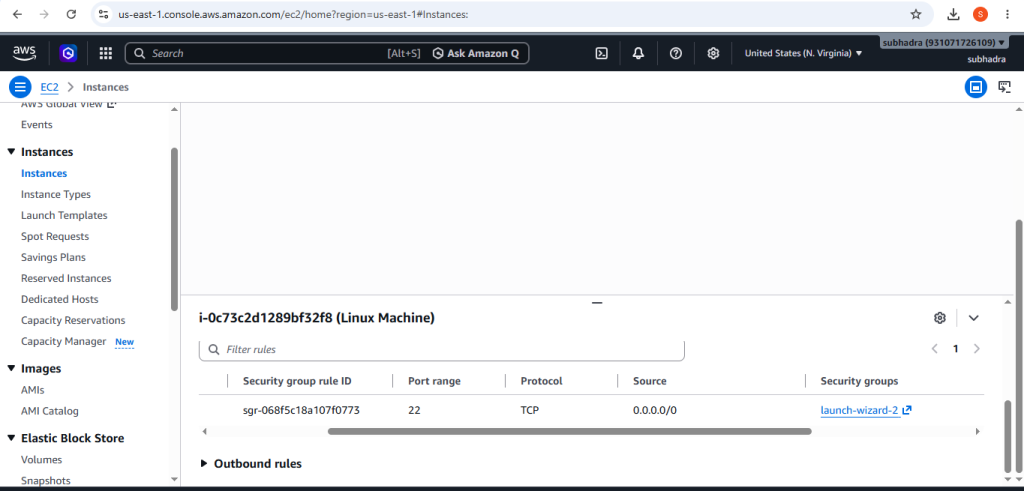
13. Terminate the Instance
when yo have finished practising do these steps to terminate the instance:
EC2 – Instances – select your instance – instance state – Terminate instance
Before doing this termination make sure you save anything you need.
conclusion
AWS allows you to create a virtual Linux server using an amazon Machine Image. Installing Linux in AWS is different from installing Linux in physical computer. For overall process creata an AWS account on AWS cloud, open EC2, select Linux AMI, choose an instance type, create a key pair, congigure network security, launch the instance, connect to Linux, and practice Linux commands.
If you practising first time Amazon Linux 2023 is a practical starting point because it is directly available as an AWS AMI. For learning cloud computing AWS is very useful because the same EC2 environment introduces important concepts such as virtual servers, AMIs, key pairs, security groups, storage, networking, SSH and server administration.
Frequently Asked Questions (FAQs)
1. What is AWS?
AWS ( Amazon Web Services) is a cloud computing platform provided by Amazon. It provides services over the internet instead of buying and maintaining physical computers.
2. What is Linux in AWS cloud?
Linux in operating system in AWS cloud which runs on a virtual server provided by AWS.
3. What is Amazon EC2?
EC2 is Amazon Elastic Compute Cloud, it is an AWS cloud service that provides virtual servers called instances.
4. Which operating systems we can practice on AWS cloud?
AWS supports many operating systems like, Amazon Linux 2023, Ubuntu Server, Windows Server, Red Hat Enterprise Linux, SUSE Linux Enterprise Server, Debian, Rocky Linux, AlmaLinux.
5. What is an AMI in AWS?
An Amazon Machine Image (AMI) is a template used to create an EC2 instance.
6. Do i need to install Linux using an ISO file on AWS cloud?
No. You do not need to download an ISO file while using an AWS cloud provided Linux AMI.
7. How do i connect to a Linux EC2 instance?
You can connect to Linux EC2 instance using methods such as EC2 instance Connect or SSH.
8. What is SSH?
SSH or Security Shell is a network protocol which is used for securely access and manage a remote Linux computer.
9. Why Apache installed during the Linux setup?
It is installed to demonstrate that software can be installed and run on the Linux EC2 instance, it is used to host web content and test server functionality.
10. Why termination is important after completing the task in AWS cloud?
Termination is an important cleanup setup in AWs cloud , if the instance is no longer needed.It prevents the virtual server from counting to run unnecessarily and help to reduce the possibility of unexpected AWS charges.
Discover more from Root Learning
Subscribe to get the latest posts sent to your email.



2 thoughts on “AWS Cloud: Ultimate 13 Easy Steps Guide to Install Linux in AWS Cloud 2026”