
Introduction
Amazon EC2 Helps deploying a website means making website files available on a server so users can access them through a web browser. Amazon Web Services (AWS) provides cloud infrastructure that can be used to deploy websites without maintaining a physical server. One simple method is to use Amazon Elastic Compute Cloud (Amazon EC2) as the hosting server. An Amazon EC2 instance provides a virtual server in the AWS Cloud.
By installing the Apache web server and placing HTML files in the appropriate directory, you can host a basic website and access it through the instance’s public IPv4 address. This guide explains how to deploy a simple HTML website on an Amazon EC2 instance running Amazon Linux 2023. It covers instance creation, security group configuration, Apache installation, website creation, and final verification.
Table of Contents
Prerequisites
Before starting, make sure you have:
- An active AWS account
- Basic knowledge of AWS EC2
- Basic Linux command knowledge
- A web browser
- A simple HTML webpage
- An EC2 instance with a public IPv4 address
A domain name is not required for this practical exercise. The website can be accessed using the Amazon EC2 instance’s public IPv4 address.
Step 1: Launch an EC2 Instance
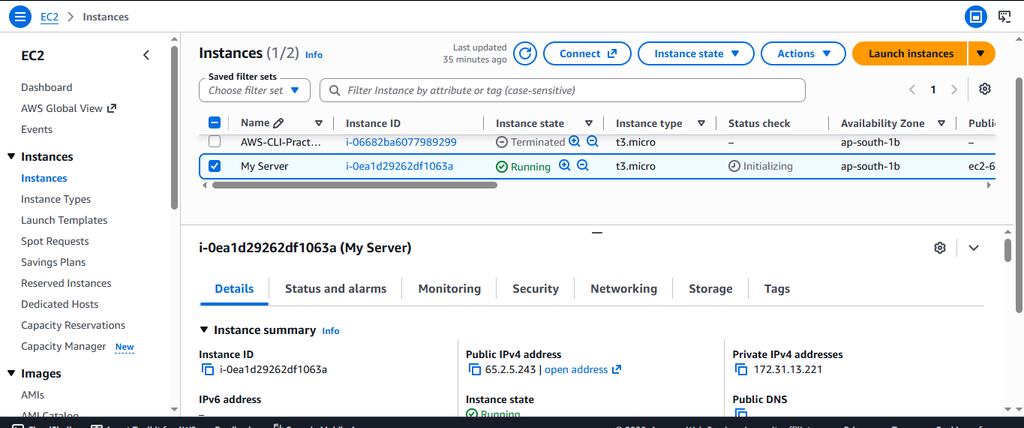
First, sign in to the AWS Management Console and open the Amazon EC2 service. Choose Launch instance to create a new virtual server. Enter a suitable name for the instance. For example:
AWS-Web-Server
For the operating system, select Amazon Linux 2023. Choose an appropriate instance type for your requirements. For a basic learning exercise, a small instance type is generally sufficient. Select or create a key pair if required for SSH access. Review the configuration and launch the instance. After the instance starts, wait until its status changes to Running and its status checks complete successfully. Open the instance details and locate the Public IPv4 address. This address will be used to access the website from a browser.
Step 2: Configure the Security Group
An Amazon EC2 security group works as a virtual firewall. It controls incoming and outgoing network traffic for the instance.
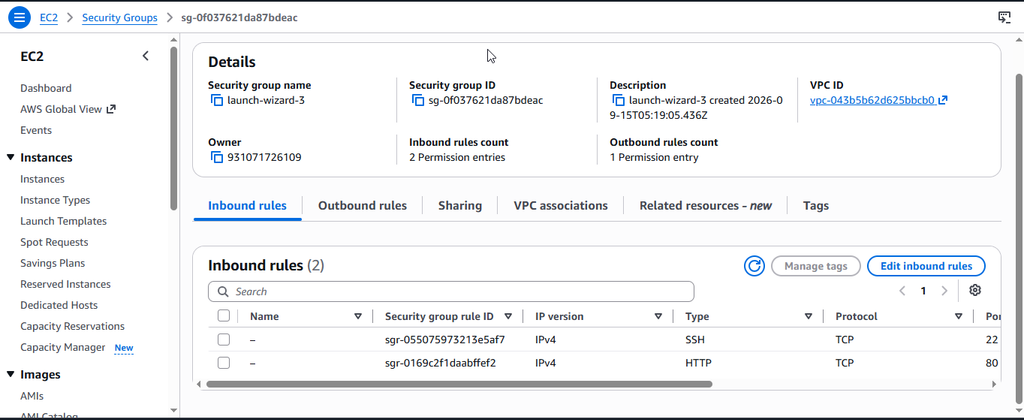
For a basic website, configure these inbound rules:
| Type | Port | Purpose |
| SSH | 22 | Connect to the EC2 server |
| HTTP | 80 | Allow visitors to access the website |
HTTP port 80 is especially important because Apache will use it to serve the website. For learning purposes, HTTP can be configured to allow traffic from 0.0.0.0/0. For SSH, restricting access to trusted IP addresses is preferable whenever practical.
After adding the rules, save the security group configuration.
Step 3: Connect to Amazon EC2 Instance
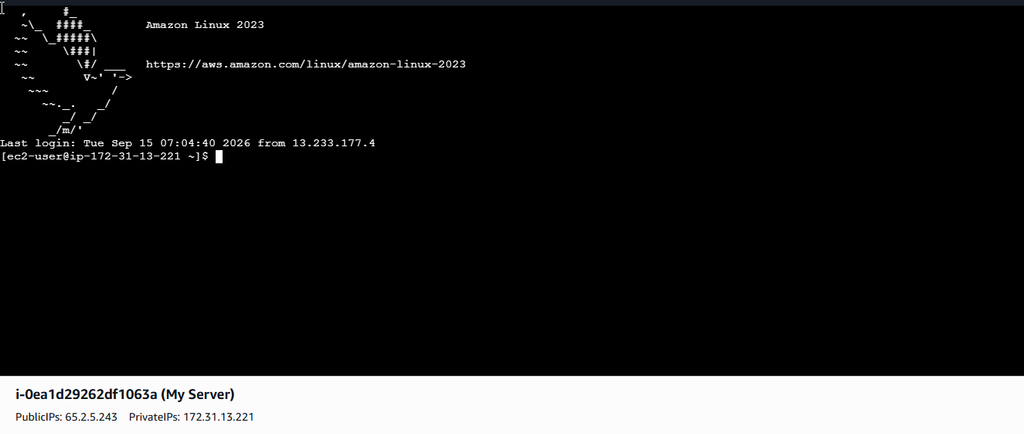
After the instance is running, select it in the EC2 console and choose Connect.
AWS provides several connection methods. For this practical exercise, the browser-based SSH connection can be used if it is available. Once connected, a Linux terminal appears. Commands entered in this terminal are executed on the EC2 instance.
You can verify the operating system with:
cat /etc/os-release
The output should identify the system as Amazon Linux 2023.
Step 4: Update the Server
Before installing the web server, update the installed packages.
Run:
sudo dnf update -y
The sudo command runs the operation with administrative privileges, while dnf is the package management tool used by Amazon Linux 2023. The -y option automatically confirms the installation prompts. Updating the system helps ensure that available packages have their latest applicable updates.
Step 5: Install Apache Web Server
Apache is an open-source HTTP server that can deliver HTML webpages to browsers.
Install Apache using:
sudo dnf install httpd -y
After the installation completes, start the Apache service:
sudo systemctl start httpd
Next, configure Apache to start automatically when the server boots:
sudo systemctl enable httpd
Verify the service status:
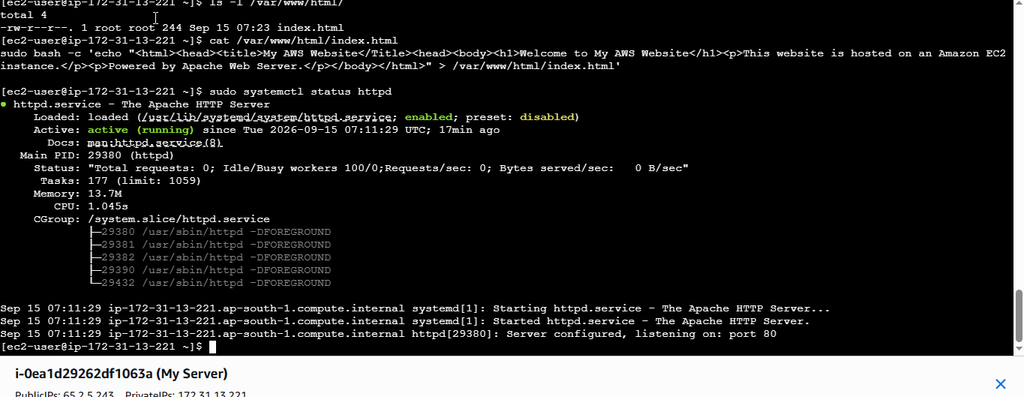
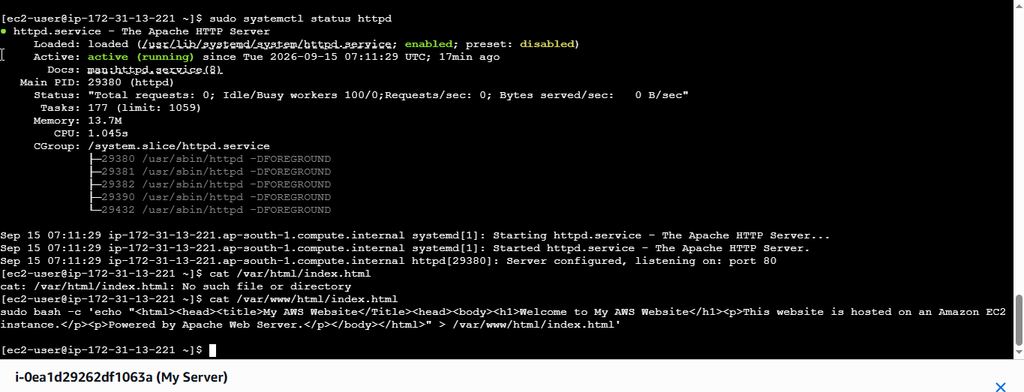
sudo systemctl status httpd
Look for:
Active: active (running)
This confirms that Apache is running successfully.
Step 6: Create the Website HTML File
Apache uses the following directory as its default web root:
/var/www/html/
The main webpage is commonly named index.html.
Create or edit the file with:
sudo nano /var/www/html/index.html
Enter the following HTML:
<html>
<head>
<title>AWS Web Hosting</title>
</head>
<body>
<h1>Welcome to My AWS Website</h1>
<h2>Hosted on Amazon EC2</h2>
<p>This Website is Hosted On an Amazon EC2 Instance.</p>
<h3>Technologies used </h3>
</ul>
<li>Amazon EC2</li>
<li>Apache Web Server</li>
<li>HTML</li>
<p>Website Deployment Completed Successfully.</p>
</body>
</html>
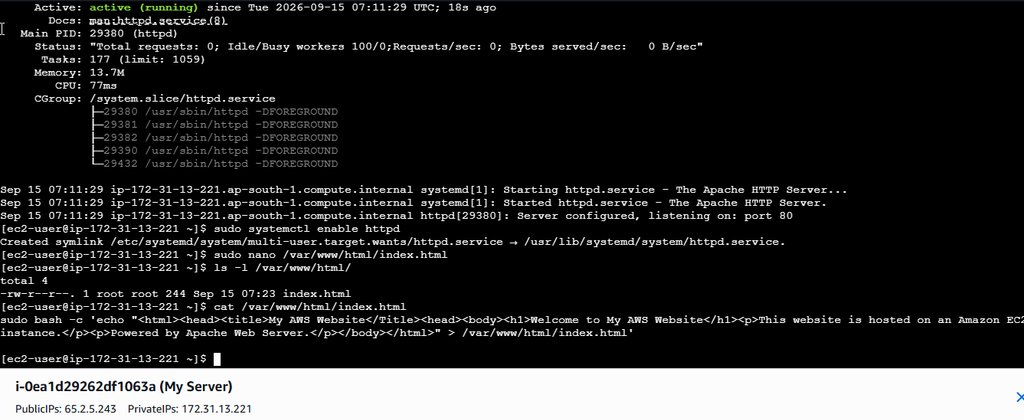
Save the file and exit Nano. To verify that the file exists, run: ls -l /var/www/html/ The output should show index.html. You can also verify the content with: cat /var/www/html/index.html
Step 7: Verify Apache and Website Configuration
Before testing the website, confirm that Apache is still running:
sudo systemctl status httpd
You can also check whether Apache is configured to start automatically:
sudo systemctl is-enabled httpd
If the output is:
enabled
Apache is configured to start automatically after a system reboot. At this point, the EC2 instance is running, Apache is active, the HTML file is present, and HTTP traffic is allowed through the security group.
Step 8: Access the Website Using the Public IP
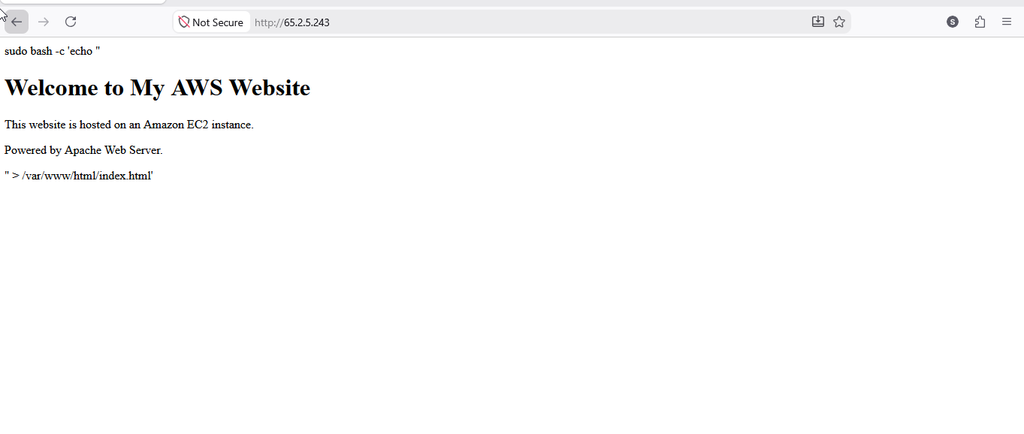
Now open a web browser. Enter the EC2 instance’s public IPv4 address using HTTP:
Replace YOUR-PUBLIC-IP with the actual public IPv4 address of your EC2 instance.
For example:
Do not use the example IP above. Use the public IPv4 address displayed in your EC2 console.
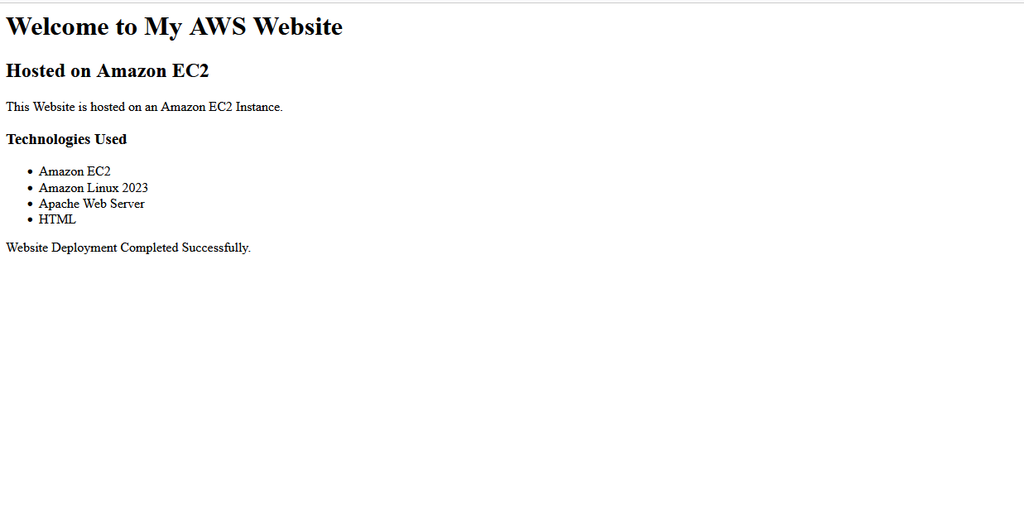
If the configuration is correct, your custom webpage should appear.
The page should display:
Welcome to My AWS Website
It should also show that the website is hosted on Amazon EC2 and list the technologies used.
Step 9: Understand the Deployment Process
The complete process can be summarized as:
AWS EC2 Instance
↓
Amazon Linux 2023
↓
Install Apache
↓
Create index.html
↓
Configure Security Group
↓
Allow HTTP Port 80
↓
Access Public IPv4
↓
Website Displayed
When a user enters the amazon EC2 public IP in a browser, the request reaches the EC2 instance through HTTP port 80. Apache receives the request and serves the index.html file from /var/www/html/.
Troubleshooting
- Website does not open
First, check whether Apache is running:
sudo systemctl status httpd
If it is stopped, start it:
sudo systemctl start httpd - Connection timed out
Check the EC2 security group’s inbound rules. Make sure HTTP port 80 is allowed.
Also confirm that the EC2 instance is running and has a public IPv4 address. - Apache default page appears
If you see the default Apache page instead of your custom webpage, check the HTML file:
cat /var/www/html/index.html
Make sure your custom content is saved correctly. - index.html cannot be found
Check the web directory:
ls -l /var/www/html/
If the file is missing, create it again using:
sudo nano /var/www/html/index.html
Security Consideration
Security is important when hosting a website on a cloud server.
Follow these practices:
- Keep Amazon Linux updated.
- Allow only the required ports.
- Restrict SSH access whenever possible.
- Avoid exposing unnecessary services to the internet.
- Use HTTPS for production websites.
- Monitor the EC2 instance regularly.
- Back up important website files.
For a production website, additional services and security configurations may be required.
Conclusion
Deploying a website on AWS EC2 is a useful way to understand cloud-based web hosting. In this process, an EC2 instance running Amazon Linux 2023 is configured as a web server. Apache is installed and started, while an HTML file is placed in /var/www/html/.
After configuring the security group to allow HTTP traffic on port 80, the website can be accessed through the EC2 instance’s public IPv4 address. This practical setup provides a simple foundation for learning AWS website hosting. Once the basic deployment is working, the environment can be extended with a domain name, HTTPS, an Elastic IP address, databases, monitoring, and other AWS services.
FAQs
1. What is Amazon EC2?
Amazon EC2 is an AWS service that provides resizable virtual servers in the cloud.
2. Can I host a website on EC2?
Yes. You can install a web server such as Apache on an EC2 instance and use it to host website files.
3. Why is Apache used?
Apache receives HTTP requests from browsers and serves website files to visitors.
4. What is the purpose of port 80?
Port 80 is the standard port for HTTP traffic. It allows browsers to communicate with an HTTP web server.
5. Where are Apache website files stored?
On this Amazon Linux setup, the default website directory is:
/var/www/html/
Discover more from Root Learning
Subscribe to get the latest posts sent to your email.