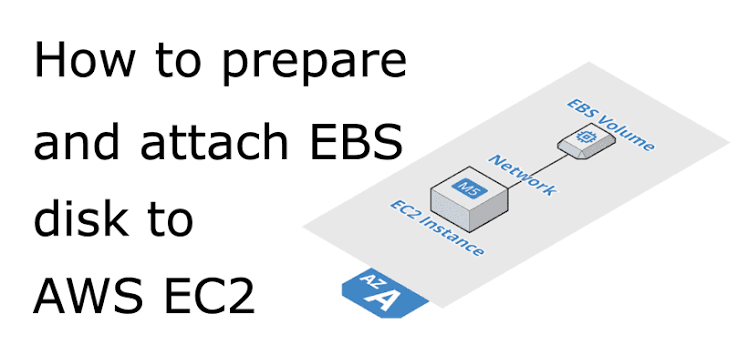
Amazon Elastic Block Store (Amazon EBS) provides persistent block storage for Amazon EC2 instances. By attaching an additional EBS volume to an EC2 instance, you can increase available storage without replacing the operating system disk.
The procedure uses the AWS Management Console and MobaXterm to connect to the Rocky Linux server.
Important: Always identify the new disk carefully before formatting it. Formatting the wrong disk can destroy data on the operating system volume.
Table of Contents
Prerequisites
Before starting, make sure you have:
- An AWS account
- Permission to manage EC2 and EBS resources
- A Rocky Linux 10 EC2 instance
- A key pair for SSH access
- MobaXterm installed
- An SSH security-group rule allowing TCP port 22
- An available EBS volume configuration
In this procedure, the Rocky Linux EC2 instance was created in the ap-south-1b Availability Zone.
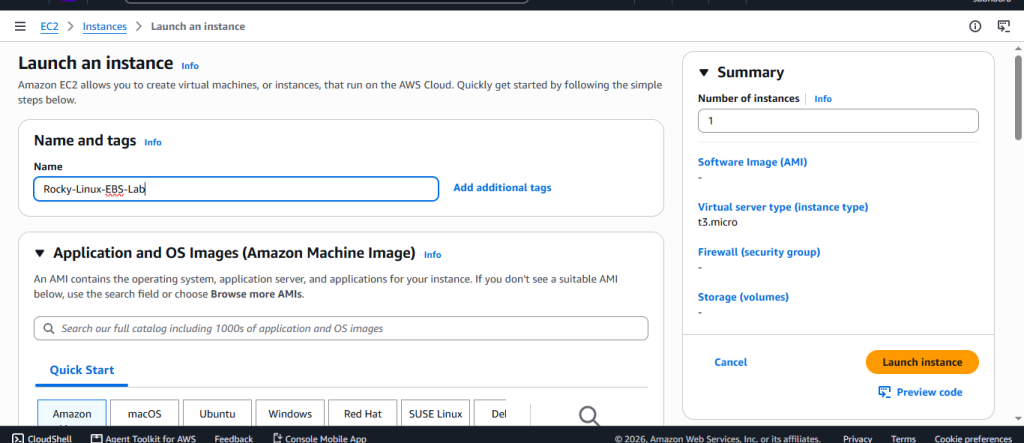
Step 1: Launch a Rocky Linux EC2 Instance
Sign in to the AWS Management Console and open EC2.
Choose Launch instance and provide a name such as:
Rocky-Linux-EBS-Lab
Under Application and OS Images, select the Rocky Linux image used for the lab.
Select the appropriate key pair for SSH access.
For the security group, allow SSH traffic on TCP port 22 from your current IP address.
After reviewing the configuration, launch the instance.
Step 2: Check the Availability Zone
After the instance starts, open:
EC2 → Instances → Rocky-Linux-EBS-Lab
Check the instance details and note the Availability Zone.
For this procedure, the instance was located in:
ap-south-1b
This information is important because an EBS volume must be created in the same Availability Zone as the EC2 instance before it can be attached.

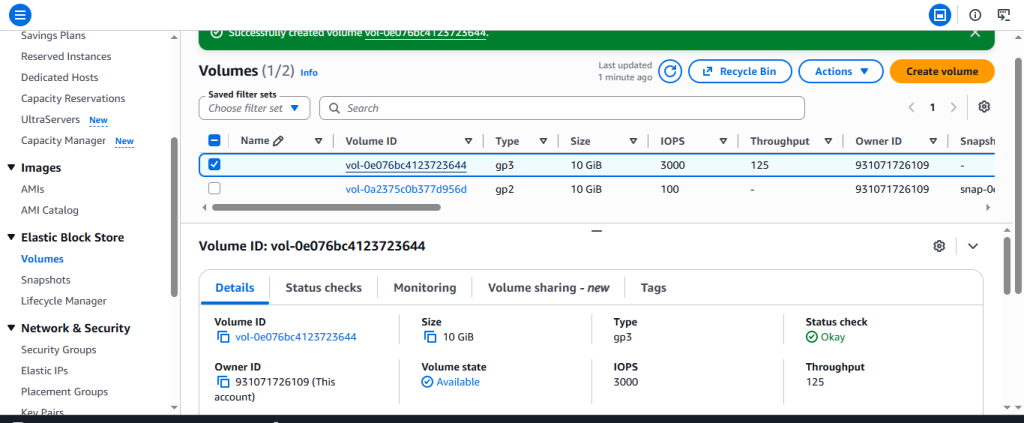
Step 3: Create an EBS Volume
Open:
EC2 → Elastic Block Store → Volumes
Select Create volume.
Configure the volume with the following settings:
- Volume type: gp3
- Size: 10 GiB
- Availability Zone: ap-south-1b
Click Create volume.

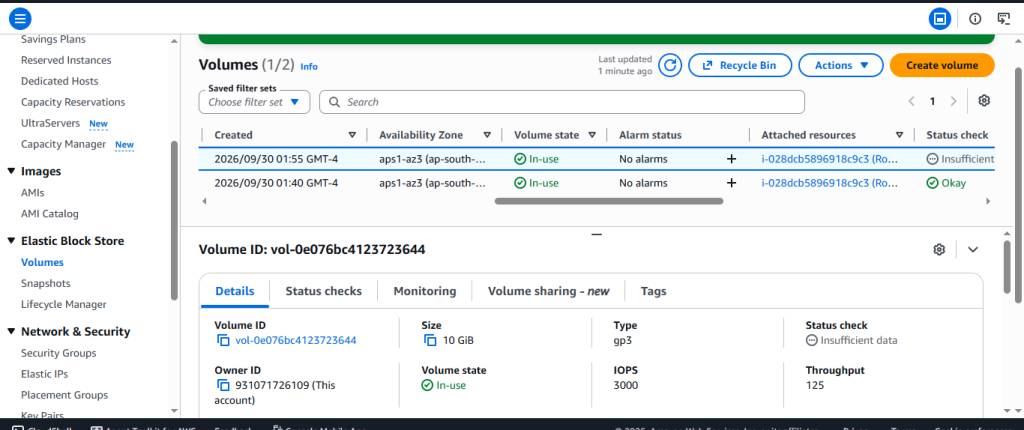
Step 4: Attach the EBS Volume
Select the new volume and choose:
Actions → Attach volume
Select the Rocky Linux EC2 instance.
For the device name, use the suggested device name, such as:
/dev/sdf
Click Attach volume.
After successful attachment, the volume status changes to In-use.
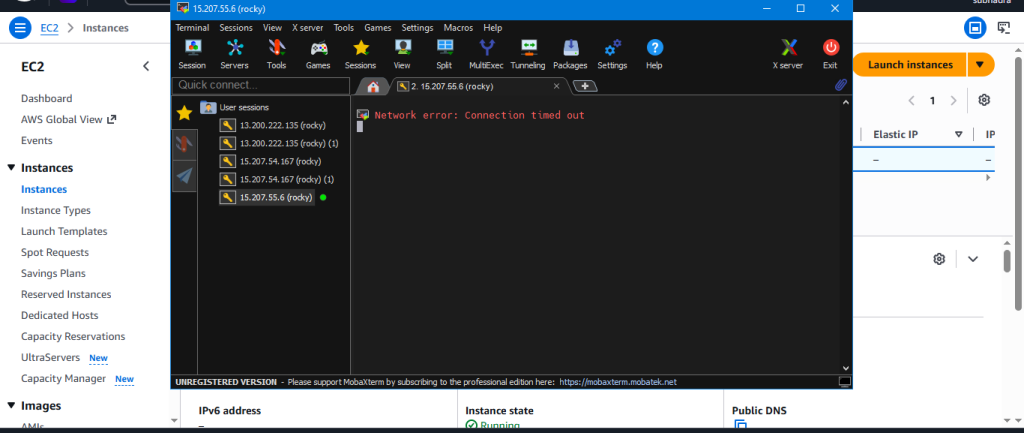
Step 5: Connect to Rocky Linux Using MobaXterm
Open MobaXterm and create an SSH session.
Enter:
- Remote host: EC2 Public IPv4 address
- Port: 22
- Username: rocky
- Private key: The key pair associated with the instance
Connect to the server.
If the connection times out, verify that the instance is running, the current public IP address is being used, and the security group allows SSH traffic on port 22.
Step 6: Identify the New Disk
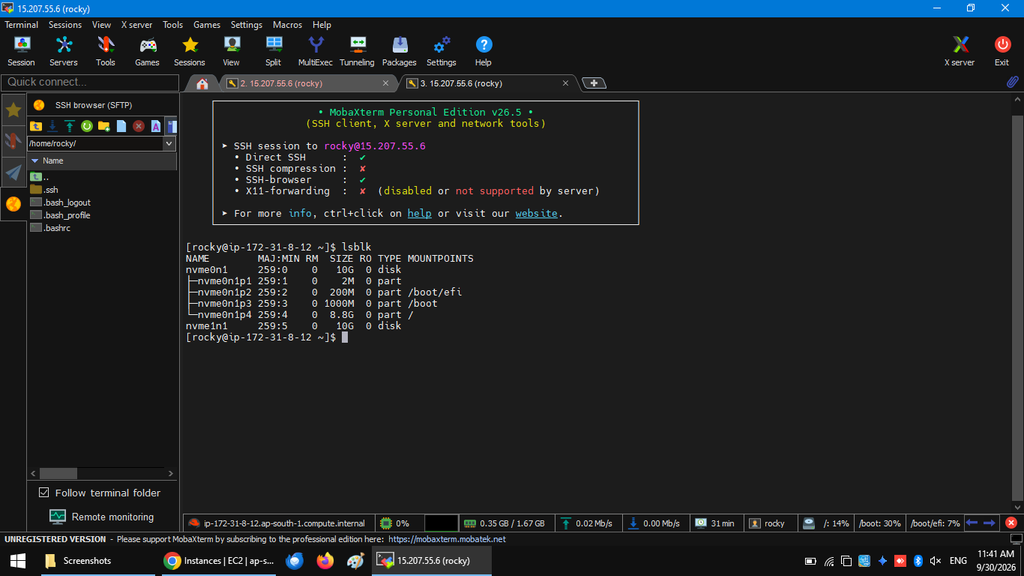
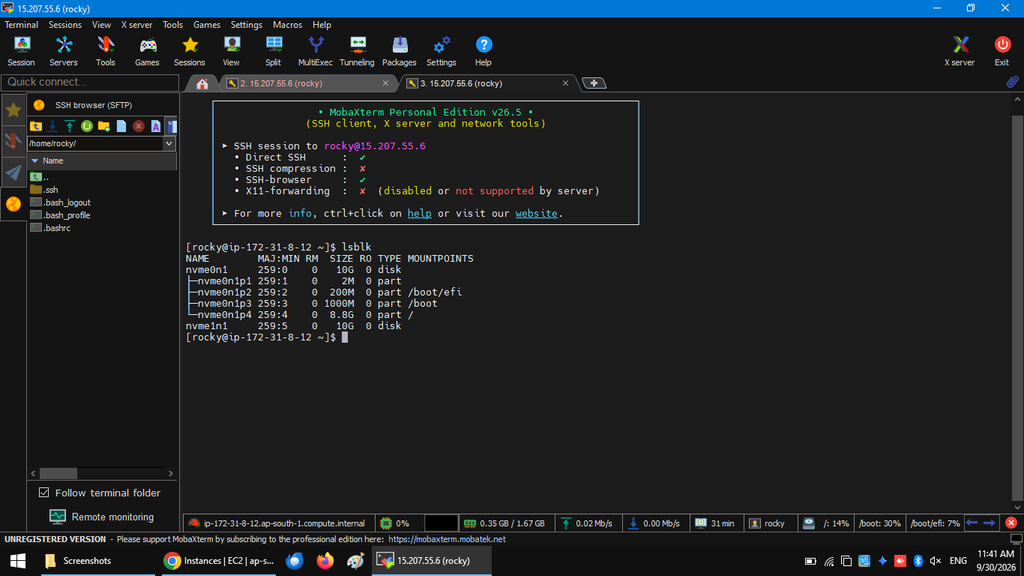
Before formatting the disk, check all available block devices.
Run:
lsblk -o NAME,SIZE,TYPE,FSTYPE,MOUNTPOINTS
The output in this procedure showed:
NAME SIZE TYPE FSTYPE MOUNTPOINTS
nvme0n1 10G disk
├─nvme0n1p1 10G part xfs /
nvme1n1 10G disk
Here, nvme0n1 is the existing operating system disk, while nvme1n1 is the newly attached EBS disk.
Step 7: Format the New Disk
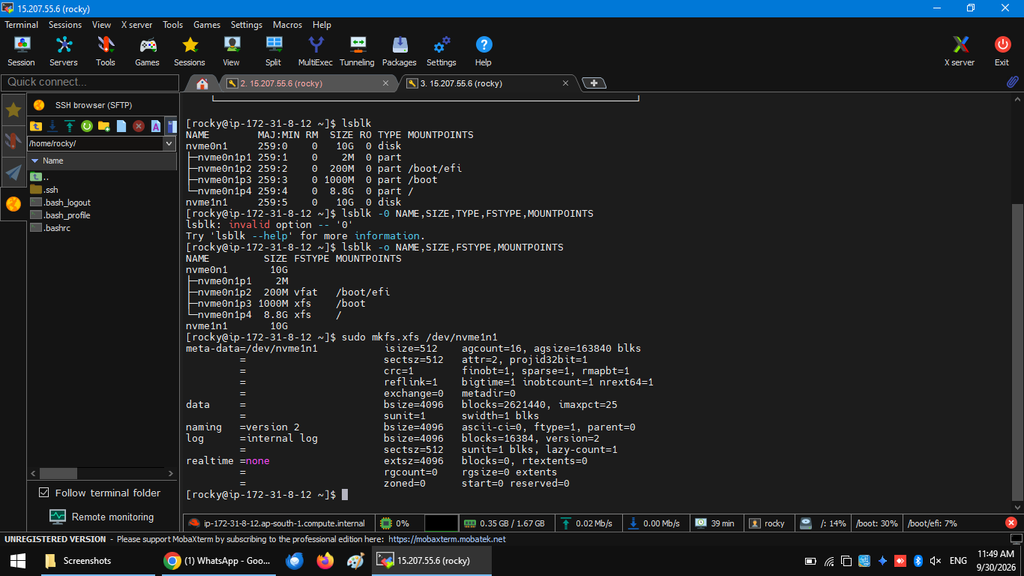
The new disk must have a file system before it can be used.
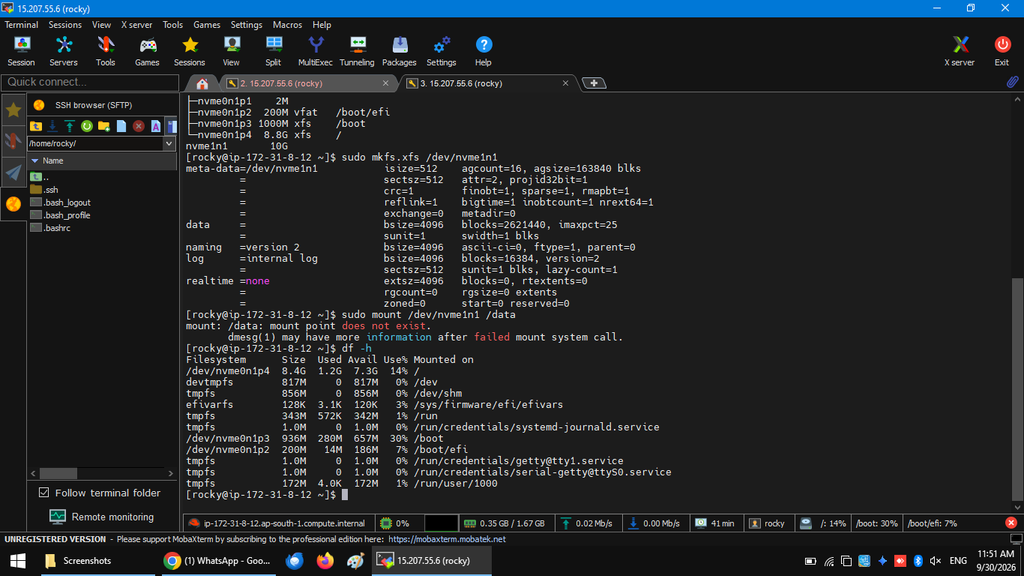
Format the new disk with XFS:
sudo mkfs.xfs /dev/nvme1n1
Do not run this command against the operating system disk.
Step 8: Create the Mount directory
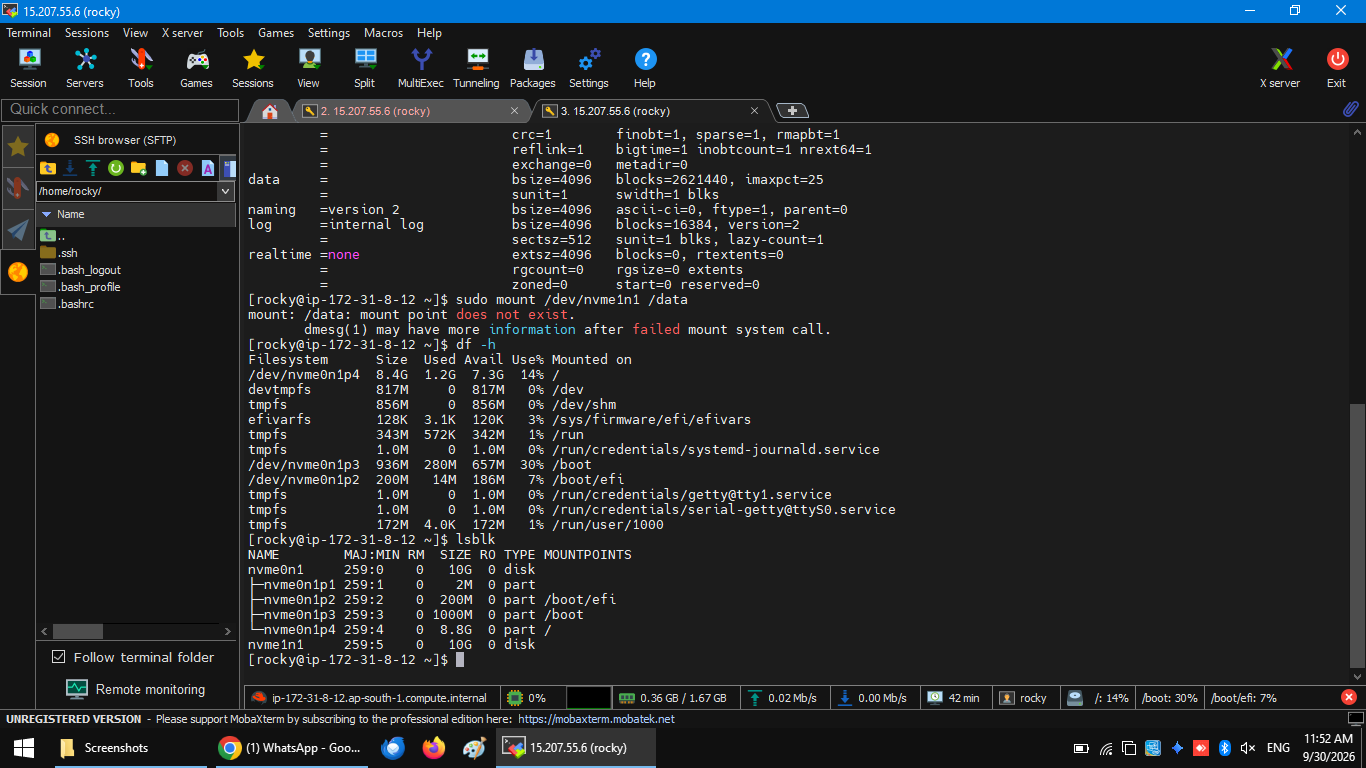
Enter the following commands:
sudo mkdir -p /data
Verify that the directory exists:
ls -ld /data
The command should display information about the /data directory.
Step 9: Mount the EBS Volume
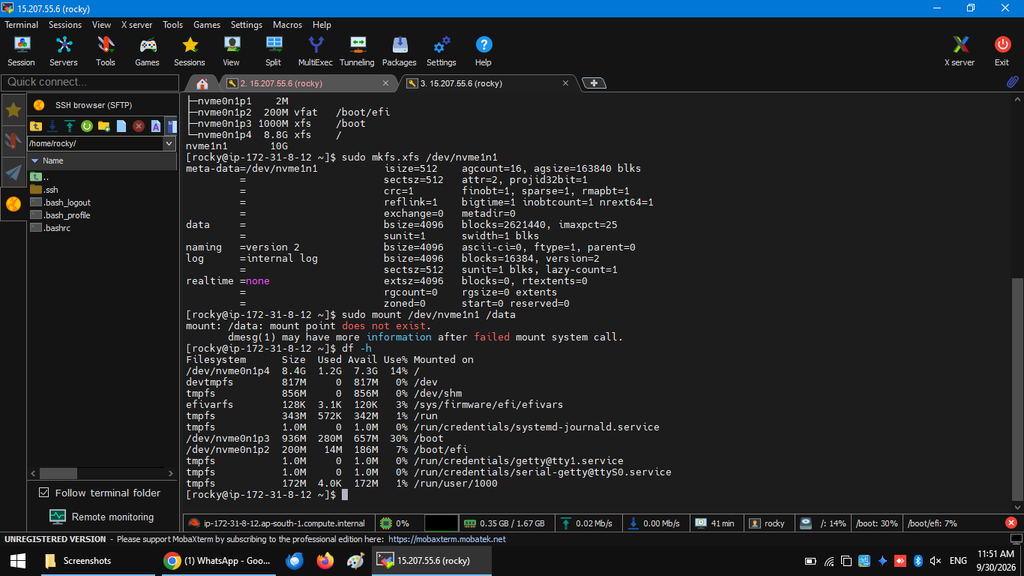
Mount the new disk to /data:
sudo mount /dev/nvme1n1 /data
Verify the available storage:
df -h /data
The output should show the new volume mounted at /data. In this procedure, the filesystem showed approximately 8.4G total space, 1.3G used, and 7.2G available. The difference from the 10 GiB volume size is normal because filesystem metadata and reserved space consume some storage.
Step 10: Configure Persistent Mounting
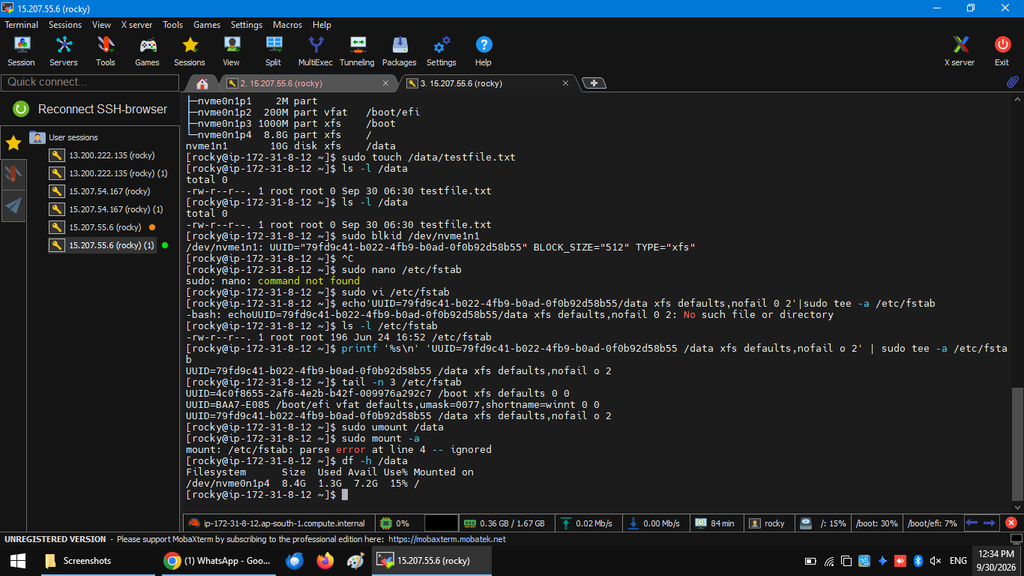
A manually mounted volume may not automatically be mounted after a reboot. Check volume of UUID:
sudo blkid /dev/nvme1n1
The UUID obtained in this procedure was:
79fd9c41-b022-4fb9-b0ad-0f0b92d58b55
Add the following entry to /etc/fstab:
UUID=79fd9c41-b022-4fb9-b0ad-0f0b92d58b55 /data xfs defaults,nofail 0 2
The nofail option helps prevent the system from failing to boot if the volume is temporarily unavailable.
The entry was added using:
printf ‘%s\n’ ‘UUID=79fd9c41-b022-4fb9-b0ad-0f0b92d58b55 /data xfs defaults,nofail 0 2’ | sudo tee -a /etc/fstab
Verify the final entries with:
tail -n 3 /etc/fstab
Step 11: Test the Persistent Configuration
Unmount the volume:
sudo umount /data
Then test the /etc/fstab configuration:
sudo mount -a
If no error appears, verify the mount:
df -h /data
The EBS volume should again appear mounted at /data.
Final Verification
The additional EBS storage is successfully configured when:
- The EC2 instance is running Rocky Linux.
- The volume is attached and shown as In-use.
- The new disk appears as /dev/nvme1n1.
- The disk uses the XFS file system.
- The disk is mounted at /data.
- The UUID is configured in /etc/fstab.
- sudo mount -a completes without errors.
- df -h /data shows the available storage.
Conclusion
Adding an EBS volume provides a practical way to expand storage on a Rocky Linux EC2 instance. In this procedure, a 10 GiB gp3 volume was created in ap-south-1b, attached to the Rocky Linux instance, formatted with XFS, mounted at /data, and configured for persistent mounting using its UUID.
This approach separates additional application or data storage from the operating system disk and provides a repeatable method for managing storage on AWS EC2.
FAQs
- Why must the EBS volume and EC2 instance use the same Availability Zone?
An EBS volume is designed to be attached to an EC2 instance within the same Availability Zone. For example, if the EC2 instance is in ap-south-1b, the EBS volume should also be created in ap-south-1b. - Why did the new EBS disk appear as /dev/nvme1n1?
On Nitro-based EC2 instances, AWS block devices can appear inside Linux as NVMe devices. Therefore, an EBS volume configured with a device name such as /dev/sdf in the AWS Console may appear as /dev/nvme1n1 inside Rocky Linux. - Why was XFS used for the new EBS volume?
XFS is a supported Linux file system and is commonly used for data storage on Linux servers. It provides features suitable for managing large files and storage workloads.
Discover more from Root Learning
Subscribe to get the latest posts sent to your email.