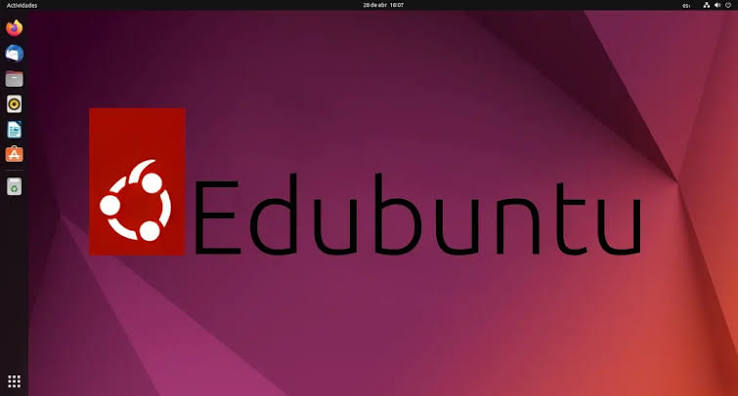
Linux operating systems have become increasingly popular among students, teachers, schools, and organizations looking for secure, flexible, and cost-effective computing solutions. Among the Linux distributions designed specifically with education in mind, Edubuntu is one of the most useful options. It is an official Ubuntu flavor developed with education as its primary focus. It combines the familiar Ubuntu desktop environment with a collection of educational applications and tools that can be useful in classrooms, laboratories, schools, and home learning environments. It is free and open source, which means users can download and use it without purchasing a traditional operating system license. (edubuntu.org)
If you are interested in trying a Linux operating system for educational purposes, installing it can be a practical starting point. The process is relatively straightforward, although you need to prepare a USB drive and make sure your computer meets the recommended requirements before beginning. This guide explains how to download Edubuntu, create a bootable USB drive, install Edubuntu on a computer, and complete the initial setup.
Table of Contents
What is Edubuntu?
It is a Linux-based operating system built on Ubuntu and designed specifically for educational environments. Its goal is to provide students and educators with a free, open-source desktop platform along with access to a broad ecosystem of educational software. According to the official project, the operating system is intended to bring the freedom of the Linux desktop and open-source educational software into classrooms. It is also designed with privacy and accessibility in mind.
Because it is an official Ubuntu flavor, users who are already familiar with Ubuntu will generally find the desktop environment and basic Linux workflow relatively familiar.
Some of the key characteristics of Edubuntu include:
- Free and open-source software
- A strong focus on education
- Access to a large ecosystem of educational applications
- Support for multiple languages
- A familiar Linux desktop environment
- Regular updates and security support through its Ubuntu foundation
- Suitability for schools, students, teachers, and home users
The current long-term-support release listed on the official website is Edubuntu 26.04 LTS, also known as Resolute Raccoon. The download page currently lists three years of support for this LTS release. (edubuntu.org)
Why Should You Use This?
Before installing a new operating system, it is useful to understand why it may be suitable for your needs. One of the biggest advantages of it is its educational focus. Instead of providing only a basic desktop operating system, it aims to provide an environment where students and teachers can access software relevant to learning and teaching. Another important benefit is that Edubuntu is open source. Users can download it without paying for a proprietary operating-system license. The software can also be customized according to the requirements of a school, laboratory, or individual user.
This can also be useful for organizations that want to reduce software licensing costs. Since the operating system is part of the Ubuntu ecosystem, it benefits from the wider Linux and Ubuntu community. However, before installing it, you should check your computer’s hardware compatibility and back up important files.
System Requirements
Before starting the installation, make sure your computer meets the requirements listed by the official Edubuntu project. For the current Edubuntu 26.04 LTS release, the published requirements include:
Requirement And Recommended Specification:
1. Processor 2 GHz dual-core processor or better
2. RAM 6 GB
3. Storage 25 GB of free hard-drive space
4. Installation USB 16 GB USB flash drive
5. Internet Recommended for additional software
These are the requirements currently published on the official Edubuntu download page. Meeting these requirements does not guarantee that every hardware configuration will work perfectly, so it is still a good idea to check your computer’s specifications before installation.
Things You Need Before Installing This OS
You do not need many things to get started with it, but preparing everything beforehand can make the installation easier.
You will generally need:
- A compatible desktop computer or laptop.
- A stable internet connection for downloading the installation image and updates.
- A USB flash drive with at least 16 GB capacity.
- Access to another working computer if necessary to create the bootable USB.
- A backup of important files stored on the computer.
- Sufficient free storage space for the installation.
Back Up Your Important Files
This is one of the most important steps before installing any operating system. If you plan to replace your existing operating system, the installation process can modify or erase data on the internal storage. Therefore, copy important documents, photographs, videos, assignments, projects, and other files to an external drive or a trusted cloud-storage service. If you plan to install Edubuntu alongside another operating system using a dual-boot configuration, you should still create a backup before changing disk partitions.
Step 1: Visit the Official Website
The first step is to download the operating system from the official website.
Go to the official Edubuntu download page:
Download Edubuntu from the official website
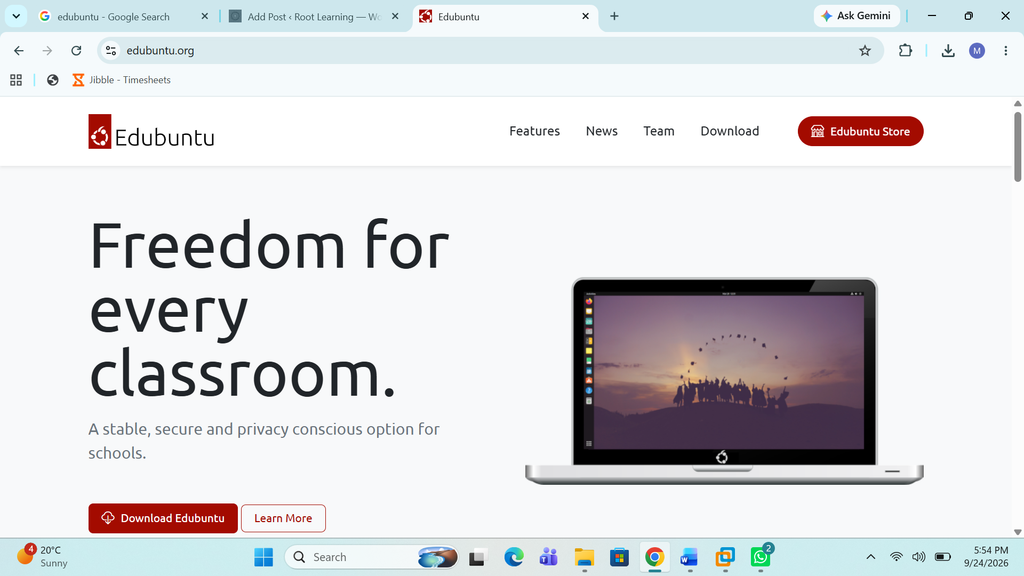
Using the official website is important because it helps you obtain the genuine installation image rather than an unofficial or modified copy.
The official download page currently provides Edubuntu 26.04 LTS as the long-term-support release. (edubuntu.org)
Step 2: Download the ISO File
Once you open the download page, locate the download option for the appropriate Edubuntu release.
An operating-system installer is generally distributed as an ISO image. An ISO file contains the files required to create installation media.
Click the download option and allow the ISO file to download completely.
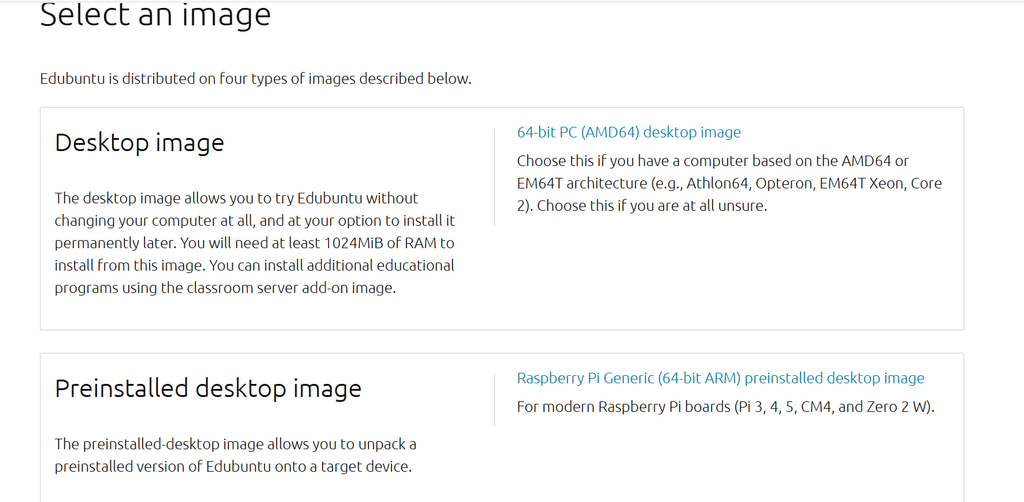
The download can take some time depending on your internet speed because operating-system installation images are relatively large.
Do not interrupt the download unnecessarily. Once it is complete, check that the ISO file has been saved properly on your computer.
Step 3: Prepare Your USB Drive
The next step is to convert your USB flash drive into a bootable installation drive.
Remember that creating a bootable installer generally involves writing the ISO image to the USB drive. The existing data on the USB drive may be erased, so move any important files from the USB before proceeding.
A USB drive with at least 16 GB capacity is listed by the Edubuntu project for flashing the installer. (edubuntu.org)
You can use an appropriate USB imaging utility available for your operating system to write the Edubuntu ISO to the flash drive.
The general process is:
- Insert the USB drive.
- Open your USB imaging application.
- Select the downloaded Edubuntu ISO file.
- Select the correct USB drive.
- Start the writing or flashing process.
- Wait until the process finishes.
- Safely eject the USB drive.
Be particularly careful when selecting the target drive. Selecting the wrong storage device could result in data loss.
Step 4: Boot Your Computer From the USB Drive
After creating the bootable USB, connect it to the computer where you want to install Edubuntu.
Restart the computer. During startup, you may need to open the boot menu or change the boot order in the computer’s UEFI/BIOS settings. The key used to access the boot menu varies by manufacturer and model. Common keys include F12, F9, F10, Esc, or Delete.
From the boot menu, select the USB storage device. If everything has been prepared correctly, the computer should start the Edubuntu installer from the USB drive instead of loading the existing operating system.
Step 5: Start the Edubuntu Installation
Once the Edubuntu installation environment loads, follow the instructions displayed on the screen. You will typically be guided through several configuration choices, such as:
- Language
- Keyboard layout
- Network connection
- Installation type
- Disk/storage configuration
- User account details
- Time zone
- Installation options
Read each screen carefully before continuing. If you are new to Linux, do not rush through the installation. In particular, pay close attention to any screen that involves disk partitions or storage.
Step 6: Choose the Installation Type
One of the most important decisions during installation is where Edubuntu will be installed. Depending on your computer configuration, you may have different options.
Replace the Existing Operating System
If you want Edubuntu to be the only operating system on the computer, you can choose the option that uses the available disk for the Edubuntu installation. This can be a straightforward option for a computer dedicated to Linux and education. However, selecting an option that erases the existing operating system can also remove existing files and applications. Make sure your important data has been backed up first.
Install Edubuntu Alongside Another Operating System
If you want to continue using another operating system, such as Windows, you may be able to configure a dual-boot installation. A dual-boot setup allows you to select which operating system to start when you turn on the computer. This option is useful if you need applications that are available only on another operating system while also wanting to explore it. However, disk partitioning is more complicated than a clean installation, so beginners should carefully review the installation choices before proceeding.
Step 7: Create Your User Account
During the installation, you will be asked to create a user account. Enter the requested information, which may include:
- Your name
- Computer name
- Username
- Password
Choose a strong password that you can remember. Your user account will be used to log into Edubuntu after installation and manage everyday tasks.
Step 8: Select Your Time Zone and Keyboard Layout
Edubuntu will also ask you to select regional settings. Choose the appropriate keyboard layout for your keyboard. You will also need to select your time zone. Selecting the correct location ensures that the system displays the appropriate local time. If your computer is connected to the internet, the installation process may also use the network connection to obtain updates or additional packages.
Step 9: Begin the Installation
After reviewing the settings, start the installation. It will copy the required files from the installation media to your computer’s internal storage and configure the operating system. The installation time can vary depending on your computer’s hardware and storage speed. Do not turn off the computer while the installation is in progress. Once the installation is complete, you will normally be prompted to restart the computer. Remove the USB drive when instructed or before the computer boots from it again.
Step 10: Restart and Log In to Edubuntu
After restarting the computer, it should boot into your newly installed Edubuntu system. Enter the username and password you created during installation. You should now be able to access the Edubuntu desktop.
Take some time to explore the interface and locate important areas such as:
- Applications
- Settings
- Files
- Software management
- Network settings
- System information
If you have used Ubuntu or another Linux distribution before, many of these features should feel familiar.
Step 11: Connect to the Internet
After the first login, connect your computer to a reliable internet connection. You can use Wi-Fi or Ethernet depending on your hardware and network setup. An internet connection is particularly useful after installation because it allows you to download system updates and additional software. The official download page also recommends an internet connection for installing additional software.
Step 12: Update Edubuntu
One of the first things you should do after installing, check for available system updates. Open the system’s software-update tools and allow available updates to be installed. Keeping the operating system updated can provide bug fixes, security improvements, and updated software packages. You can also use the terminal if you are comfortable with Linux commands. However, beginners can generally start with the graphical software-update interface before learning terminal-based administration.
Step 13: Explore Educational Software
The main reason many users choose it as educational focus. After completing the installation and updates, explore the applications available on your system. Depending on the release and installed package selection, educational software can cover different areas of learning, including mathematics, science, programming, geography, language learning, and other academic activities.
This makes it particularly interesting for schools, teachers, students, educational laboratories, and learners who want a Linux-based study environment. You can also explore additional software through the Linux software ecosystem and install applications according to your requirements.
Edubuntu for Students and Teachers
It can be useful for both students and educators. For students, it can provide a platform for studying, programming, experimenting with open-source software, and accessing educational applications. For teachers, it can serve as an alternative operating system for classroom computers or computer laboratories.
Because it is open source, institutions can also investigate ways to customize the environment according to their educational requirements. Its Ubuntu foundation also means that users can benefit from the broader Ubuntu ecosystem and documentation.
Common Problems During Installation
Although installing is generally straightforward, beginners may encounter a few common issues.
1. USB Is Not Appearing in the Boot Menu
If the USB drive does not appear, check whether the bootable USB was created correctly.
You can also restart the computer and enter the boot menu again.
In some cases, UEFI/BIOS configuration may affect which devices are available for booting.
2. Computer Starts the Existing Operating System
If your computer continues to start Windows or another operating system, the system may not be booting from the USB.
Open the boot menu and manually select the USB device.
3. Installation Cannot Continue
Check that the computer meets the published system requirements and that the installation media was created correctly.
If the ISO download was incomplete or corrupted, downloading the official image again may resolve the problem.
4. Not Enough Storage Space
Make sure that the computer has sufficient free storage before beginning the installation. The official Edubuntu download page currently lists 25 GB of free hard-drive space as a requirement. (edubuntu.org)
5. Internet Is Not Working After Installation
Check whether Wi-Fi is enabled and whether your network is visible.
If the wireless adapter is not detected, you may need to investigate hardware compatibility or install an appropriate driver.
Tips for a Smooth Installation
Following a few precautions can make the installation process much easier.
1. Back up your files first. Never begin a major operating-system installation without protecting important data.
2. Use the official download source. Download Edubuntu from the official project website rather than an unknown third-party source.
3. Use a reliable USB drive. A damaged or unreliable flash drive can cause installation problems.
4. Check the installation location carefully. Disk and partition options can affect existing data.
5. Keep your computer connected to power. If you are installing Edubuntu on a laptop, connect the charger before starting.
6. Do not interrupt the installation. Avoid shutting down or restarting the computer while files are being copied.
7. Install updates after setup. Once the operating system is running, check for available updates.
Is Edubuntu Suitable for Old Computer’s?
Edubuntu’s official website describes the distribution as resource-friendly and states that it can run well even on older hardware. However, the current published requirements for Edubuntu 26.04 LTS specify a 2 GHz dual-core processor, 6 GB RAM, and 25 GB of free storage. (edubuntu.org)
Therefore, users with older computers should check their hardware before installing the latest release.
If your computer is below the published requirements, performance may not provide the experience you expect from a modern desktop operating system.
FAQS
Q: Is Edubuntu free?
A: Yes. Edubuntu is a free and open-source Ubuntu flavor designed around educational use. (edubuntu.org)
Q: Can I install Edubuntu on a laptop?
A: Yes, provided that the laptop meets the hardware and compatibility requirements. The current Edubuntu download page lists 2 GHz dual-core processing, 6 GB RAM, and 25 GB of free storage among its requirements. (edubuntu.org)
Q: Do I need a USB drive to install Edubuntu?
A: For the standard physical-PC installation process described in this guide, a bootable USB drive is the practical method. The official Edubuntu page currently recommends a 16 GB USB thumb drive for flashing the installer. (edubuntu.org)
Q: Can I use Edubuntu alongside Windows?
A: A dual-boot setup may be possible, depending on your computer’s configuration and available storage. If you choose this method, be particularly careful with disk partitioning and back up your data before making changes.
Q: Does Edubuntu require an internet connection?
A: An internet connection is recommended, particularly for updates and additional software. The official Edubuntu download page notes that internet access is preferable for installing additional software. (edubuntu.org)
Q: What is the current Edubuntu LTS version?
A: The official Edubuntu website currently lists Edubuntu 26.04 LTS, also known as Resolute Raccoon. (edubuntu.org)
Conclusion
Installing Edubuntu is a practical way to explore a Linux operating system designed with education in mind. From downloading the official ISO and creating a bootable USB drive to configuring the system and installing updates, the overall process can be completed by following a series of straightforward steps.
Before beginning, make sure your computer meets the current requirements, back up your important files, and use the official Edubuntu download source. The current Edubuntu 26.04 LTS release lists a 2 GHz dual-core processor or better, 6 GB RAM, 25 GB of free storage, and a 16 GB USB drive for creating the installer. (edubuntu.org)
Once the installation is complete, you can explore the Linux desktop, install additional applications, and make use of the educational software ecosystem that is central to Edubuntu’s purpose.
For students, teachers, schools, and anyone interested in open-source educational computing, Edubuntu provides an accessible way to combine Linux with a learning-focused software environment.
Discover more from Root Learning
Subscribe to get the latest posts sent to your email.