Setting up your own mail server on AlmaLinux OS benefits you by giving you complete control over several email accounts, domains, & also the message delivery system. In this guide, let’s see the basic process of installing a mail server using Postfix for sending and receiving mail and Dovecot for IMAP access. In the end, we will also talk about installing Roundcube and testing our mail.
Table of Contents
AlmaLinux OS: Knowing the Benefits of Installing the Email Server
AlmaLinux OS is an excellent platform for installing an email server because it offers stability, security, and reliable performance. With AlmaLinux OS, businesses and users can efficiently manage email services while maintaining greater control over their server environment. Its open-source nature also makes it a cost-effective solution for modern email hosting.
Steps to Install the Email Server on AlmaLinux OS
Going step by step can definitely help you with the email server setup on AlmaLinuxOS
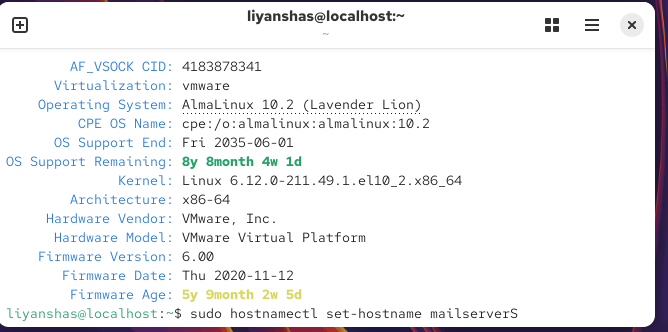
- The first step is to set up a hostname, as the person testing this function may not have a hostname. If you have one, don’t do this step.
Type: sudo hostnamectl set-hostname mailserver
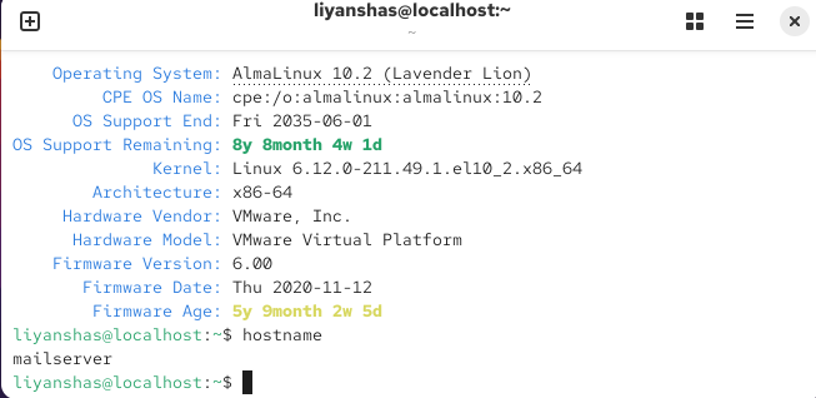
- Type hostname to check whether the setup is done or not.
- Find the VM IP address
First, connect the Ethernet on VMware
Search for the ens and then bring ens160 up
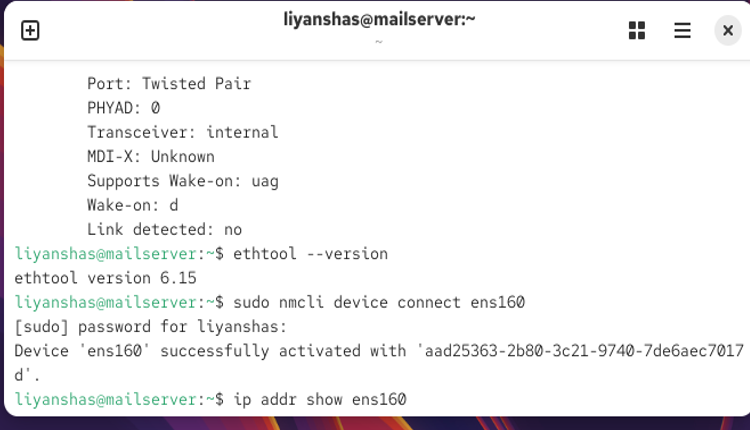
Type: sudo ethtool ens160
- Check VMware’s virtual network service
On your Windows host:
- Press Windows + R.
- Type:
services.msc
- Press Enter.
- Find these services:
- VMware DHCP Service
- VMware NAT Service
Check whether each one is showing the following:
- Running
- Stopped
- Not found
Don’t change anything yet.
Reply like:
VMware DHCP Service: Running
VMware NAT Service: Running
DHCP running & for NAT no status
Great. That gives us a useful clue.
- VMware DHCP Service: Running ✅
- VMware NAT Service: no status / likely not running ❌
Let’s check the NAT service specifically.
In the same Services window:
- Find VMware NAT Service.
- Right-click it.
- Select Start.
If it starts successfully, it should show:
Status: Running
Type: ip addr show ens160
Run only:
ip addr show ens160
Look for a line starting with:
inet
For example:
inet 192.168.73.128/24
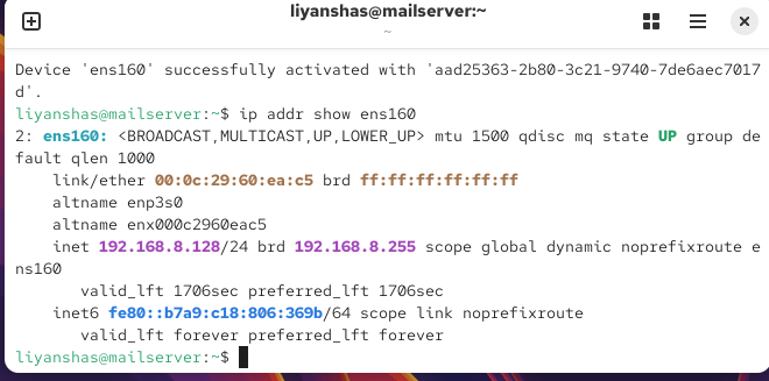
Perfect. ✅ Your AlmaLinux VM now has the IP like the below:
192.168.8.128
So the network is working
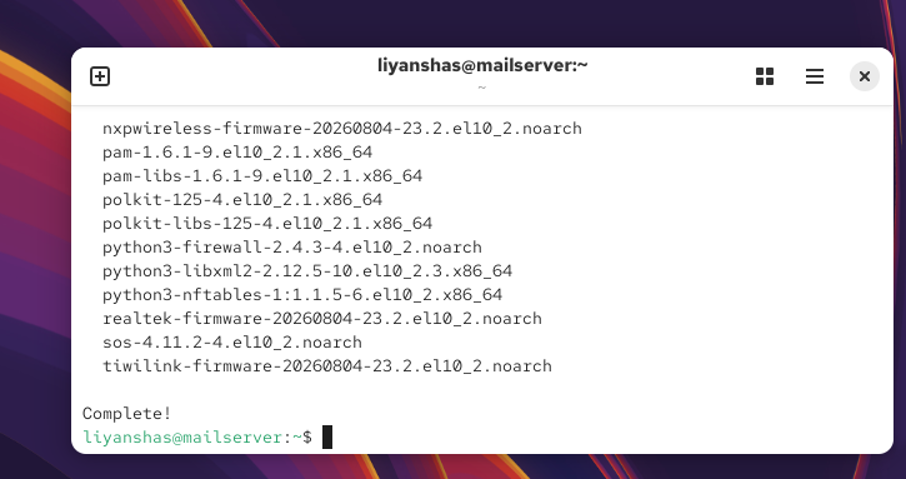
- Now update AlmaLinux
Type sudo dnf update -y
Check the complete status
- Install Postfix
Postfix will be the SMTP mail server. It’s responsible for sending and receiving email.
Run:
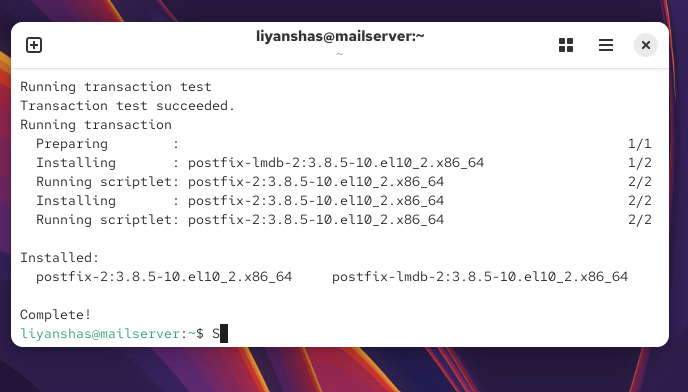
sudo dnf install -y postfix
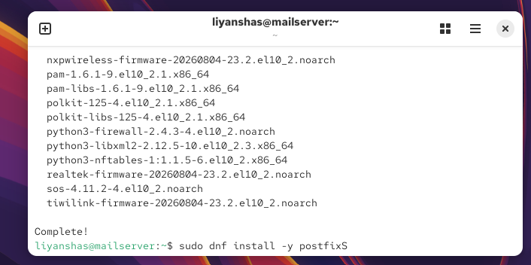
Wait until it says the installation is complete.
- Start Postfix
Run:
sudo systemctl enable –now postfix
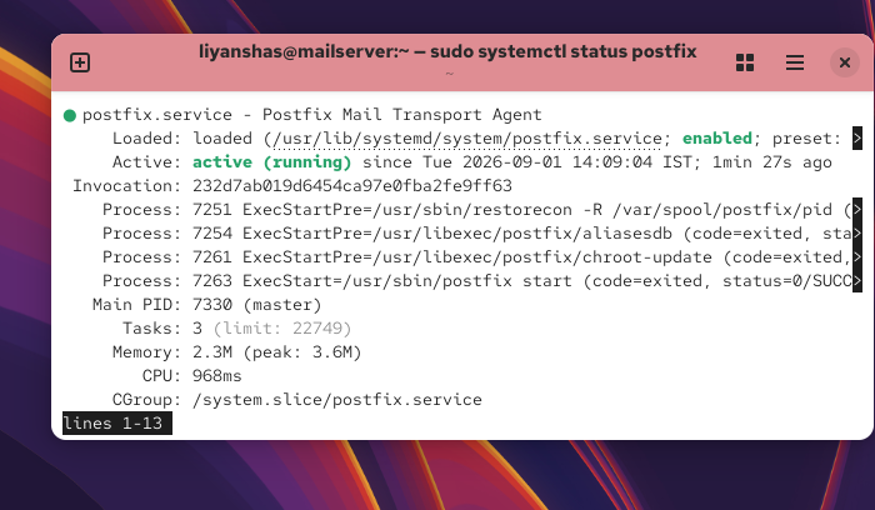
Then check its status:
sudo systemctl status postfix
Look for:
Active: active (running)
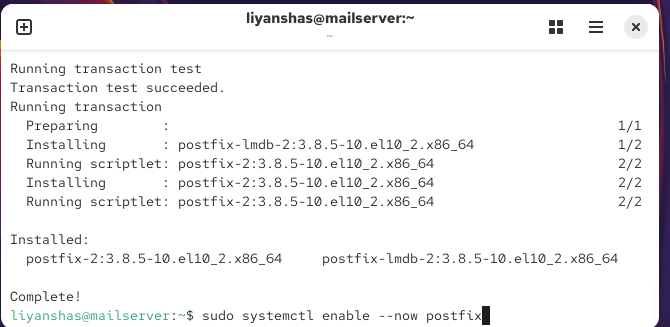
The “Created symlink” message means systemctl enable successfully configured Postfix to start automatically when AlmaLinux boots.
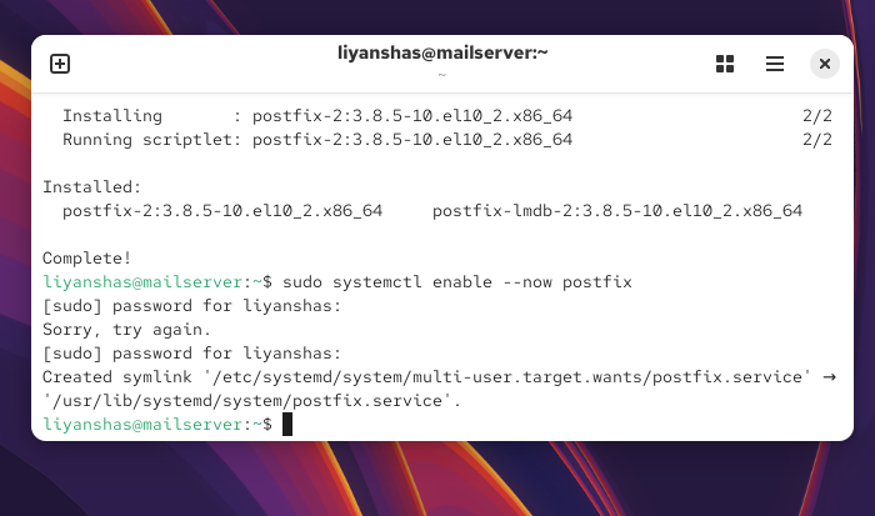
Now we need to confirm it’s actually running.
sudo systemctl status postfix
- Install Dovecot
Dovecot will handle IMAP, allowing email clients such as Thunderbird to access the mailbox.
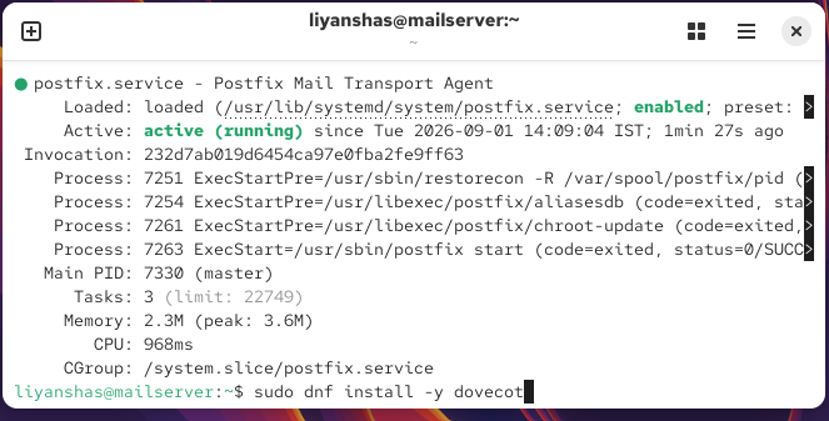
Run:
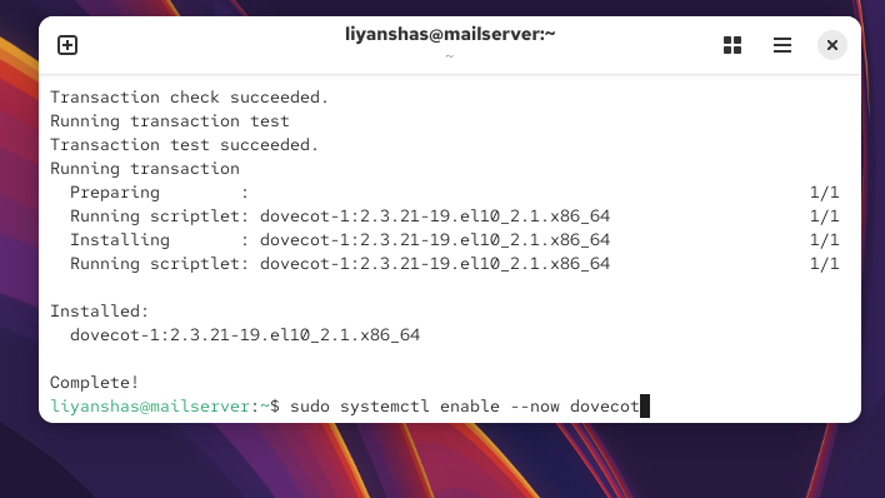
sudo dnf install -y dovecot
Wait until the installation finishes.
- Start Dovecot
Run:
sudo systemctl enable –now dovecot
Then check:
sudo systemctl status dovecot
Look for:
Active: active (running)
- Create your first mail user
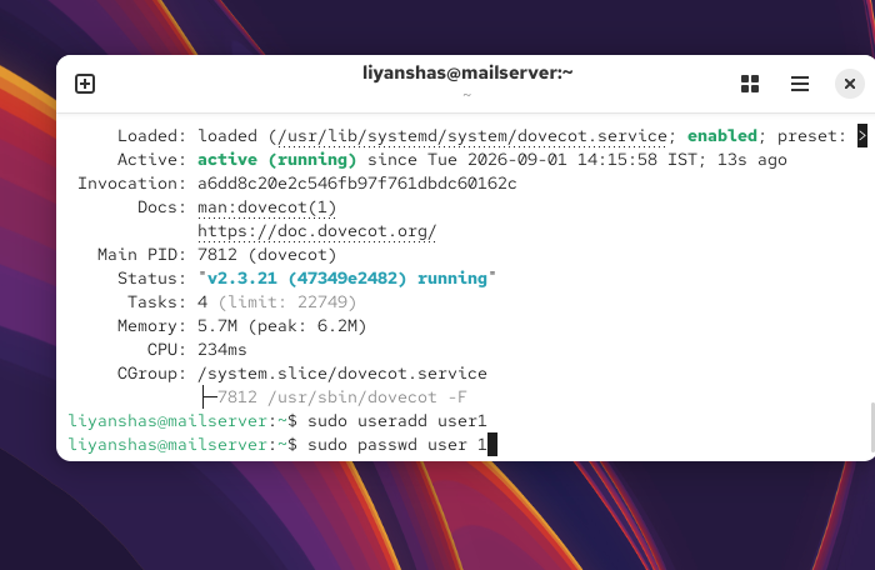
We’ll create a user called user1. This user will have the email address we’ll use for testing.
Run:
sudo useradd user1
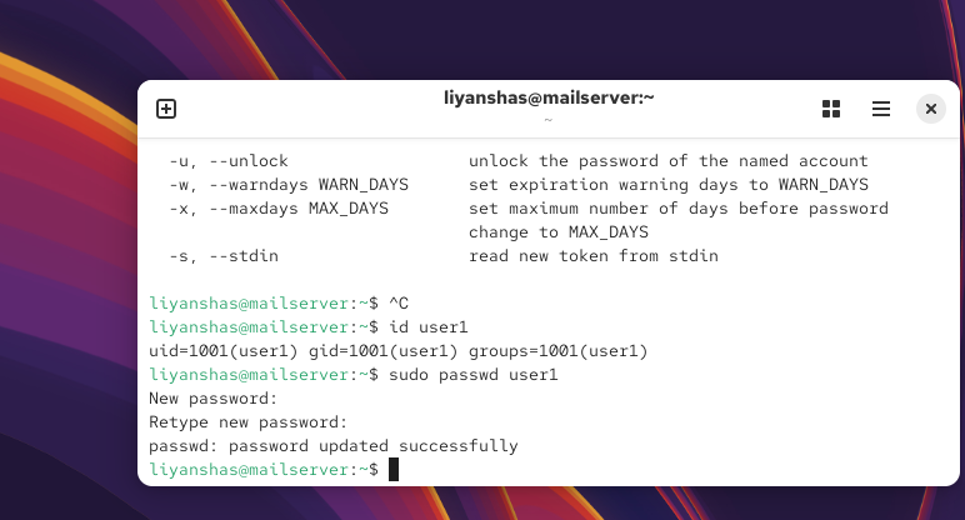
Then set a password:
sudo passwd user1
You’ll be asked to enter the password twice.
Use a password you can remember for this lab.
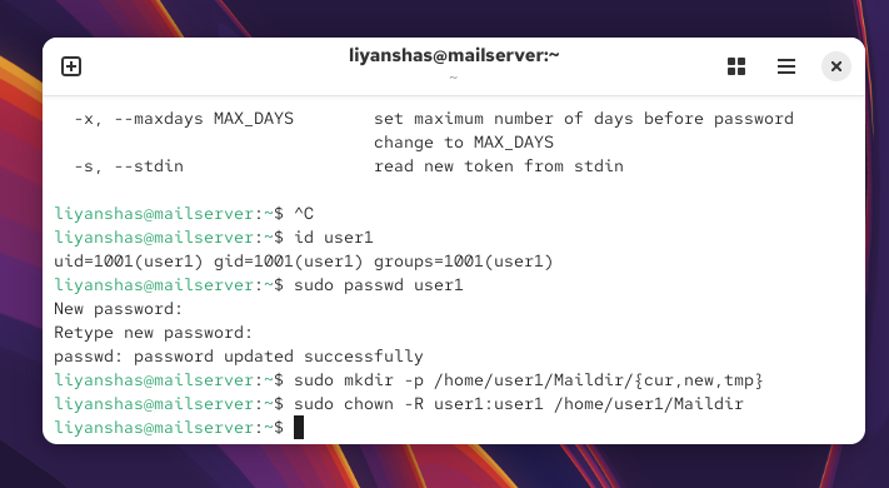
- Create the user’s Maildir
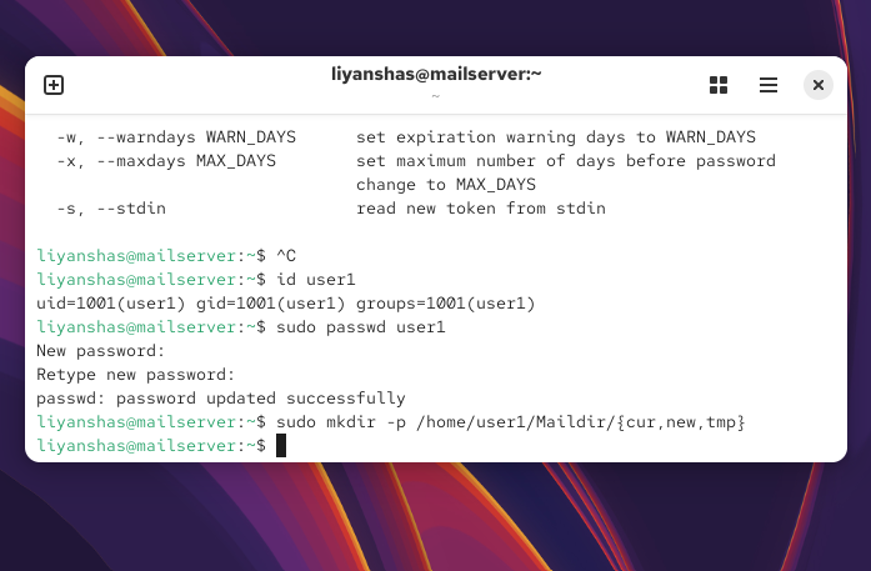
This is where Postfix will store user1’s emails.
Run this one command:
sudo mkdir -p /home/user1/Maildir/{cur,new,tmp}
After it finishes, you should simply get your command prompt back with no error.
- Give user1 ownership of the mailbox
Run:
sudo chown -R user1:user1 /home/user1/Maildir
There should be no output if it succeeds.
- Configure Dovecot’s mailbox location
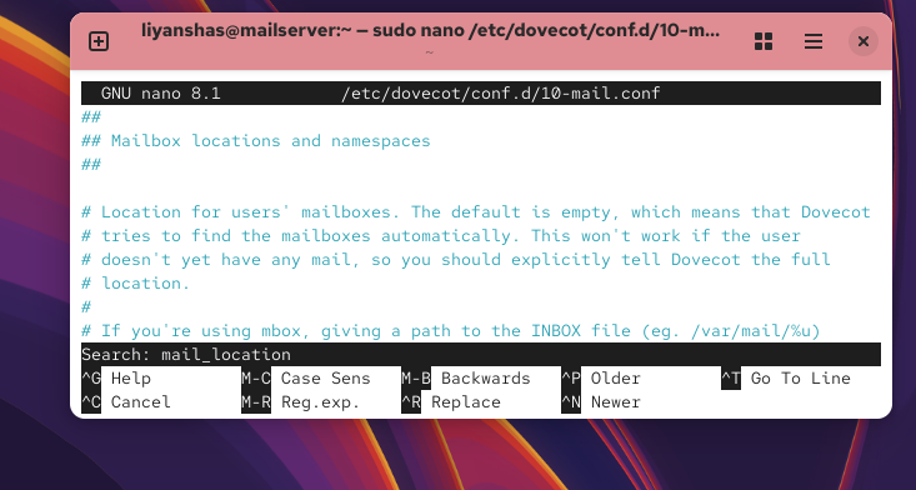
Now we’ll tell Dovecot that user1’s mailbox is the Maildir we just created.
Run:
sudo nano /etc/dovecot/conf.d/10-mail.conf
A text editor will open.
Find this line:
mail_location =
Change it to:
mail_location = maildir:~/Maildir
In Nano
- Press Ctrl + W
- Type mail_location
- Press Enter
- Change the line
- Press Ctrl + O, then Enter to save
- Press Ctrl + X to exit
Stop there after saving and exiting.
- Check the Dovecot configuration
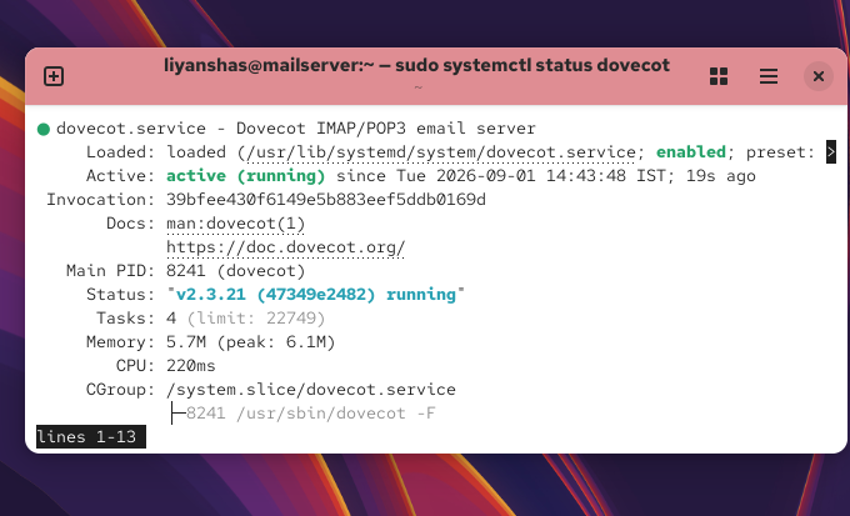
Restart Dovecot
Restart Dovecot
Run:
sudo systemctl restart dovecot
Then check:
sudo systemctl status dovecot
Look for:
Active: active (running)
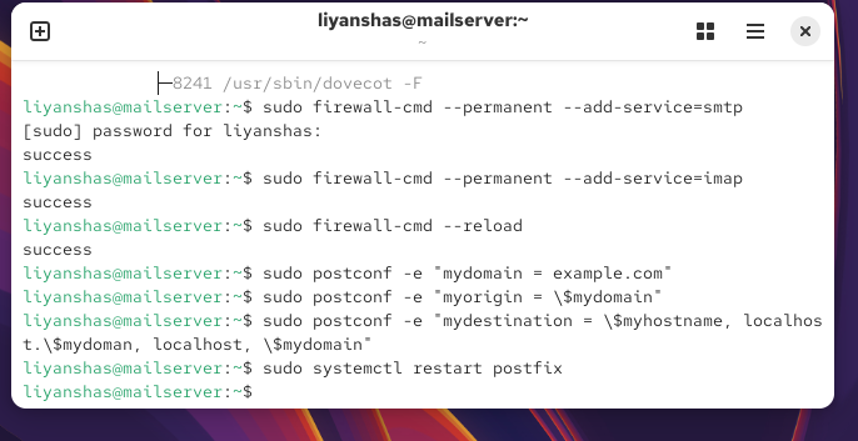
- Open the mail ports in the firewall
Run this command:
sudo firewall-cmd –permanent –add-service=smtp
Then:
sudo firewall-cmd –permanent –add-service=imap
Then apply the changes:
sudo firewall-cmd –reloadStop there.
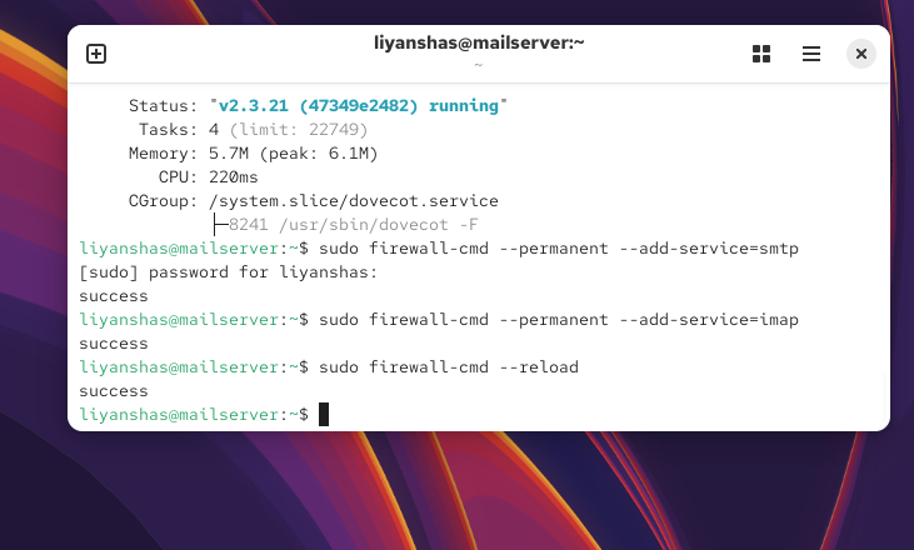
- Firewall is now allowing SMTP and IMAP.
Configure Postfix for your test domain
For our lab, let’s use:
example.com
We need to tell Postfix that example.com is our mail domain.
Run:
sudo postconf -e “mydomain = example.com”
Then:
sudo postconf -e “myorigin = \$mydomain”
And:
sudo postconf -e “mydestination = \$myhostname, localhost.\$mydomain, localhost, \$mydomain”
Finally restart Postfix:
sudo systemctl restart postfix
- Check Postfix configuration
Run:
sudo postconf myhostname mydomain myorigin mydestination
You should see values including:
mydomain = example.com
myorigin = $mydomain
mydestination = …
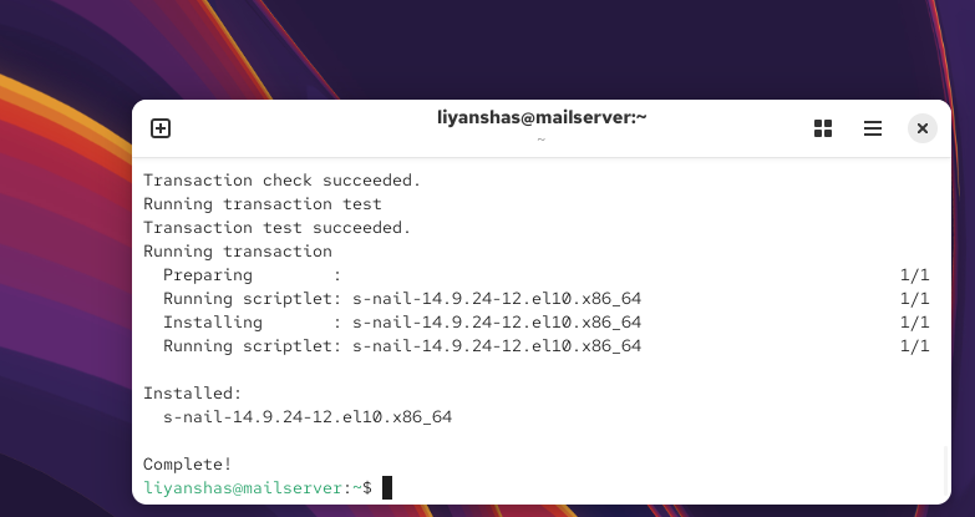
- Install the mail testing command
Run:
sudo dnf install -y s-nail
- Test sending a local email
We’ll send an email from the root account to user1.
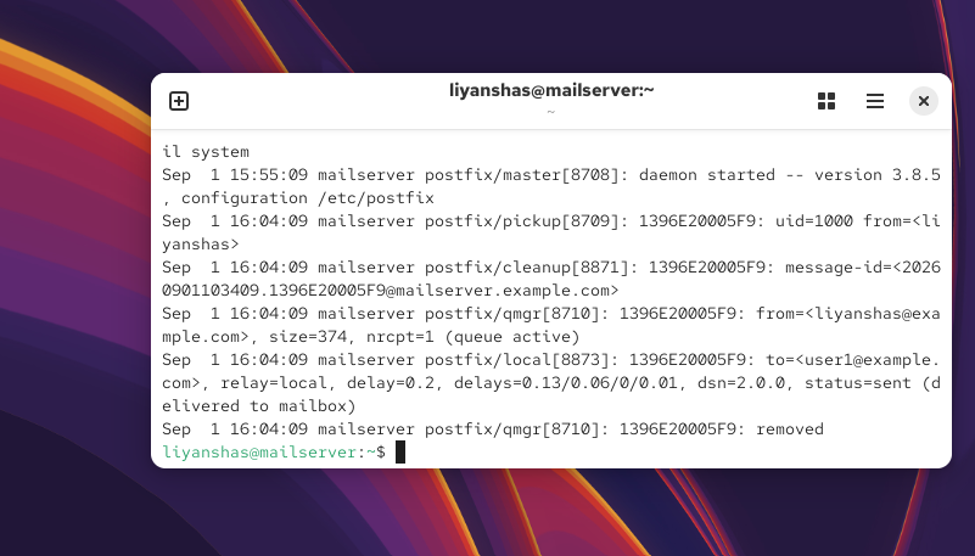
- Check whether the message was delivered
Run:
sudo tail -20 /var/log/maillog
Look for a line containing:
status=sent
- Install the packages needed for Roundcube
Roundcube is a web application, so we need a web server, PHP, & a database.
Run:
sudo dnf install -y httpd php php-mysqlnd php-mbstring php-intl php-json php-xml php-zip php-gd php-ldap mariadb-server
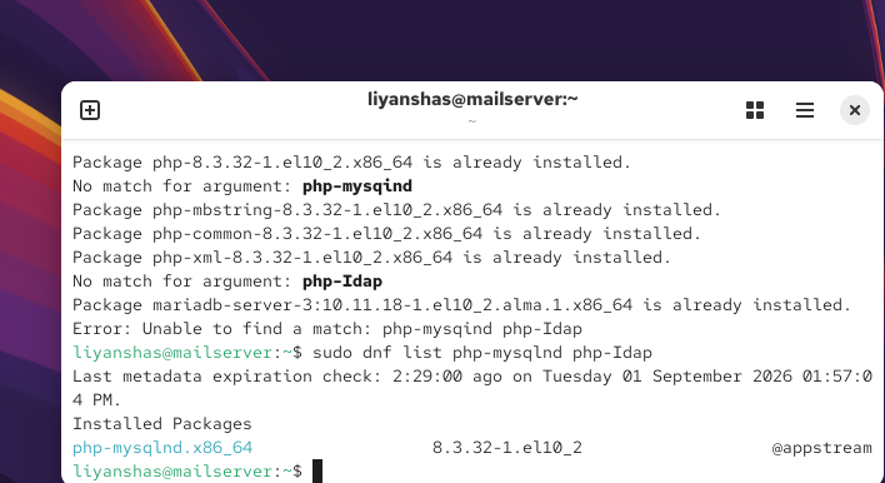
- Check the PHP packages
Run only:
sudo dnf list php-mysqlnd php-ldap
- Start Apache
Run:
sudo systemctl enable –now httpd
Then check:
sudo systemctl status httpd
Look for:
Active: active (running)
- Start MariaDB
Run:
sudo systemctl enable –now mariadb
Then check:
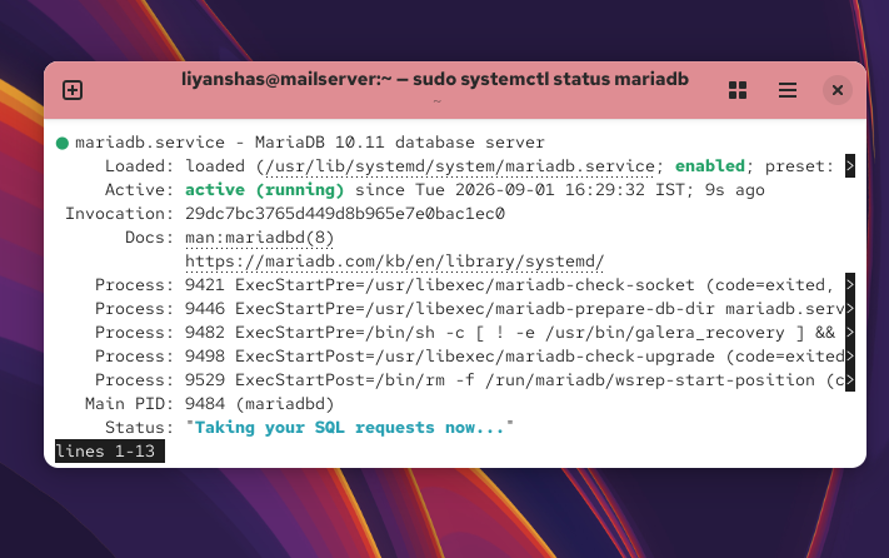
sudo systemctl status mariadb
Look for:
Active: active (running)
Press q to exit.
If you want to know about MariaDB or Apache installation, click here
- Create the Roundcube database
Now we’ll create a database and user specifically for Roundcube.
Run:
sudo mysql
You should get a MariaDB prompt like:
MariaDB [(none)]>
Then enter these commands one at a time:
CREATE DATABASE roundcube;
CREATE USER ’roundcube’@’localhost’ IDENTIFIED BY ‘Roundcube@123’;
GRANT ALL PRIVILEGES ON roundcube.* TO ’roundcube’@’localhost’;
FLUSH PRIVILEGES;
Then exit:
- Install Roundcube
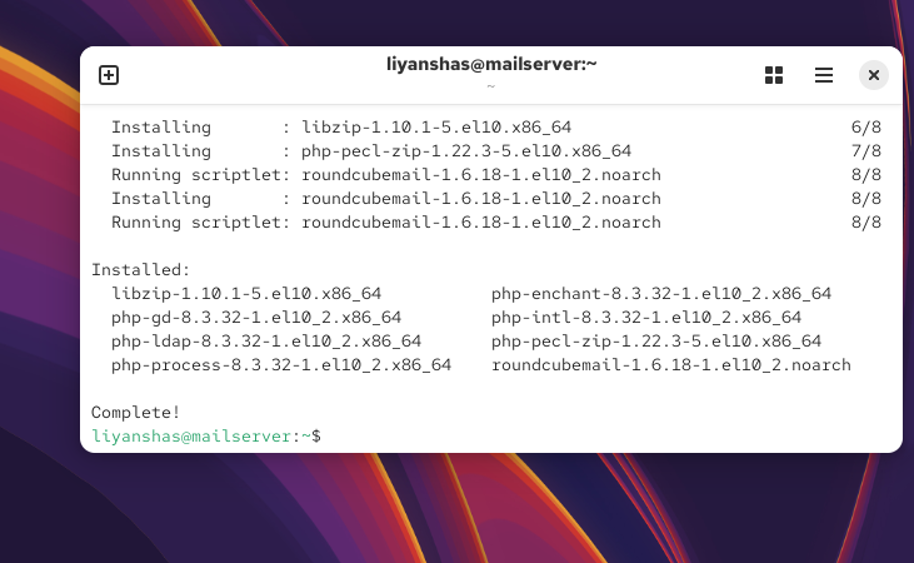
Now we need to install the Roundcube webmail application itself.
Run:
sudo dnf install -y roundcubemail
Let it finish.
- Check Roundcube’s web files
Run this one command:
ls -la /usr/share/roundcubemail
This will confirm where Roundcube is installed.
Check for folders such as:
config
program
skins
vendor
- Now let’s locate Roundcube’s configuration file.
Run:
sudo ls -la /etc/roundcubemail
- Create Roundcube configuration
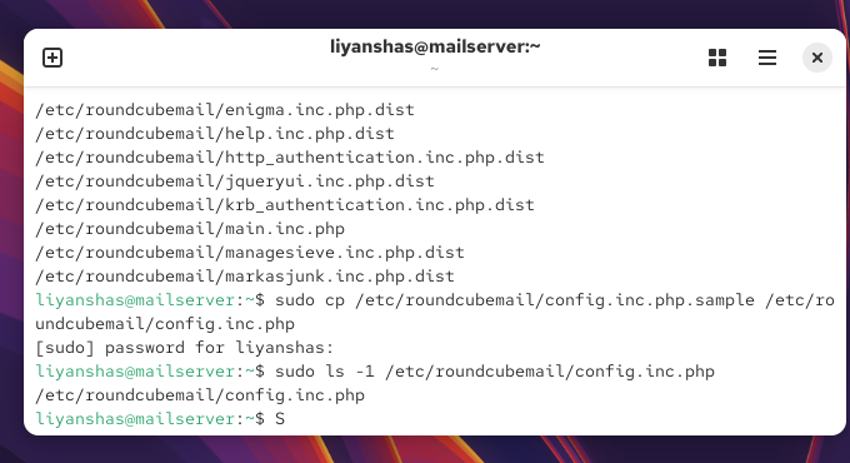
Run:
sudo cp /etc/roundcubemail/config.inc.php.sample /etc/roundcubemail/config.inc.php
Then check that it exists:
sudo ls -l /etc/roundcubemail/config.inc.php
Set the Roundcube database connection
Open:
sudo nano /etc/roundcubemail/config.inc.php
Press:
Ctrl + W
Search for:
db_dsnw
This time it should find the setting.
Change that line to:
$config[‘db_dsnw’] = ‘mysql://roundcube:Roundcube@123@localhost/roundcube’;
Then save and exit:
Ctrl + O
Enter
Ctrl + X
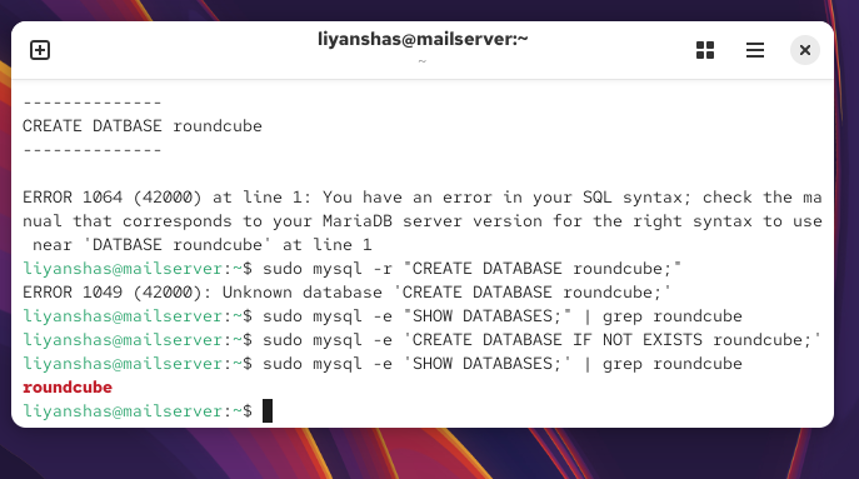
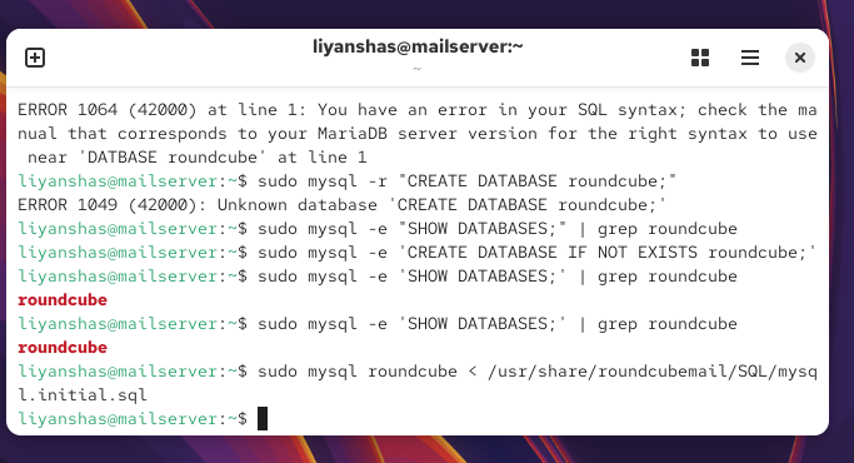
Create the Roundcube database
sudo mysql -e ‘CREATE DATABASE IF NOT EXISTS roundcube;’
Then immediately run:
sudo mysql -e ‘SHOW DATABASES;’ | grep roundcube
The second command should print:
roundcube
Then import the Roundcube tables:
sudo mysql roundcube < /usr/share/roundcubemail/SQL/mysql.initial.sql
- Configure Roundcube to connect to Dovecot
At your normal Linux prompt, run:
sudo nano /etc/roundcubemail/config.inc.php
You will see the Roundcube configuration file.
Press:
Ctrl + W
Type:
default_host
Press Enter.
If you find a line like:
$config[‘default_host’] = ”;
change it to:
$config[‘default_host’] = ‘localhost’;
If you see Not Found, that’s okay. Press Esc, go to the bottom of the file, and add this line:
$config[‘default_host’] = ‘localhost’;
Your existing line:
$config[‘smtp_host’] = ‘localhost:587’;
should be left unchanged.
Then save:
Ctrl + O
Press Enter, then exit:
Ctrl + X
- Now restart Apache:
sudo systemctl restart httpd
If there is no error, the restart succeeded.
- Open Roundcube in your browser
On your Windows host computer, open a web browser and enter:
http://192.168.8.128/roundcubemail/
You should see the Roundcube login page.
Use:
Username: user1@example.com
Password: your user1 password
- Let’s fix the Roundcube directory access.
Run:
sudo nano /etc/httpd/conf.d/roundcubemail.conf
At the bottom of the file, add:
<Directory “/usr/share/roundcubemail”>
Require all granted
</Directory>
Then save:
Ctrl + O → Enter → Ctrl + X
Now run:
sudo apachectl configtest
You want:
Syntax OK
Then:
sudo systemctl restart httpd
After that, on Windows open:
http://192.168.8.128/roundcubemail/
This should address the 403 caused by Apache directory access rules.
- If you still get Internal Server Error, don’t change anything else. Run:
sudo tail -20 /var/log/httpd/error_log
If Round Cube does not work in Windows then do the following
In Nano, change:
Require local
to:
Require all granted
So that section becomes:
<Directory /usr/share/roundcubemail/>
<IfModule mod_authz_core.c>
#Apache 2.4
Require all granted
</IfModule> Leave the older Apache 2.2 section alone for now
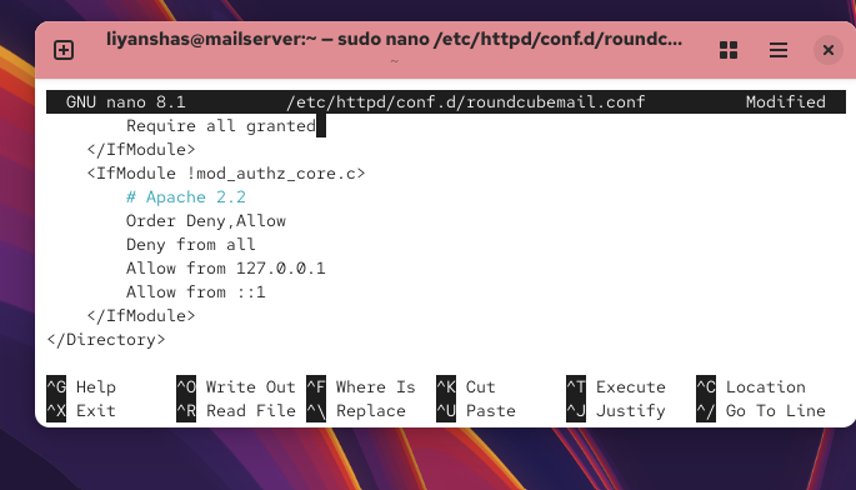
- Then, on you normal browser, copy and paste http://192.168.8.128/roundcubemail/. It should work normally
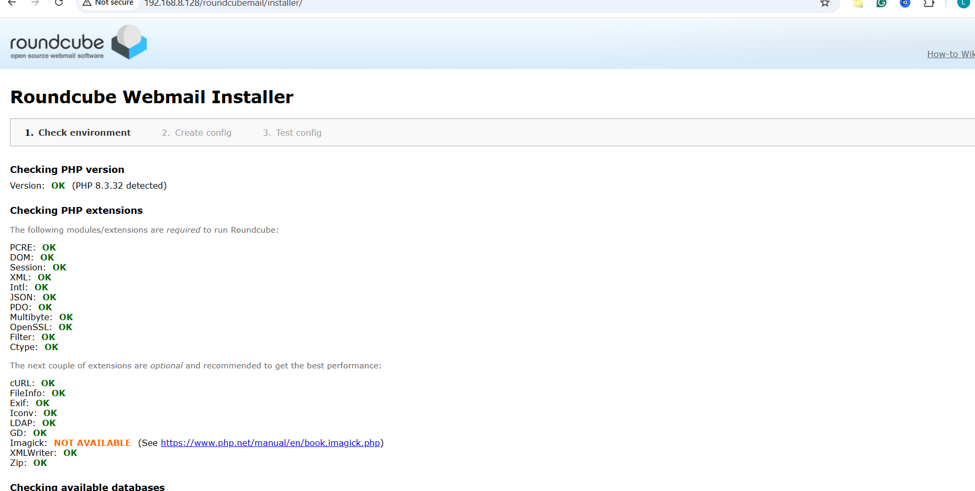
- Database setup for mail server setup
Enter:
Database type: MySQL
Database server: localhost
Database name: roundcube
Database user: roundcube
Database password: Roundcube@123
- Then click CREATE CONFIG / Continue for mail server setup.
Save config.inc.php Download the File
If you have Windows, we have to shift the file to Alama Linux for that use Power Shell
In PowerShell, first run:
cd “$HOME\Downloads”
Then:
dir config.inc.php
its showing connection refused
That’s normal. It means SSH is now running and is asking you to authenticate.
On AlmaLinux, run:
sudo chmod 644 /etc/roundcubemail/config.inc.php
sudo chown root:root /etc/roundcubemail/config.inc.php
sudo restorecon -v /etc/roundcubemail/config.inc.php
Then refresh the Roundcube installer page.
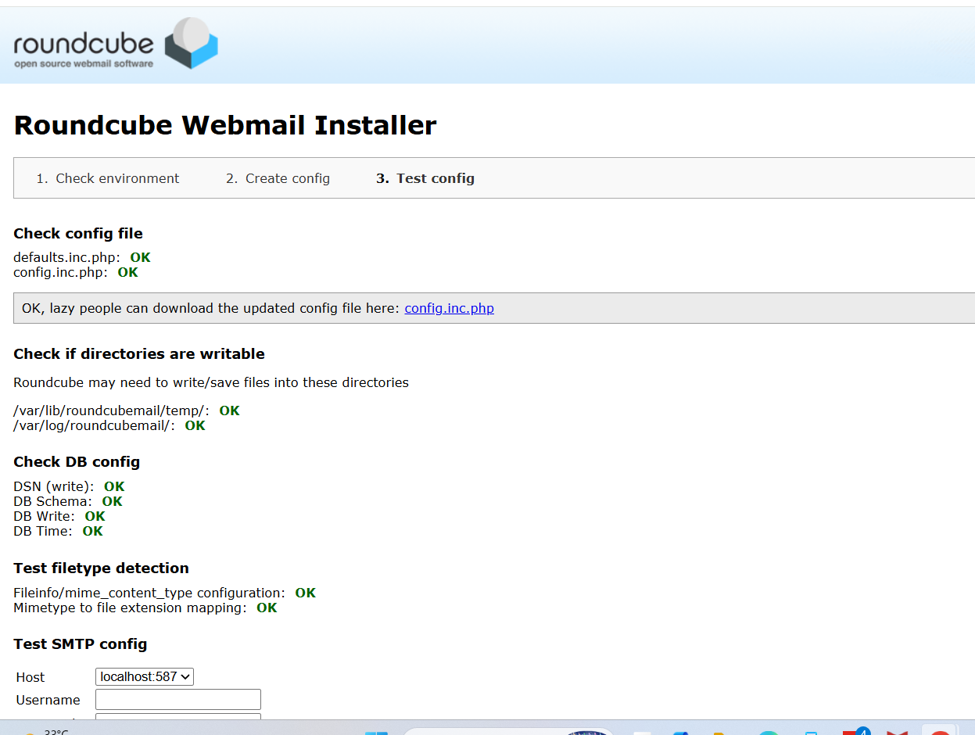
- Reload
sudo setsebool -P httpd_can_network_connect on
Then restart PHP-FPM:
sudo systemctl restart php-fpm
Then log in with the recent details, and you will see the following:
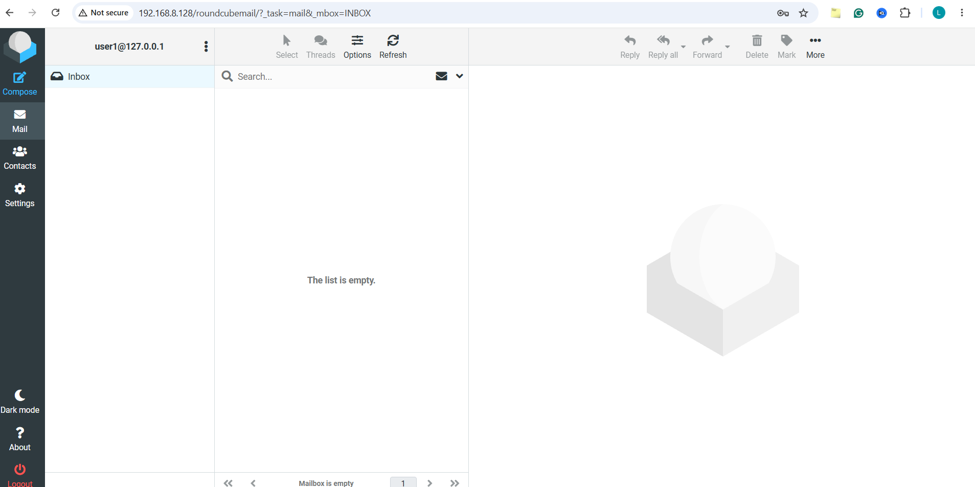
This is how you can download the mail server on AlmaLinux. You may get stuck in the process of installing the mail server; hence, following the right steps is very important.
Conclusion
AlmaLinux OS is a reliable platform to build your own mail server. AlmaLinux OS is a powerful & also a reliable choice for anyone looking to build a secure mail server in 2026. Designed for stability, performance, and long-term server use, AlmaLinux OS provides an excellent foundation for hosting professional mail services. With tools such as Postfix and Dovecot, users can create a dependable mail server for sending, receiving, and managing emails. Its open-source nature also makes AlmaLinuxOS an affordable option for businesses, developers, and system administrators. Whether you are setting up your first email server or managing an advanced hosting environment, AlmaLinux OS offers the flexibility and reliability needed for a smooth server experience.
FAQs
Q. Is downloading the OS important for an email server?
A. If you want to install the email server on AlmaLinux, then installing AlmaLinux is very important.
Q. How can you build the mail server on AlmaLinux?
A. You can build a full-featured email server on AlmaLinux using Postfix as the Mail Transfer Agent combined with Dovecot for IMAP/POP3 services, or you can do that using an automated installer.
Q. What is Postfix for a mail server?
A. Postfix is a free, open-source MTA used to route & also deliver electronic mail between servers using the Simple Mail Transfer Protocol (SMTP).
Q. What is Dovecot for a mail server?
A. Dovecot is an open-source IMAP & POP3 email server software for Linux & UNIX-like systems that lets users securely access, read, & also manage emails stored on a mail server.
Discover more from Root Learning
Subscribe to get the latest posts sent to your email.