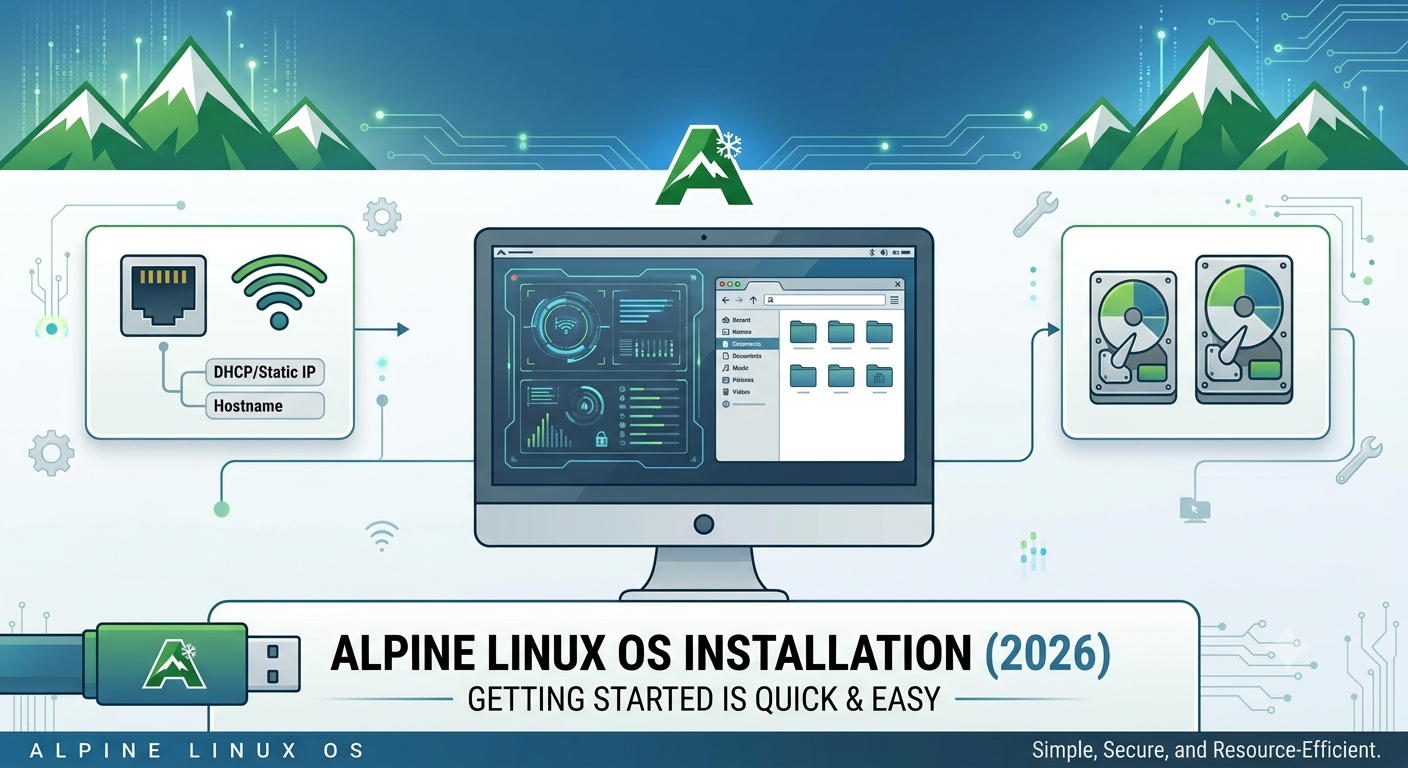
If you’re looking for a Linux distribution that is fast, lightweight, and doesn’t come loaded with software, you can use Alpine Linux.
Alpine Linux has built a strong reputation for keeping things simple. It’s small enough to run comfortably on systems with limited resources, yet flexible enough to power servers, virtual machines, containers, and development environments.
What makes Alpine particularly interesting is its minimalist approach. Instead of giving you a huge collection of applications and services from the beginning, it gives you a clean foundation and lets you decide what belongs on your system.
In this guide, we’ll take a closer look at Alpine Linux, its main features, where it works best, and a few things you should know before getting started.
Table of Contents
What Is Alpine Linux?
Alpine Linux is a lightweight, security-focused Linux distribution built around the Linux kernel. It uses the musl C library and BusyBox to keep its core system small and efficient.
Unlike distributions such as Ubuntu or Linux Mint, Alpine doesn’t try to provide everything out of the box. The default installation is intentionally minimal, so you can add only the applications and services you actually need.
That makes Alpine a good match for situations where storage space, memory usage, performance, or simplicity matters.
Alpine also uses APK (Alpine Package Keeper) for managing software. With it, you can install packages, remove them, and keep your system updated without dealing with a complicated package-management process.
Why Is Alpine Linux Popular in 2026?
Alpine Linux has remained popular because its lightweight design fits particularly well with modern computing environments.
Here are some of the main reasons people choose it.
1. It Uses Very Few Resources
One of Alpine’s biggest advantages is its small footprint.
A minimal Alpine system doesn’t need the same amount of memory or storage as many larger Linux distributions. This can make a noticeable difference when you’re working with:
- Virtual machines
- Containers
- Small cloud servers
- Home servers
- Network devices
- Testing environments
For developers and administrators running several services on one machine, using a lightweight operating system can also leave more resources available for the applications themselves.
2. Security Is an Important Focus
Alpine was designed with security and simplicity in mind.
Its minimal installation means there are fewer unnecessary packages and services running by default. That can reduce the number of components that need to be maintained and monitored.
Of course, installing Alpine doesn’t automatically make a system secure. Regular updates, strong passwords, proper access controls, firewall configuration, and good administration practices are still important.
3. It’s Widely Used With Containers
If you’ve worked with Docker or other container technologies, you’ve probably come across Alpine Linux.
Its small base images are one reason it became popular in the container world. A smaller base can help keep container images compact and make them easier to distribute.
However, there’s an important detail to remember: Alpine uses musl libc, while many Linux applications are built around glibc.
Most applications can be adapted or run successfully, but compatibility should always be tested before moving an application into production.
4. The Package Manager Is Straightforward
Alpine uses APK instead of package managers such as APT or DNF.
APK is designed around Alpine’s lightweight philosophy and provides the tools needed to manage software without adding unnecessary complexity.
Once you’re familiar with the basic Alpine commands, installing and maintaining packages is fairly straightforward.
5. You Control What Gets Installed
Alpine doesn’t try to make decisions for you.
You start with a relatively clean environment and can build it around your own requirements. Whether you’re creating a small web server, a development environment, or a container image, you can install the components you actually need.
For people who like having control over their systems, this can be a major benefit.
Alpine Linux Installation Steps
Below are the Alpine Linux installation steps:
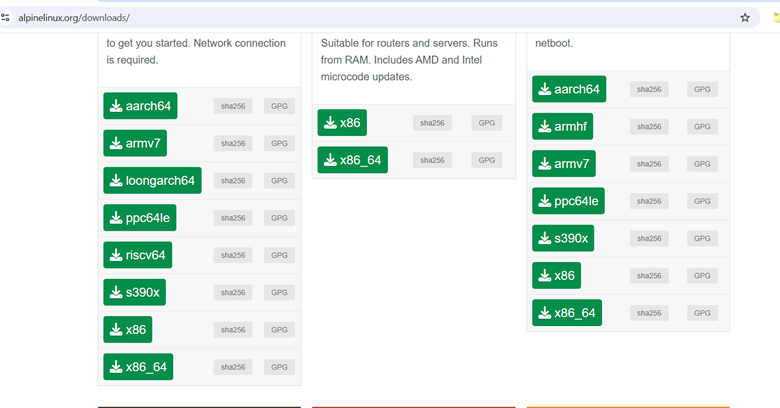
On the Alpine download page, under Standard, click x86_64.to download the Alpine Linux OS file
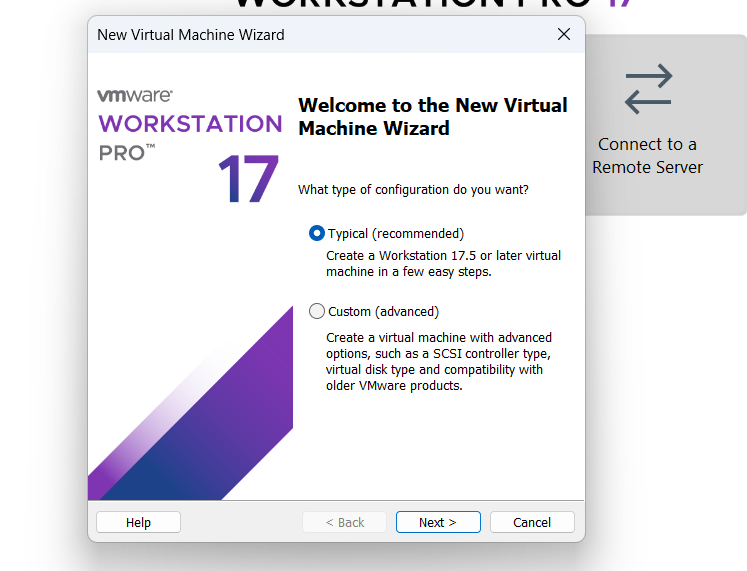
Open VMware Workstation → Create a New Virtual Machine
Typical
Then choose the ISO file
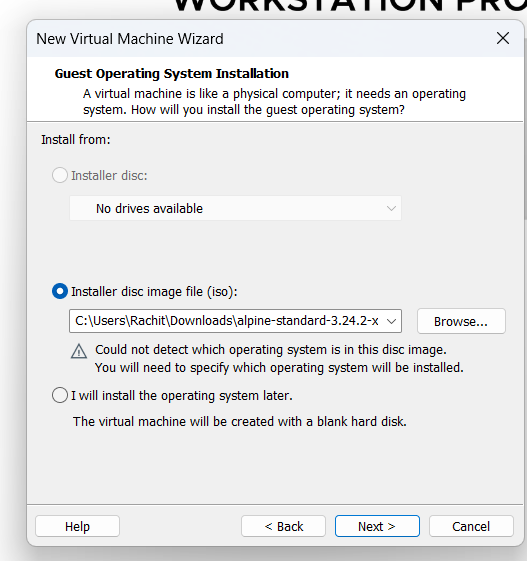
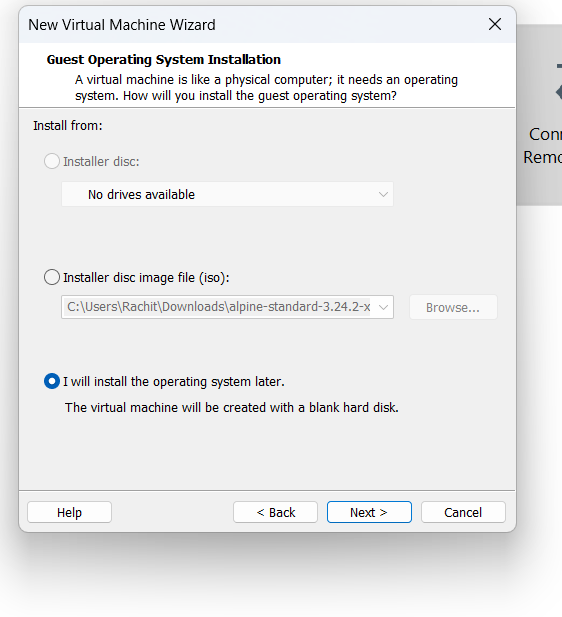
Its ok to receive the notification of could not detect; for that, we will go to I will install the OS later
For Guest Operating System, select:
- Linux
For Version, select:
Other Linux 6.x kernel 64-bit
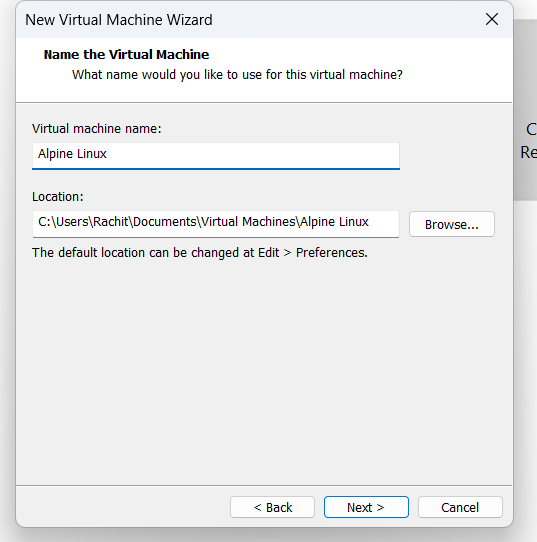
Name the virtual Machine as Alpine Linux
Maximum disk size: 8 GB
Select Store virtual disk as a single file
Click Next
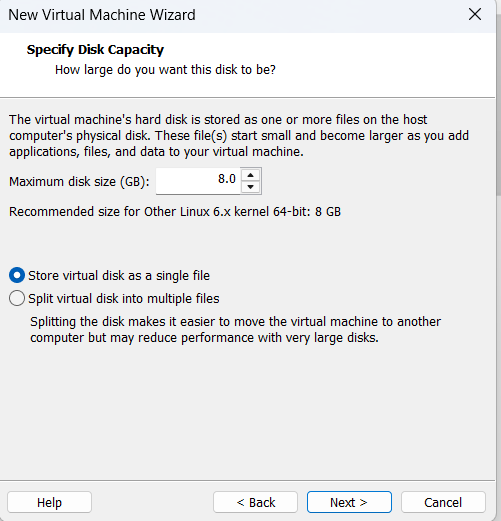
Click Customize Hardware…
Select Memory
- Set it to 1 GB (1024 MB) or 2 GB (2048 MB).
- Choose 2 GB if your computer has enough RAM.
For your setup, I’d recommend:
- Processors: 1
- Cores per processor: 2
- RAM: 2 GB
- Disk: 8 GB
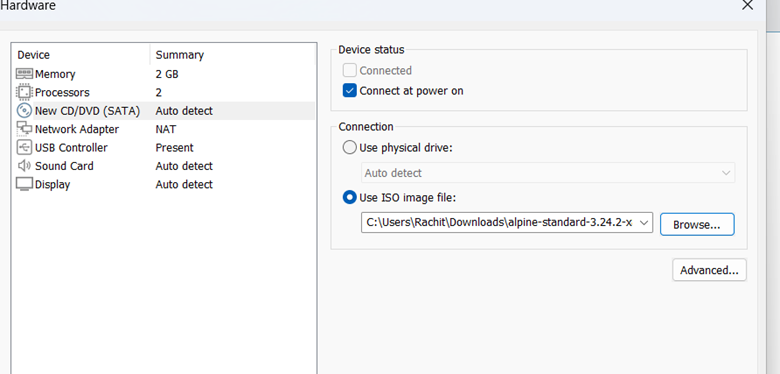
Confirm CD/DVD is using your downloaded Alpine ISO.
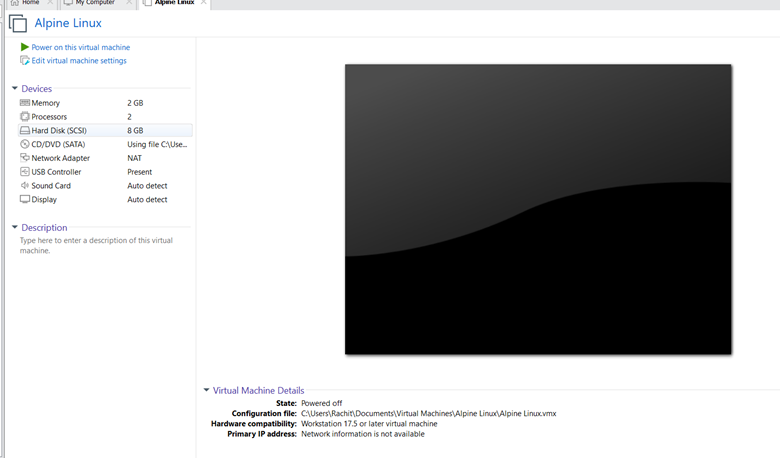
Click Close.
Click Finish.
Then Power On this virtual Machine
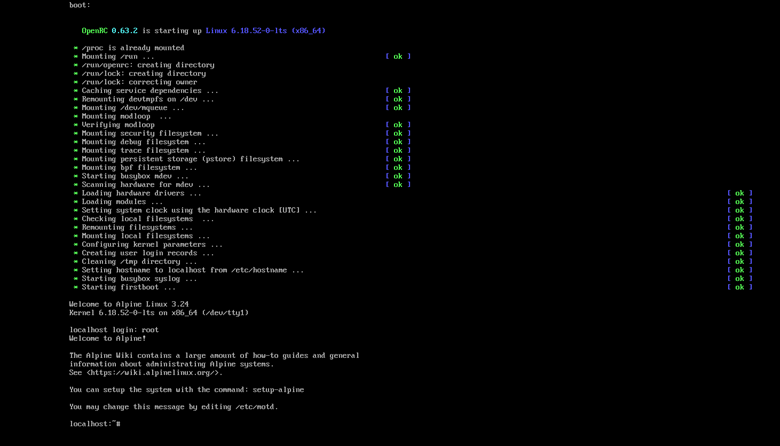
To start setting up Alpine Linux on your virtual disk, type the following command at the prompt and press Enter:
setup-alpine
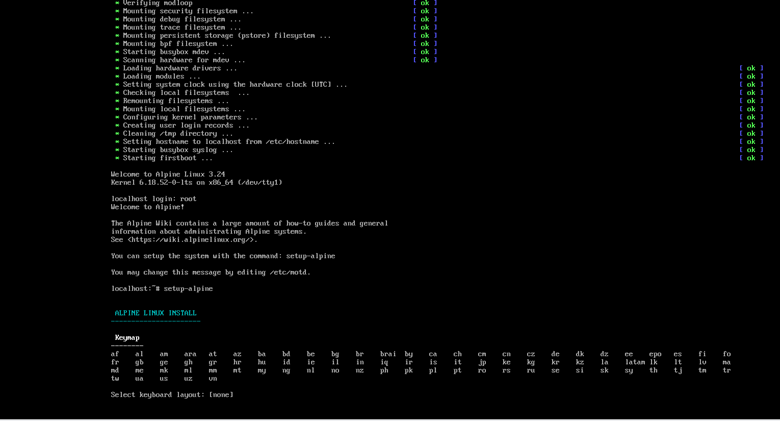
Type us (or your preferred layout code like uk, in, etc.) and press Enter.
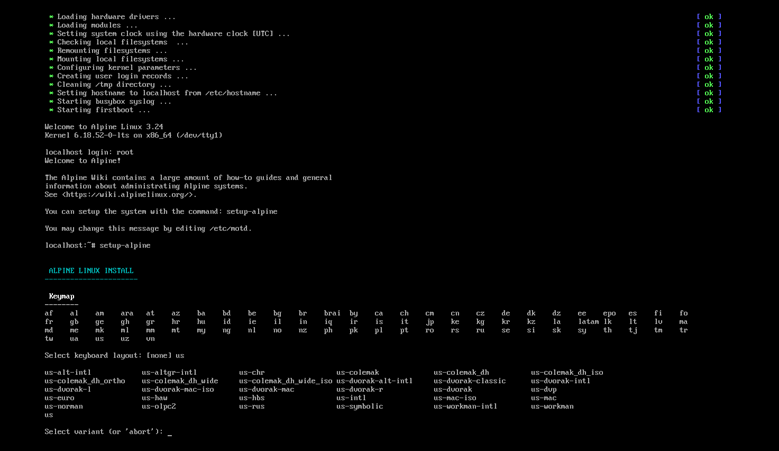
Type the letters us and hit Enter again.
Type host name as Alpine or anything else
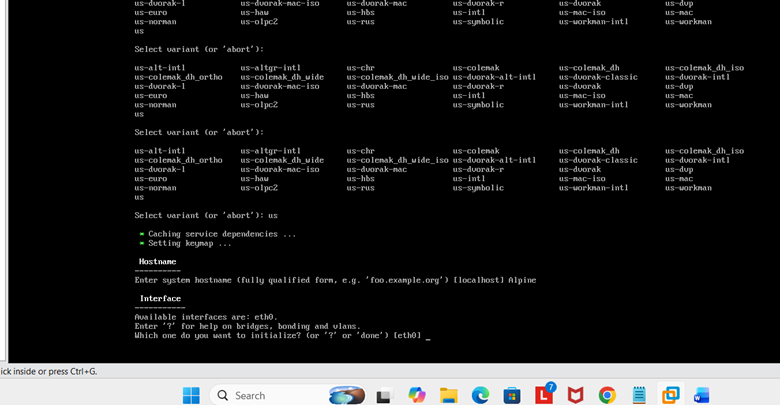
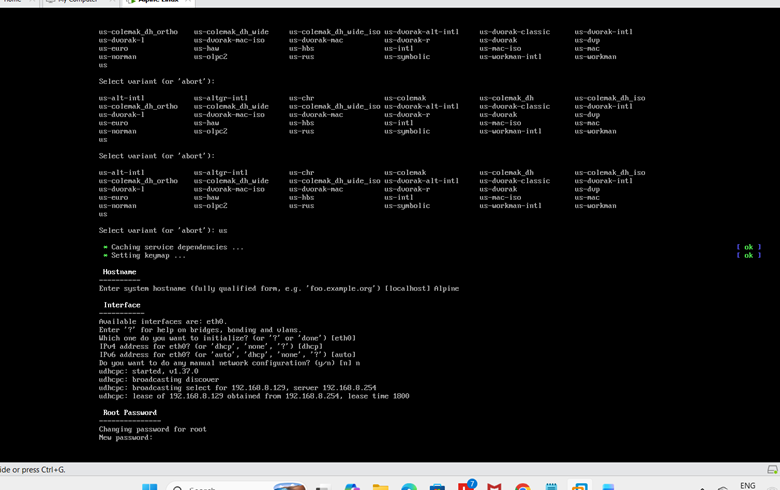
At the localhost login: prompt, type root and press Enter.
- Note: No password is required for the live ISO login.
Press Enter to skip creating a user for now (it will default to no).
Then following questions will arise
- Which SSH server?
Press Enter (defaults to openssh).
- Which disk(s) would you like to use?
Type sda and press Enter.
- How would you like to use it?
Type sys and press Enter (this installs Alpine directly to the VMware virtual hard disk).
- WARNING: Erase the above disk(s)?
Type y and press Enter.
How would you like to use it?
Type sys and press Enter (this installs Alpine directly to the virtual hard drive).
WARNING: Erase the above disk(s)?
Type y and press Enter.
Selecting sys installs Alpine Linux directly onto the VMware virtual disk (a traditional disk installation), which ensures your changes, files, and configurations persist after rebooting.
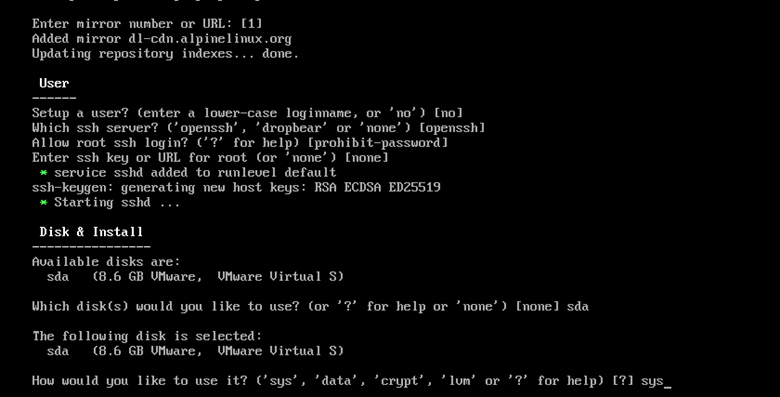
After pressing Enter, you will see a warning message asking:
- WARNING: Erase the above disk(s) and continue? [N/y]
Type reboot and press Enter to restart the system.
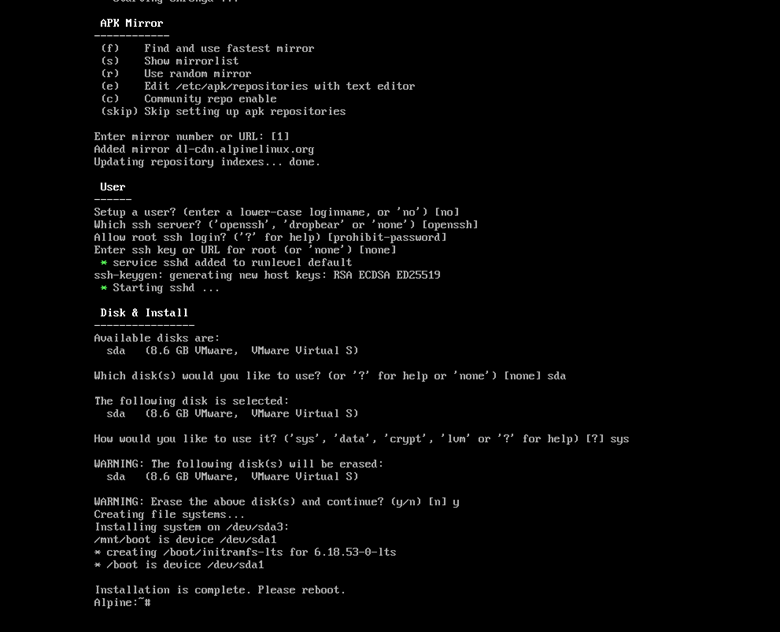
Congratulations! Your installation is complete, and Alpine Linux is now running directly from your virtual disk.
To log in:
- localhost login: Type root and press Enter.
- Password: Type the root password you created during the setup-alpine process and press Enter (note: no characters will show as you type).
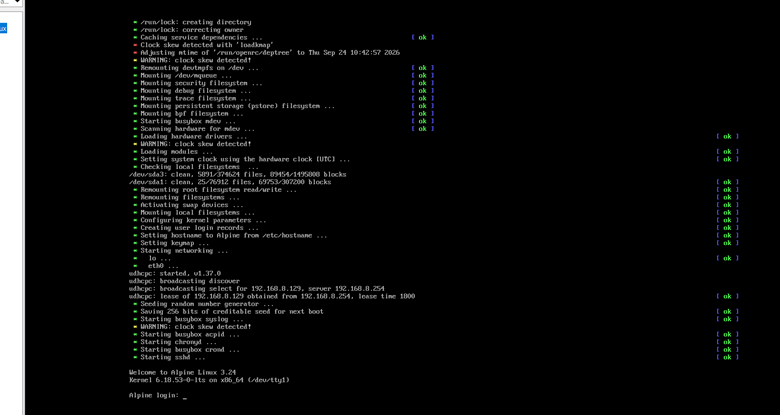
Here is how to set up a lightweight Desktop Environment (XFCE) on your fresh installation:
Enable the Alpine Community repository (required for desktop packages):
setup-apkrepos
Select option f for the fastest mirror,
Then type
setup-desktop
Select Desktop Environment:
When prompted, type xfce and press Enter.
setup-user
Enter the username: Type a simple name (e.g., alpineuser or user) and press Enter.
Set the password: Enter a password for this new account when prompted (characters will not show as you type) and confirm it.
Install VMware display drivers & integration tools:
apk add open-vm-tools open-vm-tools-gtk xf86-video-vmware
You may be met with a black and blank screen. Let’s fix this.
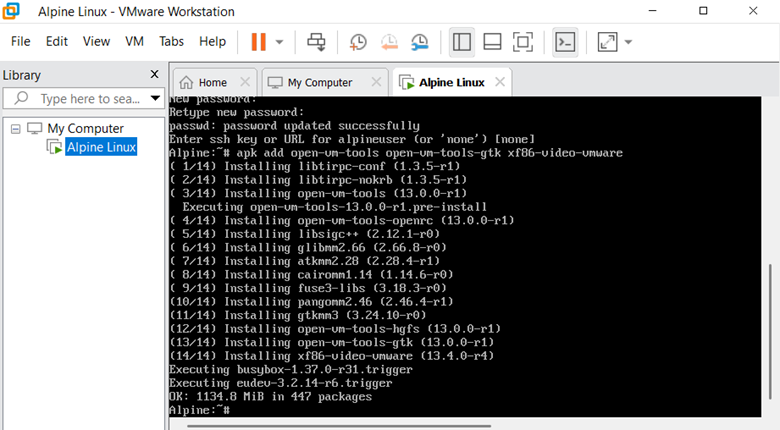
Log in:
- Type root and press Enter.
- Type your root password and press Enter.
Disable LightDM so it stops auto-crashing into a black screen. Type the following commands:
rc-update del lightdm default
Install the required D-Bus and video drivers:
apk add dbus xf86-video-modesetting xf86-video-vmware xf86-input-libinput
Start the D-Bus service:
rc-update add dbus default
rc-service dbus start
Launch XFCE directly to test:
startxfce4
This will bypass LightDM and boot your XFCE desktop directly in the window!
The desktop will look like the below:
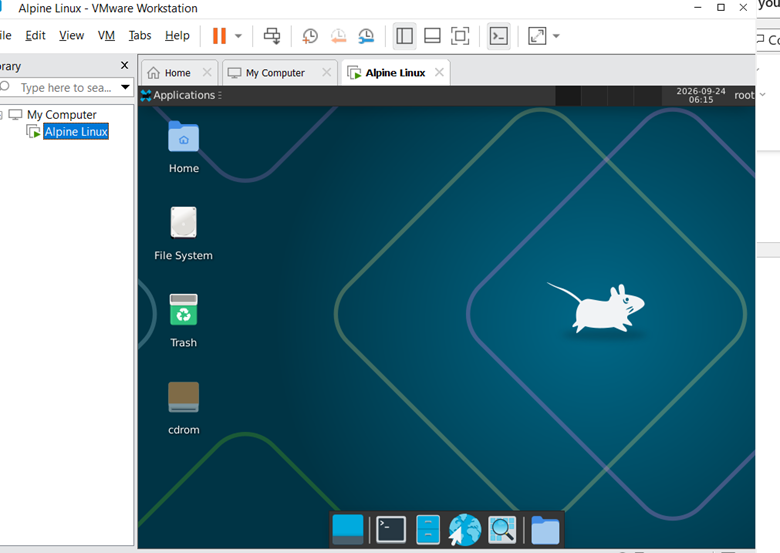
This is how installation can be completed.
FAQs
Below are the Alpine Linux FAQs:
Q. Is Alpine Linux free?
A. Yes. Alpine Linux is free and open-source, so you can download, install, and use it without purchasing an operating-system license.
Q. Is Alpine Linux suitable for beginners?
A. Yes, although it may take some time to get used to. Its minimal design means you’ll encounter fewer preconfigured tools and services than you would with beginner-focused distributions.
Q. Does Alpine Linux use systemd?
A. No. Alpine Linux uses OpenRC as its default init and service-management system.
Q. What package manager does Alpine Linux use?
A. Alpine uses APK, short for Alpine Package Keeper. It is used to install, remove, upgrade, and manage software packages.
Q. Is Alpine Linux good for servers?
A. Yes. Its small footprint and flexible configuration make it suitable for many server workloads.
Q. Can Alpine Linux be used as a desktop OS?
A. Yes. You can install a graphical desktop environment and other desktop applications. However, it generally requires more manual configuration than distributions designed specifically for desktop users.
Q. Why is Alpine Linux commonly used in containers?
A. Its minimal userspace can help keep container images small. However, application compatibility should be checked because Alpine uses musl libc rather than glibc.
Q. Does Alpine Linux use glibc?
A. Alpine’s standard environment uses musl libc. This is one of the main technical differences to consider when moving software from a glibc-based distribution.
Q. Can Alpine Linux run inside a virtual machine?
A. Yes. Alpine works well in many virtualized environments and is often chosen when users want lightweight virtual machines.
Q. Is Alpine Linux suitable for production?
A. It can be, depending on the application and environment. Before using it in production, test your software, understand its compatibility requirements, establish an update process, and make sure your team is comfortable managing Alpine.
Discover more from Root Learning
Subscribe to get the latest posts sent to your email.