Every system runs low on storage sooner or later. You install new software, save project files, or download large datasets, and the main disk fills up. Adding a second disk is the easiest fix. But a brand-new disk is empty, so you must first partition it, format it, and mount it before Edubuntu can store any files on it.
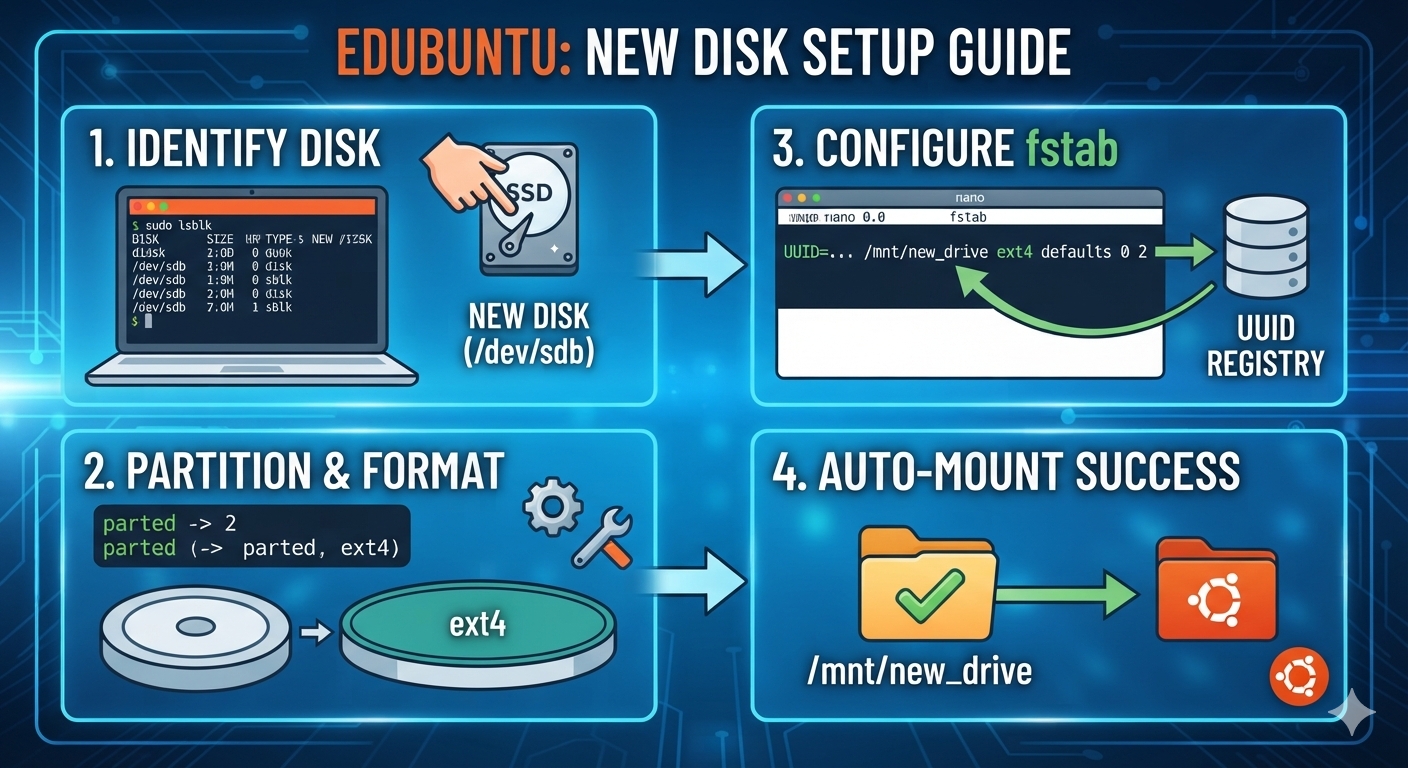
In this guide, you will learn how to add a new virtual disk in VMware Workstation, find it in Edubuntu, create a partition, format the disk with the ext4 file system, mount it, and use /etc/fstab so it mounts automatically at every boot. We tested every step on Edubuntu 26.04.1 LTS running inside VMware Workstation. Because Edubuntu is an official Ubuntu flavour, the same commands also work on Ubuntu and other Ubuntu-based systems.
Table of Contents
What You Will Need
Before you start, make sure you have:
VMware Workstation installed on your Windows computer
• An Edubuntu virtual machine that is already installed and working
• Free space on your Windows drive (for example, 20 GB for a 20 GB virtual disk)
• Your Edubuntu username and password, because the commands use sudo
• About 15 to 20 minutes
A quick note on the order: Finish installing Edubuntu first, then add the extra disk. You do not need to start over or reinstall anything. Adding a disk to an existing virtual machine takes only a few clicks.
What Does It Mean to Partition and Format a Disk?
These two words confuse many beginners, so here is a simple explanation.
• Partitioning divides a disk into sections. Even if you use the whole disk as one section, you still need a partition table that tells the system where that section starts and ends.
• Formatting prepares a partition to store files. When you format a partition, the system creates a file system on it. This is like drawing the shelves inside an empty cupboard. Without it, nothing can be saved.
• Mounting attaches the formatted partition to a folder, so you can open it and save files there.
In Linux, a drive does not get a letter like D: in Windows. It is attached to a folder, and this folder is called the mount point.
Important: Formatting erases everything on a partition. This is safe on a new empty disk, but you must never format a disk that has data you need. That is why Step 4 of this guide shows you how to confirm the right disk first.
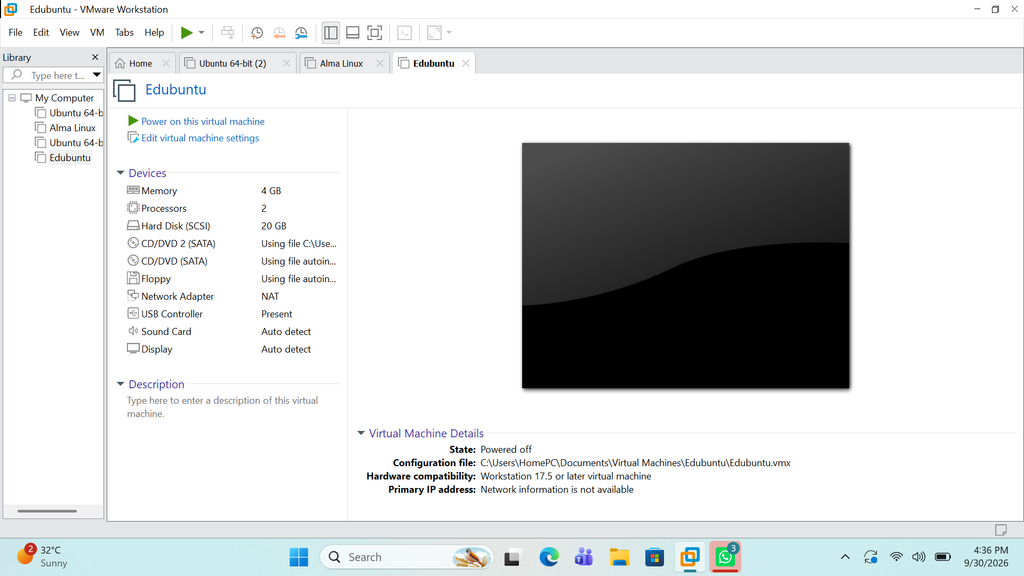
Step 1: Turn Off the Machine
VMware lets you add a hard disk only when the virtual machine is fully powered off.
Inside Edubuntu, click the power icon at the top right and choose Power Off. Do not use Suspend, because a suspended machine is not fully off. Wait until VMware shows State: Powered off on the virtual machine’s home tab.
Step 2: Add a Nee Hard Disk in VMware Workstation
Now create the new virtual disk.
1. Click Edit virtual machine settings.
2. In the Hardware tab, click Add at the bottom left.
3. Select Hard Disk and click Next.
4. Keep the recommended type, SCSI, and click Next.
5. Choose Create a new virtual disk and click Next.
6. Enter the size. In this guide we used 20 GB.
7. Select Store virtual disk as a single file and click Next.
8. Click Next on the file name screen, then click Finish.
9. Click OK to save the settings.
Step 3: Power On and Open the Terminal
Click Power on this virtual machine and log in to Edubuntu. Press Ctrl + Alt + T to open the Terminal. If nothing opens, search for “Terminal” in the Applications menu.
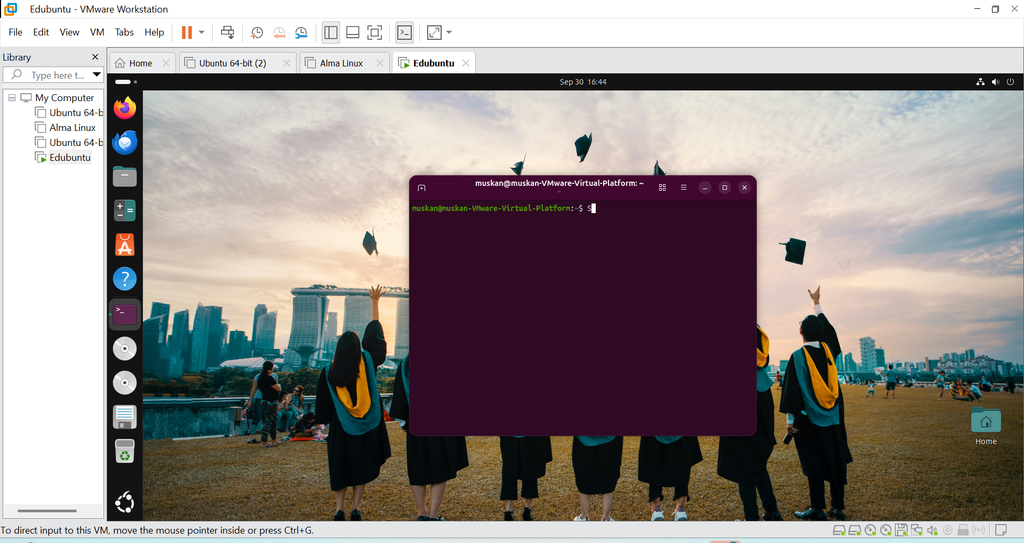
Typing tip: The $ sign in the terminal is part of the prompt. Do not type it. Click inside the terminal and type the command right after the prompt. A small mistake, such as an extra letter at the start, gives a “command not found” error. For example, slsblk fails, but lsblk works.
Step 4: Find the New Disk with lsblk
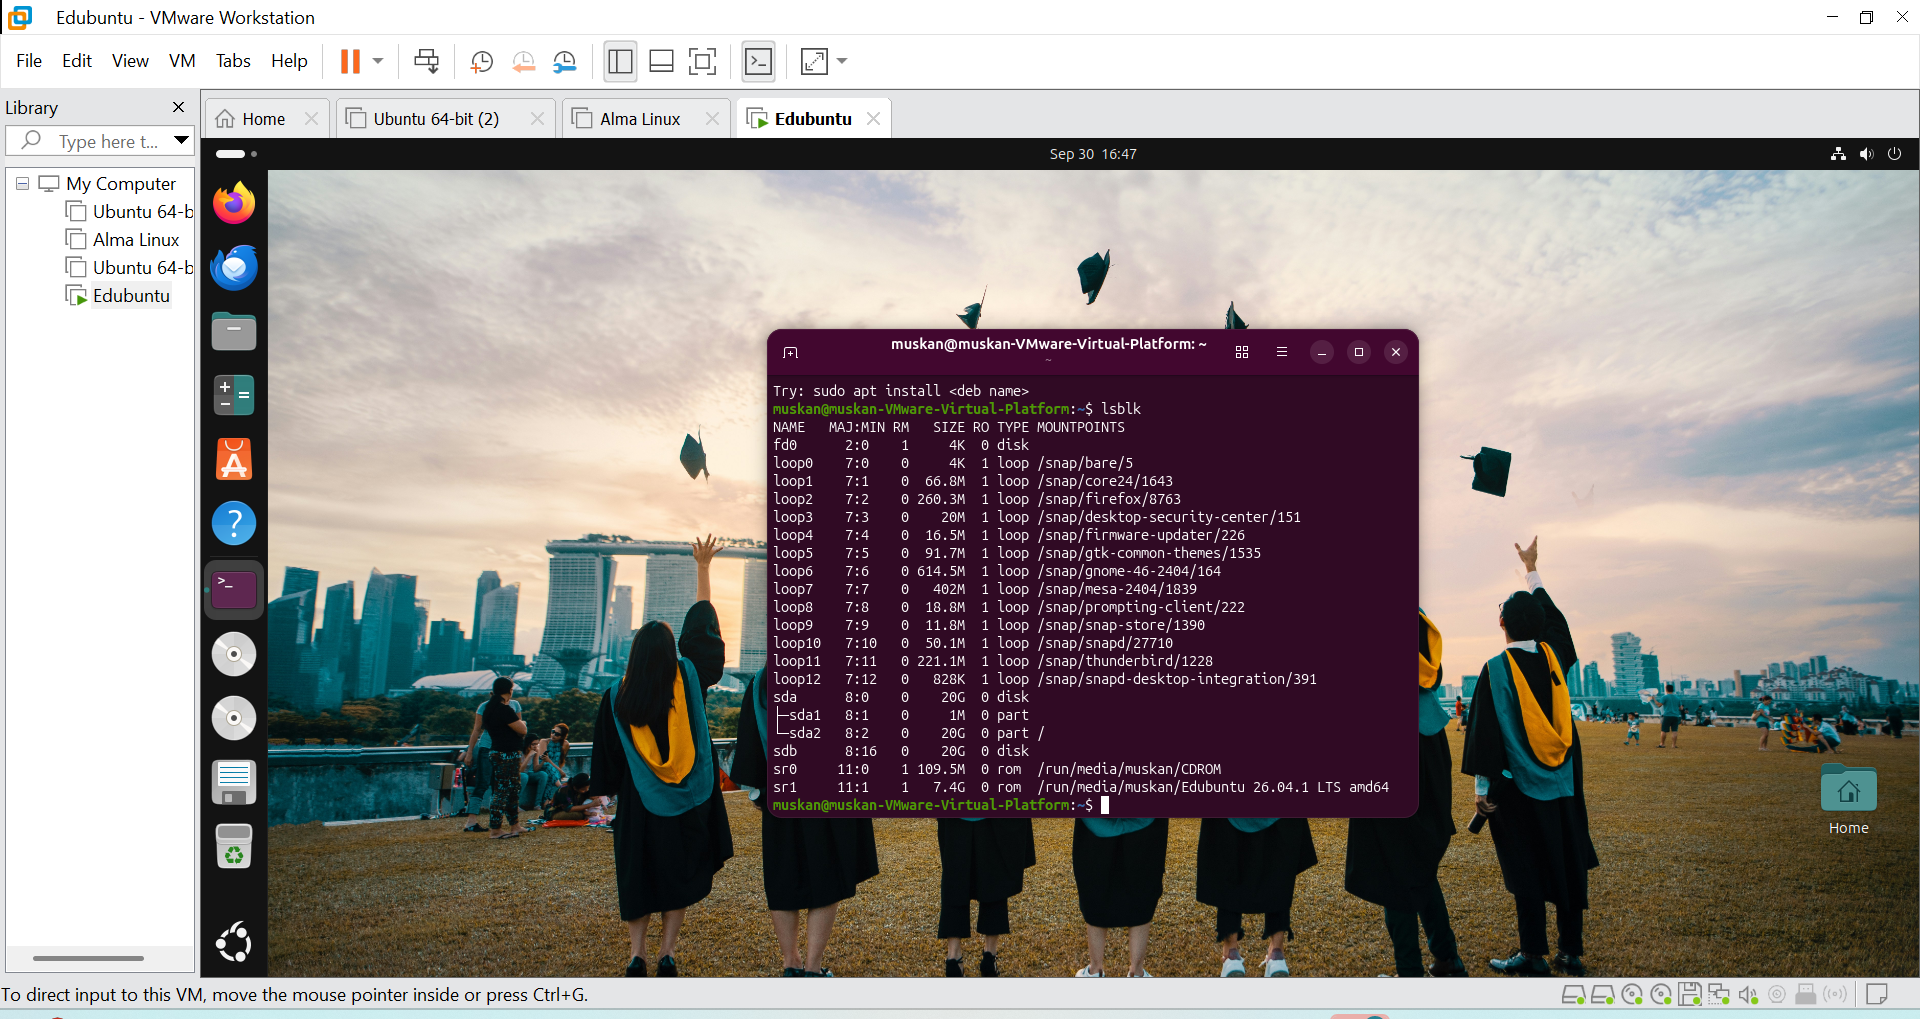
The lsblk command lists all storage devices. Type:
lsblkThe list is long. Lines starting with loop belong to snap packages, so you can ignore them. Look for lines with the type disk.
In our setup:
• sda was 20 GB with two partitions (sda1 and sda2), and sda2 was mounted on /. This is the main system disk.
• sdb was 20 GB with no partitions and no mount point. This is the new disk.
To hide the clutter, you can use this shorter command:
lsblk -d -o NAME,SIZE,TYPE | grep diskWarning: The name can be different on your system, such as sdc or nvme1n1. Always check the size and confirm that the disk has no partitions before you continue. If you format the wrong disk, its data is lost permanently.
Step 5: Create a Partition
Now create a table for GPT and entire disk using partition
sudo parted /dev/sdb --script mklabel gpt mkpart primary 0% 100%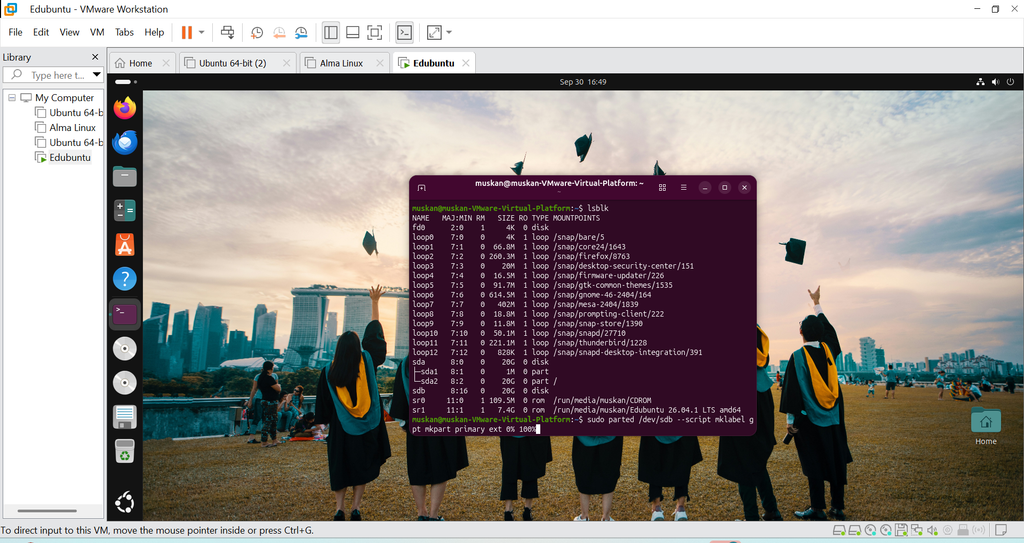
The terminal asks for your password. Nothing appears while you type, not even dots. This is normal. Type it carefully and press Enter. If no error appears, the partition was created, and it is named /dev/sdb1.
Step 6: Format the Partition as ext4
Now format the new partition. We will use ext4, the default and most reliable file system for Ubuntu and Edubuntu.
sudo mkfs.ext4 /dev/sdb1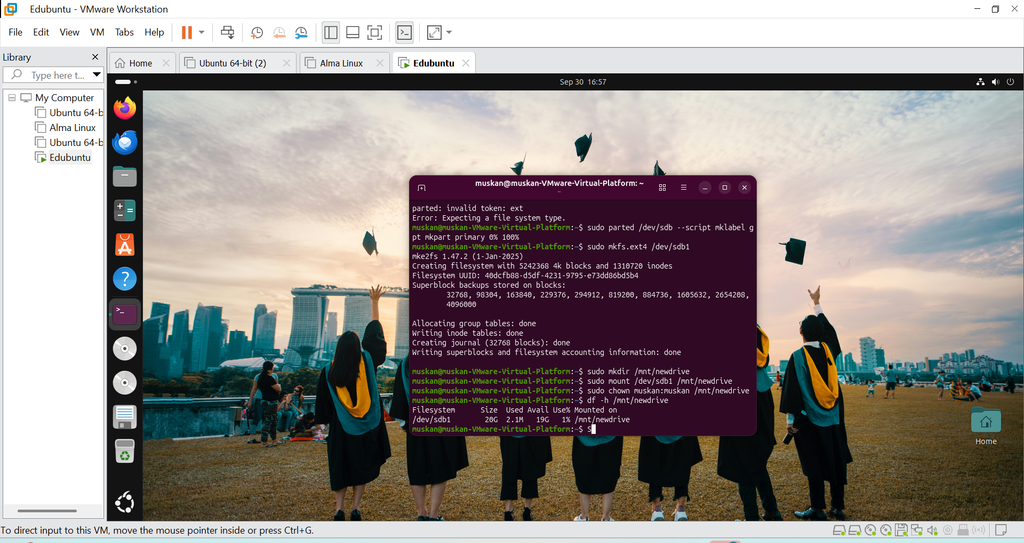
The output shows lines like “Allocating group tables: done,” “Writing inode tables: done,” and “Creating journal: done.” When the last line, “Writing superblocks and filesystem accounting information: done,” appears, the format is finished.
Check before pressing Enter: The command is mkfs.ext4 with the number 4, and the target is the partition you just created, /dev/sdb1. If you format the wrong target, the data on it is gone.
Step 7: Create a Mount Point and Mount the Disk
Create the folder that will act as the mount point:
sudo mkdir /mnt/newdriveMount the partition to it:
sudo mount /dev/sdb1 /mnt/newdriveBy default, only the root user can write to a newly formatted disk. To let your own user save files there, run:
sudo chown yourusername:yourusername /mnt/newdrive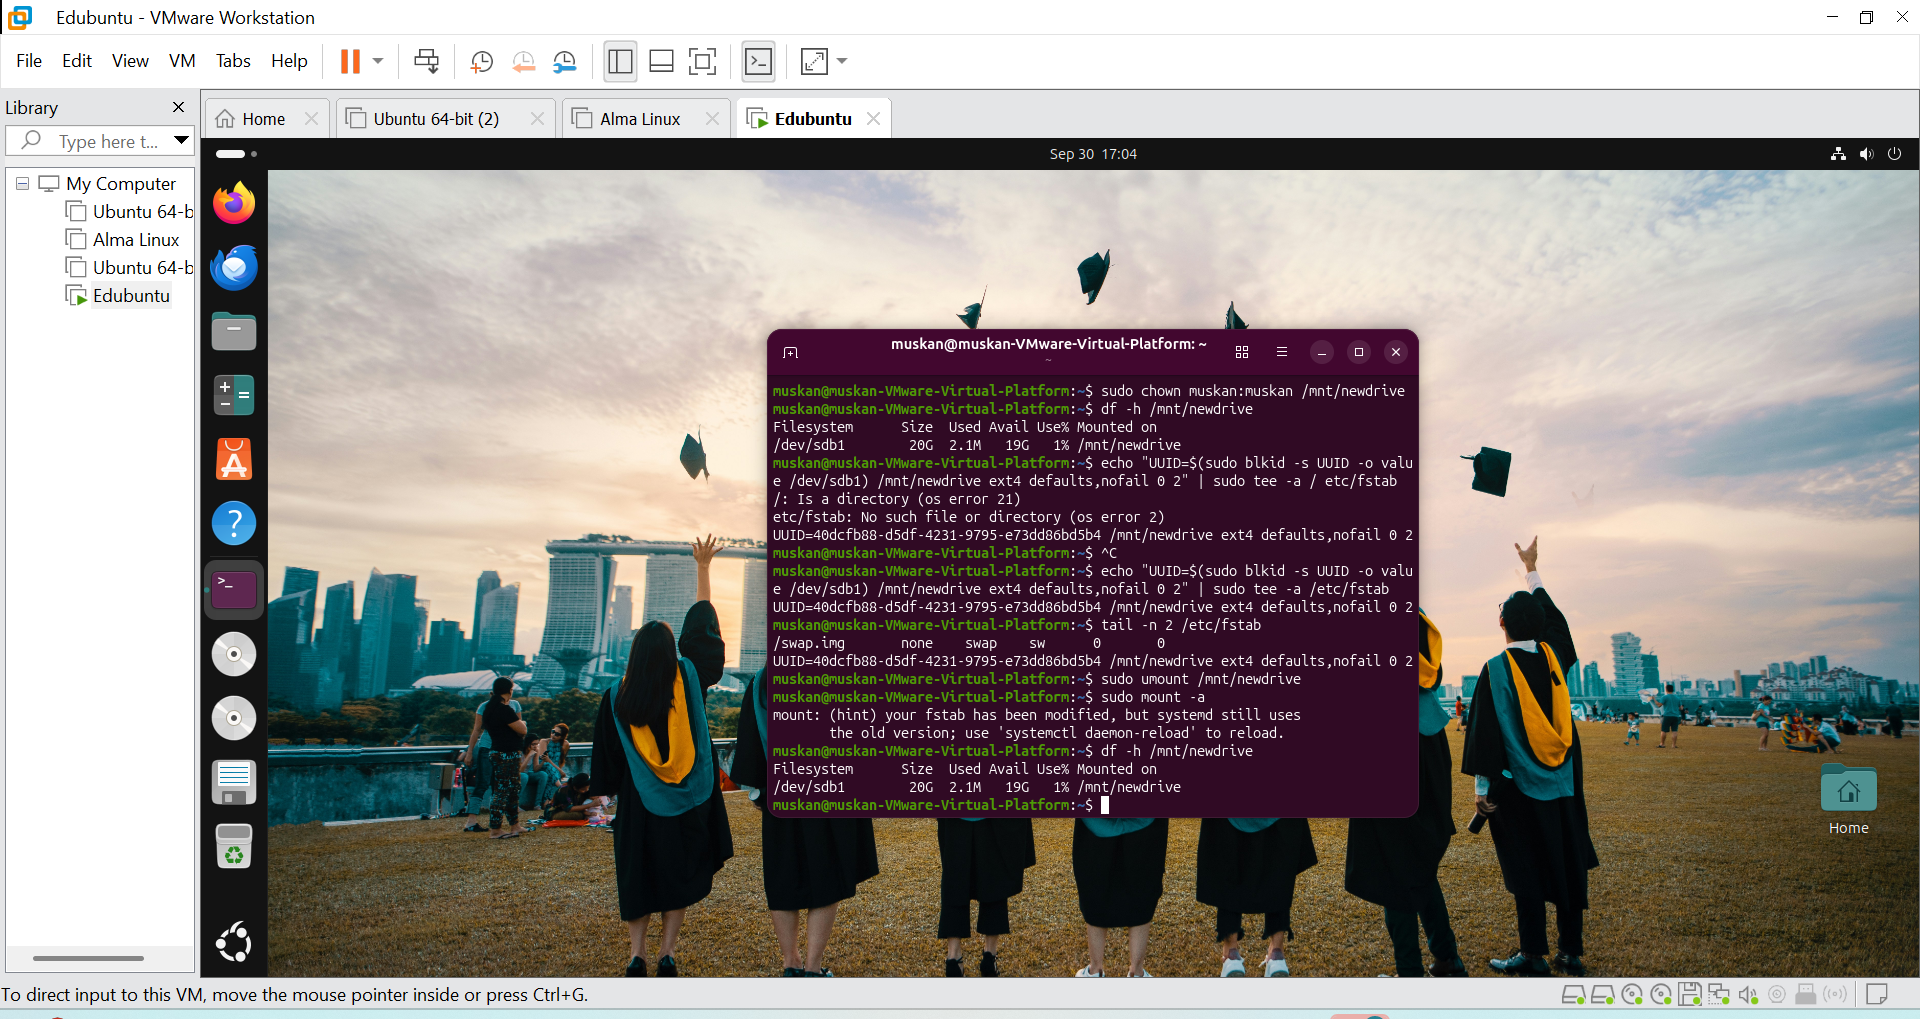
Replace yourusername with your real username. For example, if your username is muskan, the command is sudo chown muskan:muskan /mnt/newdrive.
df -h /mnt/newdriveYou should see /dev/sdb1 with about 20G total size, around 19G available, and /mnt/newdrive under “Mounted on.” The disk is now working.
Step 8: Auto-Mount the Disk with fstab
The mount you just made lasts only until the next restart. After a reboot, the disk still exists, but it is not attached to the folder. To fix this, you add an entry to the /etc/fstab file. This file tells Edubuntu which disks to mount at boot.
We use the disk’s UUID, which is a unique ID, instead of /dev/sdb1. Names like sdb can change when you add or remove disks, but the UUID never changes.
Run this single command exactly as written. It finds the UUID for you and adds the line to fstab:
echo "UUID=$(sudo blkid -s UUID -o value /dev/sdb1) /mnt/newdrive ext4 defaults,nofail 0 2" | sudo tee -a /etc/fstab• UUID=… identifies the partition.
• /mnt/newdrive is the mount point.
• ext4 is the file system type you used when you formatted the disk.
• defaults,nofail are the mount options. The nofail option is important. If the disk is ever missing, Edubuntu still boots normally instead of stopping with an error.
• 0 2 tells the system to skip dump backups and to check this disk after the root file system.
Be careful with this command. The path at the end must be /etc/fstab with no space between / and etc. In our test, one extra space caused the errors “Is a directory” and “No such file or directory.” Also, run the command only once. Running it twice adds a duplicate line.
Check that the line was added:
tail -n 2 /etc/fstabThe last line should start with UUID= and contain /mnt/newdrive ext4 defaults,nofail 0 2.
Step 9: Test fstab Without Restarting
A mistake in fstab can cause boot problems, so test it first. These commands unmount the disk and then mount everything listed in fstab:
sudo umount /mnt/newdrive
sudo mount -a
df -h /mnt/newdrive
If df shows /dev/sdb1 mounted on /mnt/newdrive again, your fstab entry is correct.
You may see this message after mount -a:
“your fstab has been modified, but systemd still uses the old version; use ‘systemctl daemon-reload’ to reload.”
Step 10: Final Check After a Restart
The final proof is a restart.
1. Restart your Edubuntu virtual machine.
2. Log in and open the Terminal.
3. Run df -h /mnt/newdrive.
If the output shows /dev/sdb1 with 20G and /mnt/newdrive, the disk mounted by itself at boot. Your setup is complete.
How to Use the New Disk
Save or copy files into /mnt/newdrive. You can also open it in the Files app. Press Ctrl + L and type /mnt/newdrive, or use Other Locations in the sidebar.
Common Problems and Fixes
“Command not found.” Check that you did not type the $ sign and that there is no extra letter at the start.
“Authentication failed, try again.” The sudo password was wrong. Use the same password you use to log in to Edubuntu. Check that Caps Lock is off, and type slowly. Nothing shows on screen while you type.
“parted: invalid token” error. A part of the command was mistyped. Retype it carefully, or copy it exactly as shown in Step 5.
The new disk does not appear in lsblk. Make sure you clicked OK in the VMware settings after adding the disk. If it is still missing, power off the virtual machine and check that the new hard disk is listed in the settings.
The disk is not mounted after restart. Open fstab with sudo nano /etc/fstab and check the new line for typos. Then run sudo mount -a to see any error message.
Permission denied when saving files. Run the chown command from Step 7 again with your own username.
Quick Summary of All Commands
lsblk
sudo parted /dev/sdb --script mklabel gpt mkpart primary 0% 100%
sudo mkfs.ext4 /dev/sdb1
sudo mkdir /mnt/newdrive
sudo mount /dev/sdb1 /mnt/newdrive
sudo chown yourusername:yourusername /mnt/newdrive
df -h /mnt/newdrive
echo "UUID=$(sudo blkid -s UUID -o value /dev/sdb1) /mnt/newdrive ext4 defaults,nofail 0 2" | sudo tee -a /etc/fstab
sudo umount /mnt/newdrive
sudo mount -a
df -h /mnt/newdrive
Conclusion
Adding storage to Edubuntu takes a few clear steps: add the disk in VMware, find it with lsblk, partition it, format it as ext4, mount it, and add it to fstab so it mounts at every boot. The most important habits are to confirm the disk name before you format anything and to test your fstab entry before you restart.
Once you have done it one time, the same process works for any extra disk, whether it is a virtual disk in VMware or a physical drive in a real computer. Keep the command list handy, and you can set up new storage in just a few minutes.
Discover more from Root Learning
Subscribe to get the latest posts sent to your email.