Today, We are finally moving to Ubuntu from CentOS tutorial and now we have portfolio that includes CentOS, RHEL, AWS and Ubuntu.
We will start fresh with the basics, So let’s learn about how to install Ubuntu in our VMware Workstation.
We will start with searching the ISO file to install Ubuntu, We will search “Ubuntu iso download” on Google.
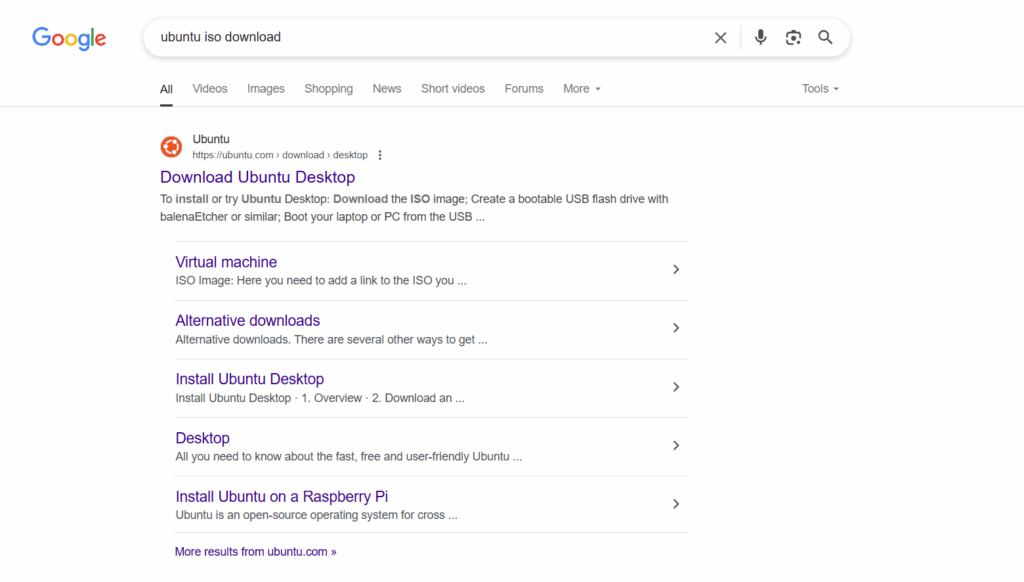
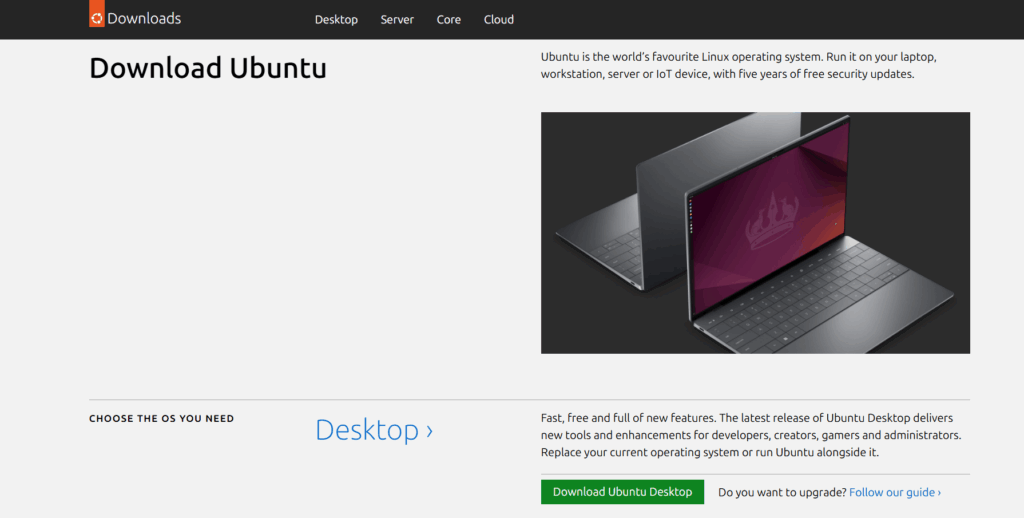
We can go from first link as well as from second link. We just have to reach “Download Ubuntu” page and in front of Desktop we will find the “Download Ubuntu Desktop” button to download Ubuntu.
Next, We will get the page of Ubuntu 24.04.2 LTS that is the latest stable version of Ubuntu till now. We have to click on ‘Download‘ button.
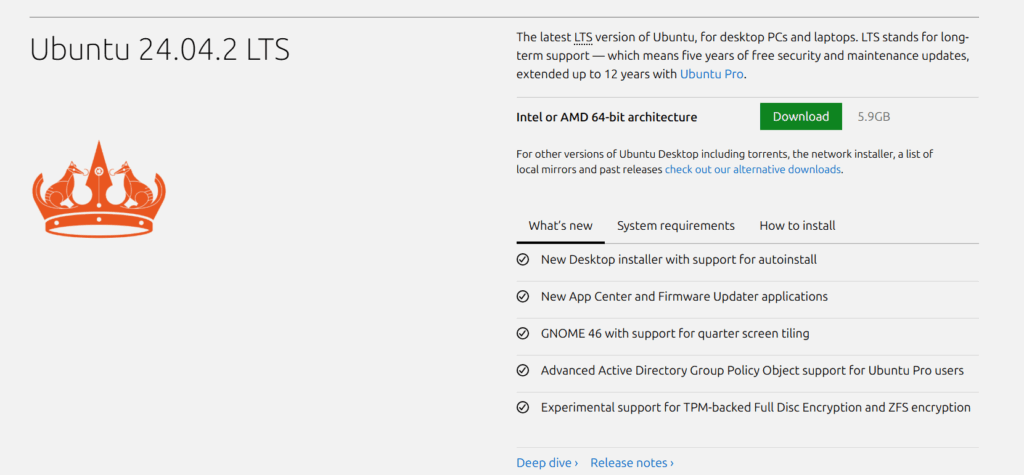
Our Ubuntu OS will start downloading and we have to wait for the completion of it downloading.
Now we will open VMware Workstation and start configuring our Ubuntu machine to install Ubuntu but if you don’t know about VMware Workstation then click on the link.
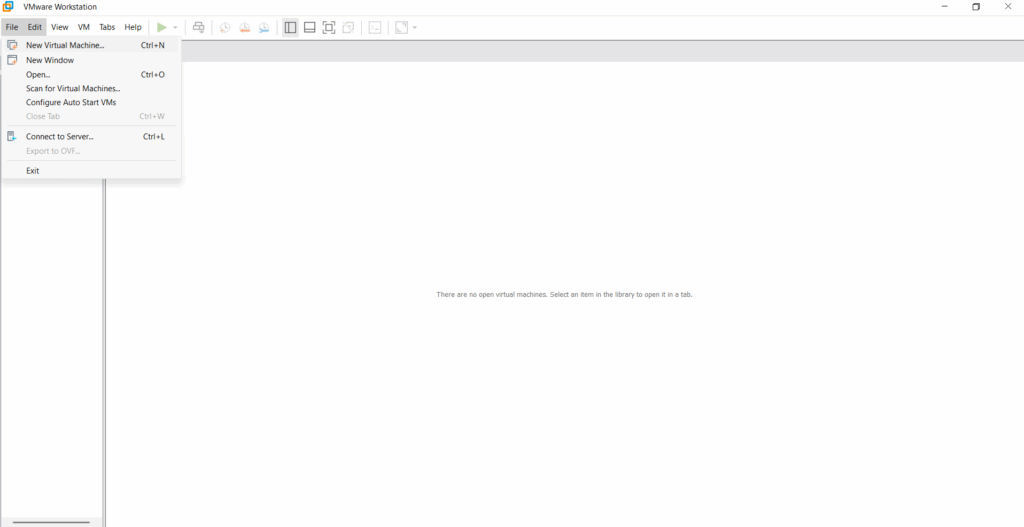
We will select “New Virtual Machine” from file in menu bar.
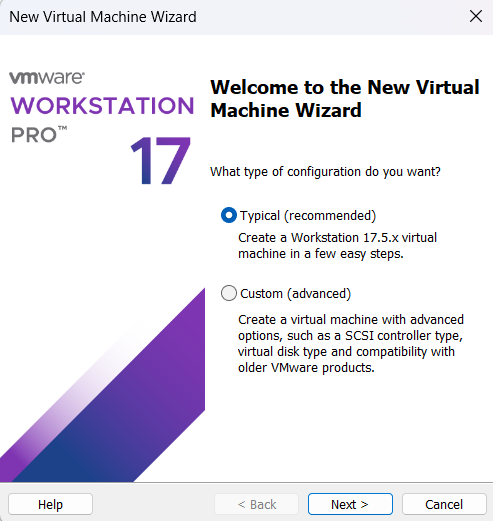
We will go with the default option “Typical” as we don’t want to go for advance options. Click on Next.
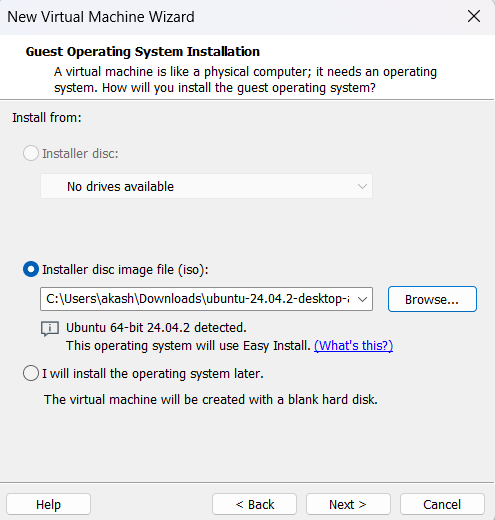
Now we will select the Ubuntu ISO 24.04.2 that we have downloaded earlier by clicking on Browse button. After selecting the ISO file we can click on Next button.
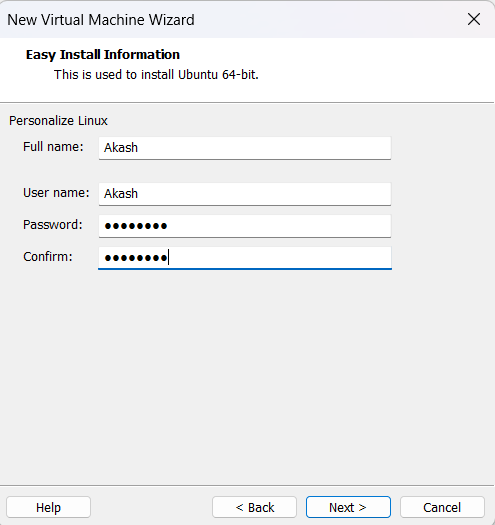
Next we have to write the Full name, User name and Password of your choice and click on Next.
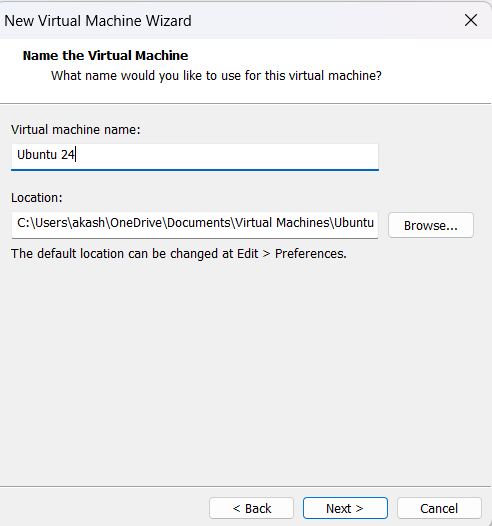
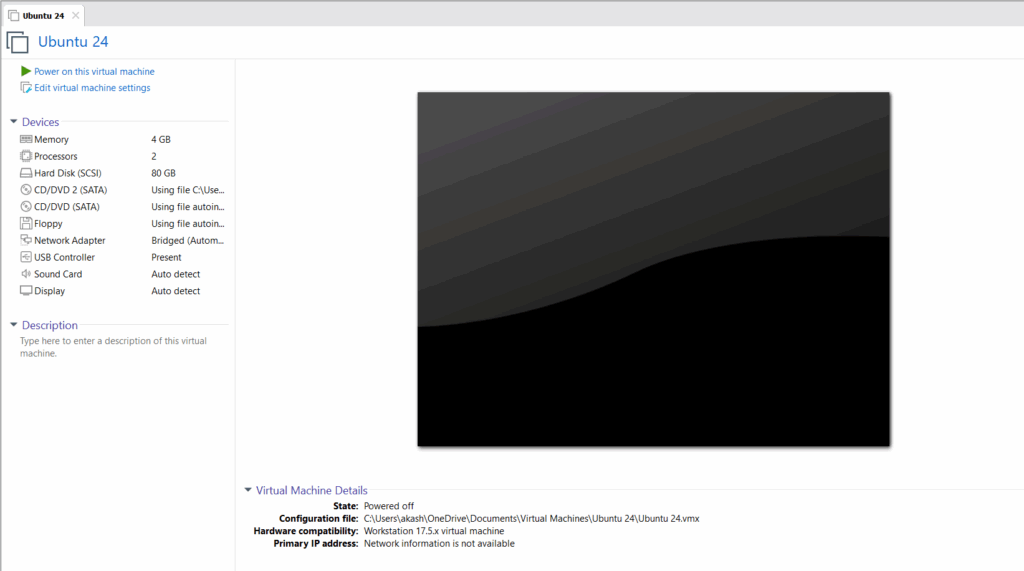
We have to give name and location to our virtual machine, Click on Next button after giving name and location by clicking on Browse button.
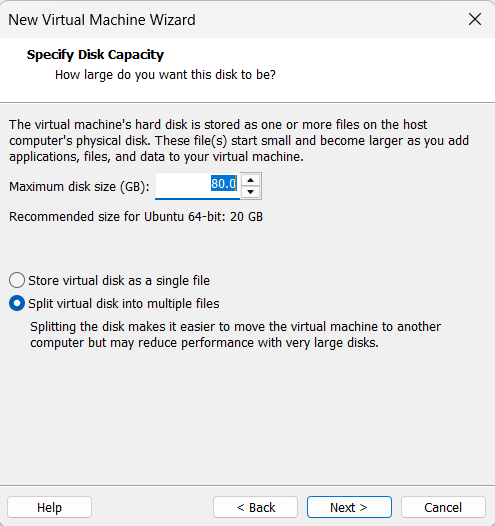
Now we have to give the hard disk size in (GB) to your virtual machine and also keep selecting the default option for hard disk that is “Split virtual disk into multiple files”.
Recommend disk size is 80GB but it is all about your choice to increase or decrease your hard disk size.
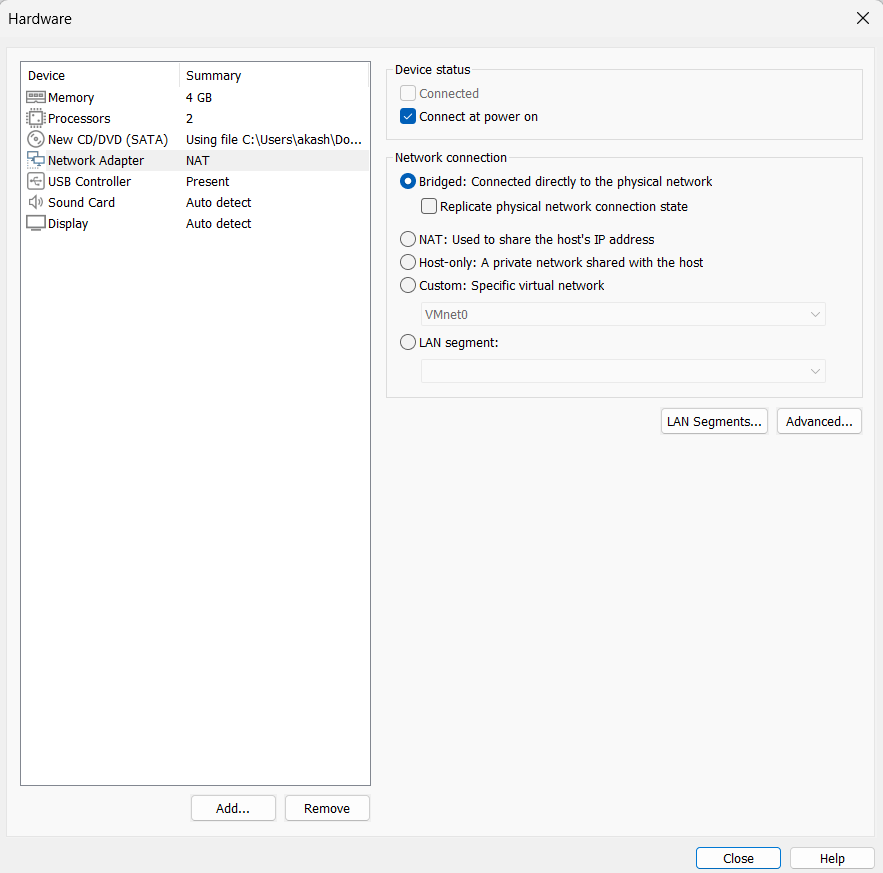
Now we have to customize the hardware for some selected items to change, Click on Customize Hardware button.

We will change Network Adaptor from NAT to Bridged for running internet in our Ubuntu machine. Click on Close after changing it.
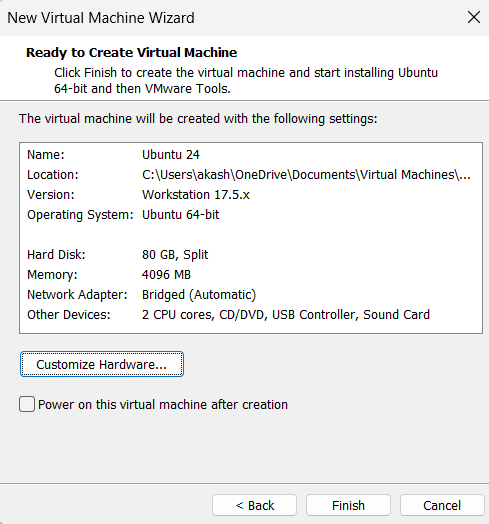
Next we have to click on Finish and Power on this Virtual Machine.
After powering on our Ubuntu 24 we will see preparing Ubuntu window on our screen.

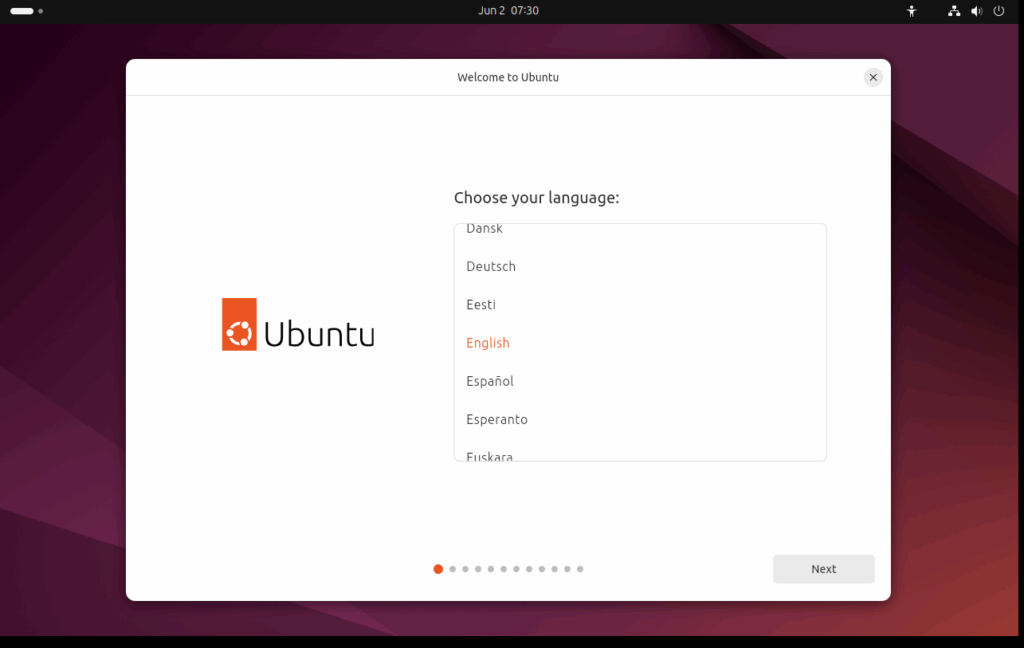
Now we have to customize our Ubuntu as per our choices. So, First option is to choose the language.
Most of us will choose English and click on Next.
Next, Some accessibility option will be there to help in Seeing, Hearing, Typing and many more. If anyone needs help in any of that then they can set it up. We will click on Next.

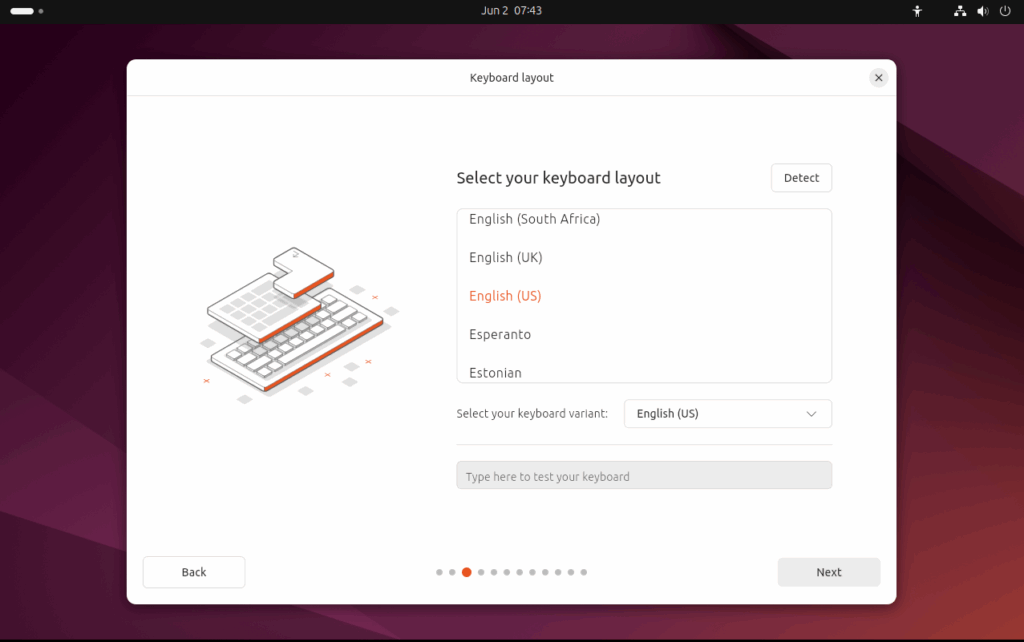
Now we have to select our keyboard layout for our Ubuntu. We will go with English (US) and click on Next button.
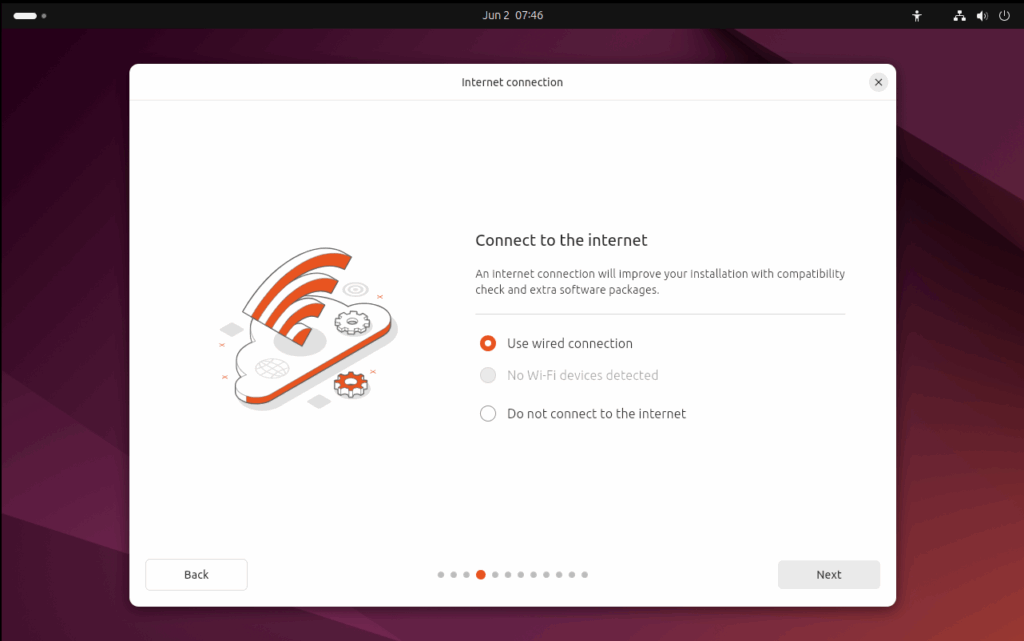
We have already connect our Virtual Machine with bridged connect so we can choose wired connection for our Ubuntu.
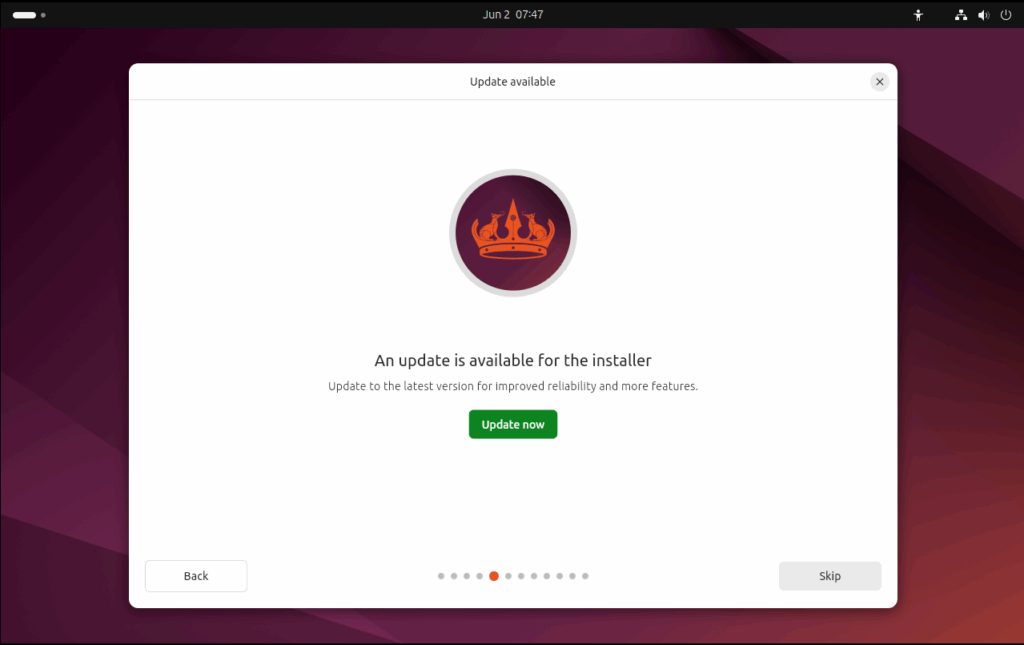
There is an update for our installer so we can install it by clicking on Update now button.
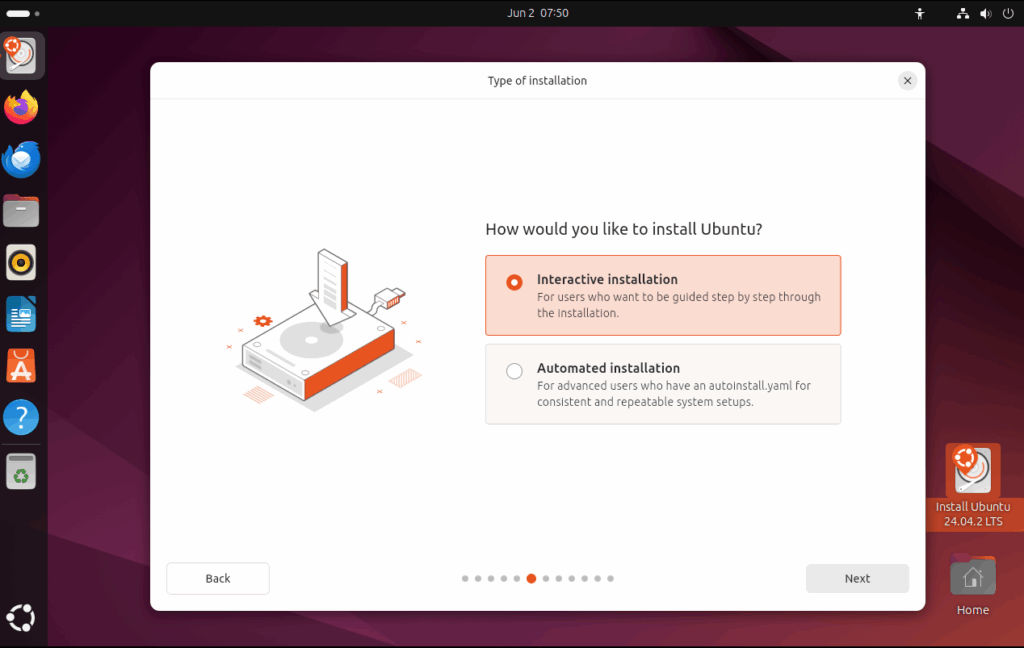
Now, We have to select “Interactive installation” for step by step installation and click on Next.
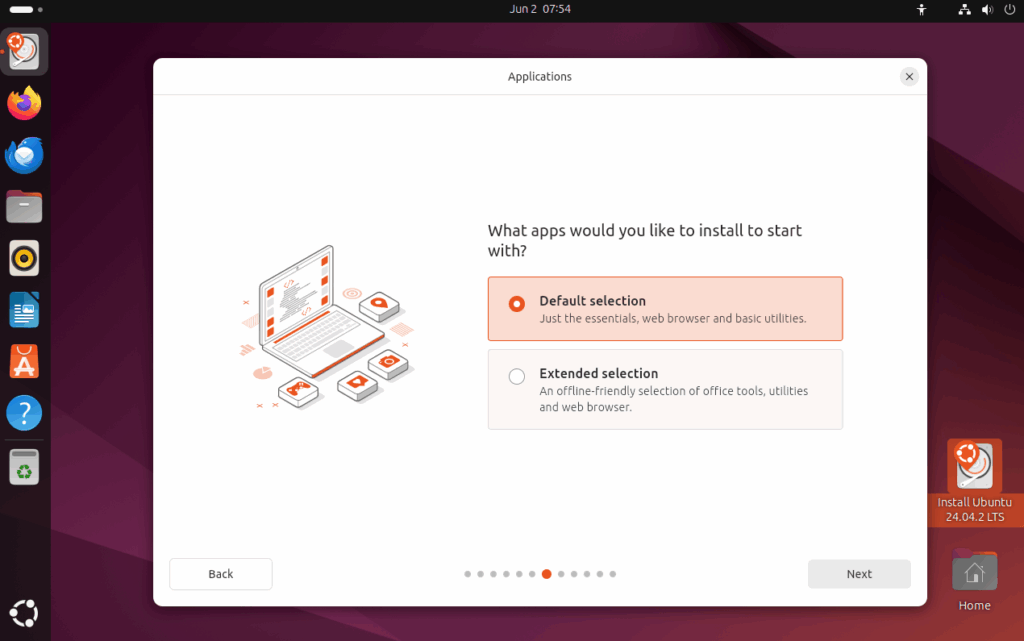
We can go with “Default selection” as it will have less applications.
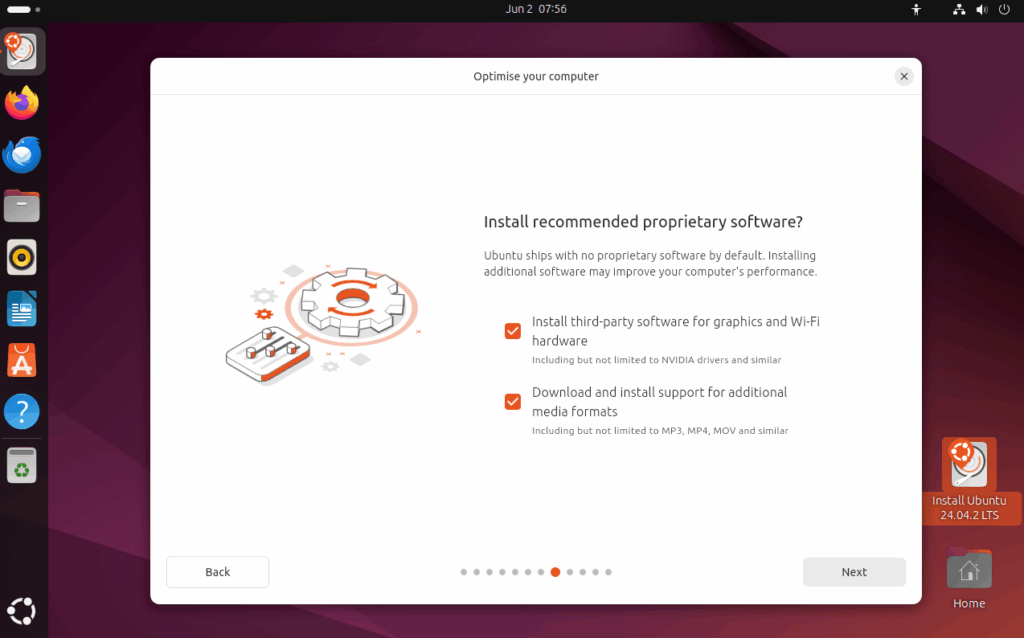
We have to select third party software for graphics, Wi-Fi and media formats.
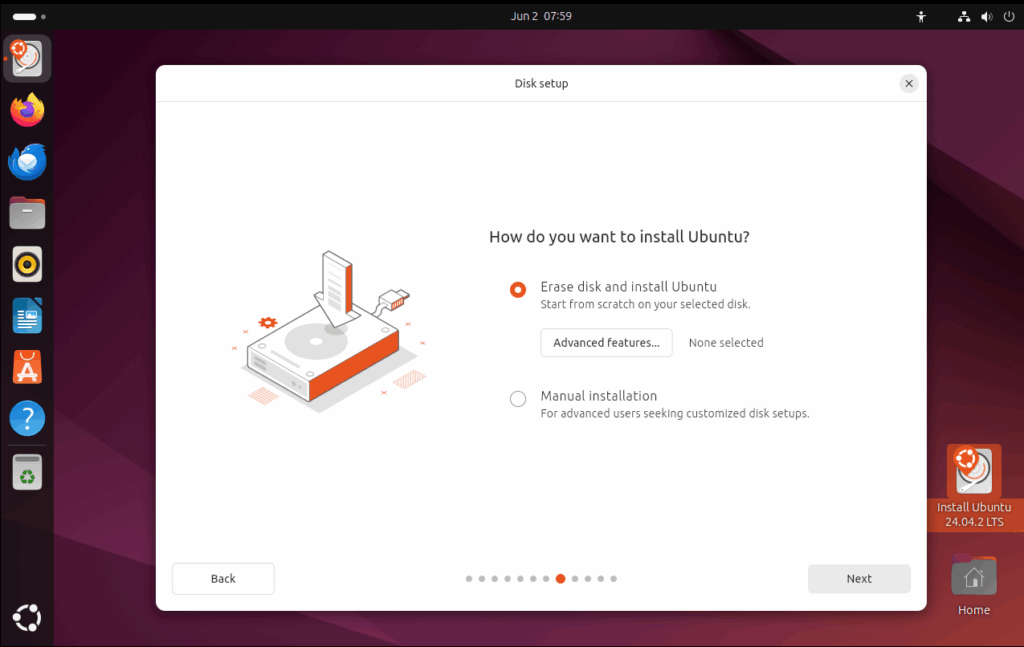
Now we have to select “Erase disk and install Ubuntu” to start from scratch.
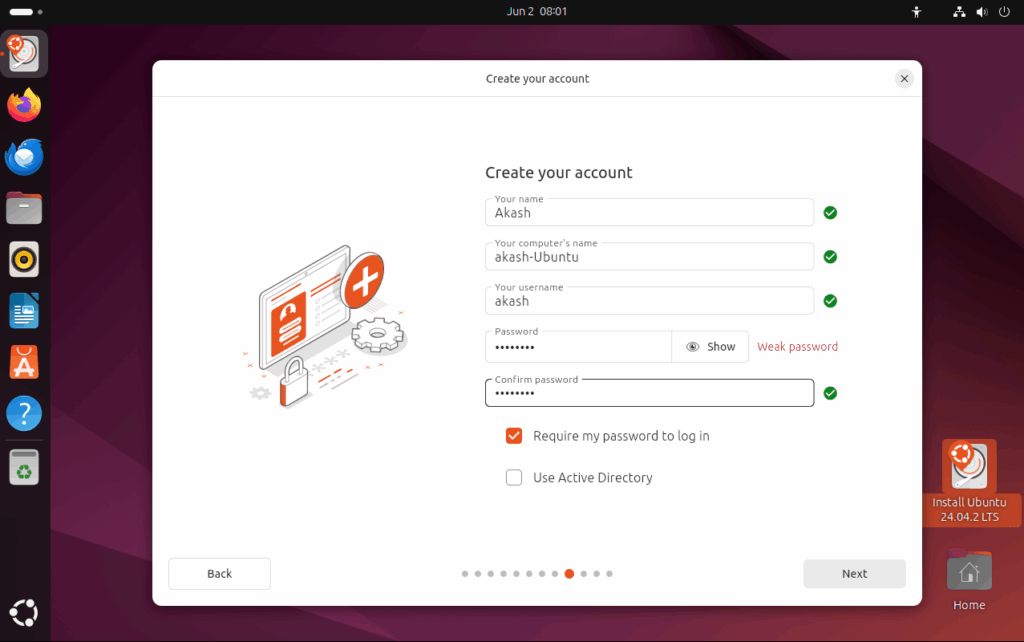
We have to create our account by filling the necessary details like Name, Computer’s name and Password.
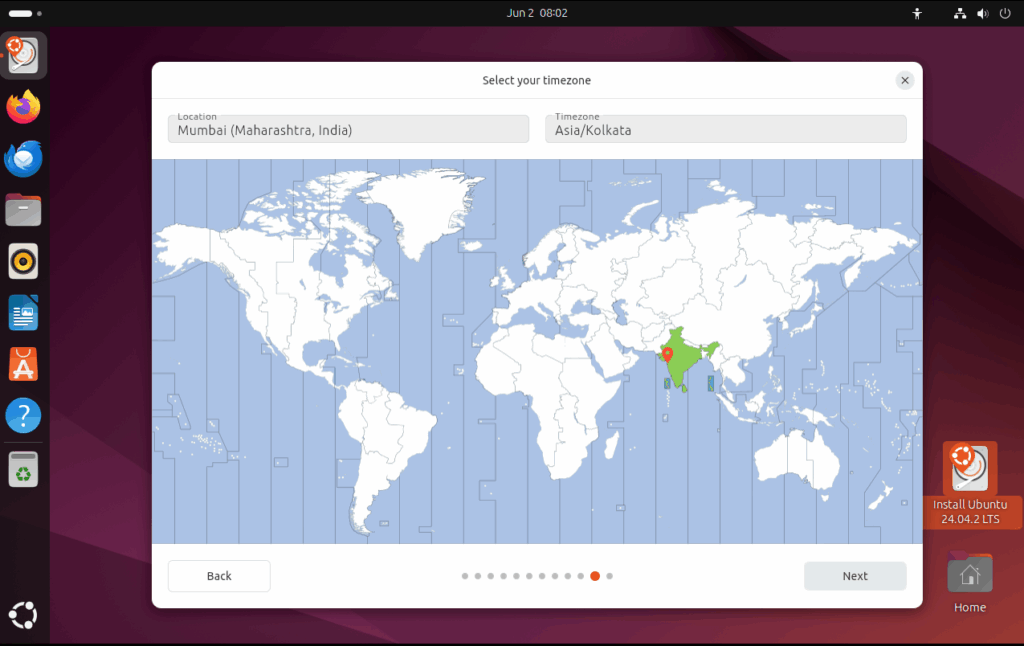
Next, We have to set the time by selecting our Timezone.
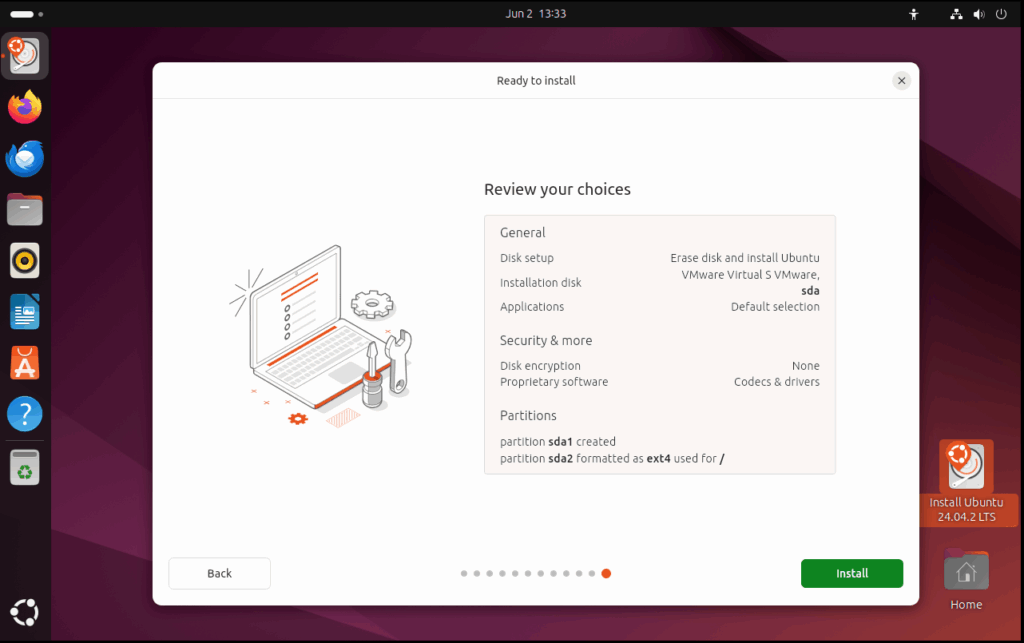
Final step is to review the choices and click on Install button.
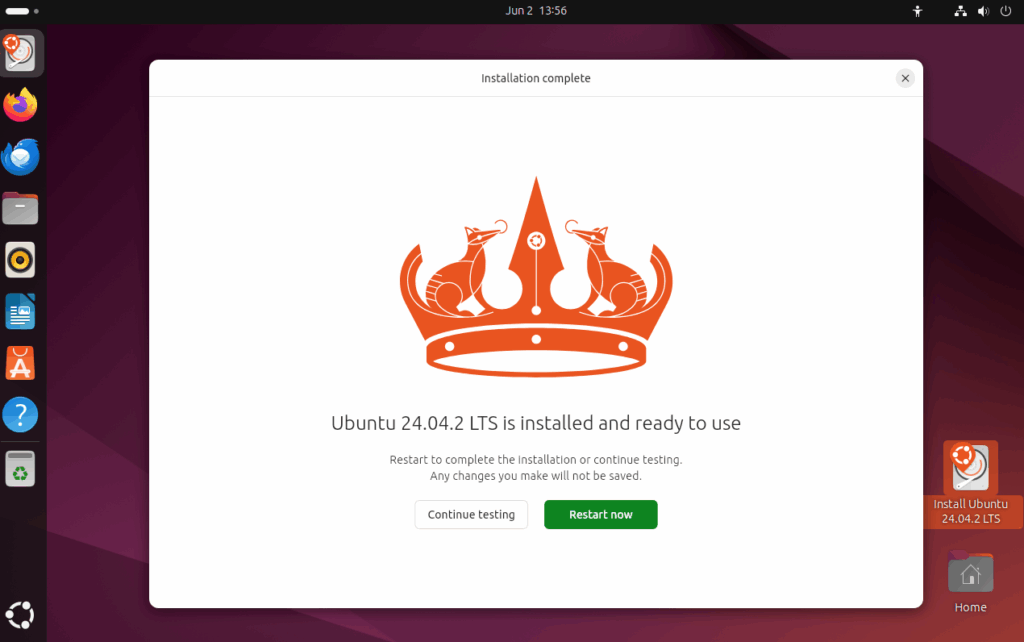
It will take easily 15-20 minutes to install and after that we will click on “Restart now” button to save our changes.
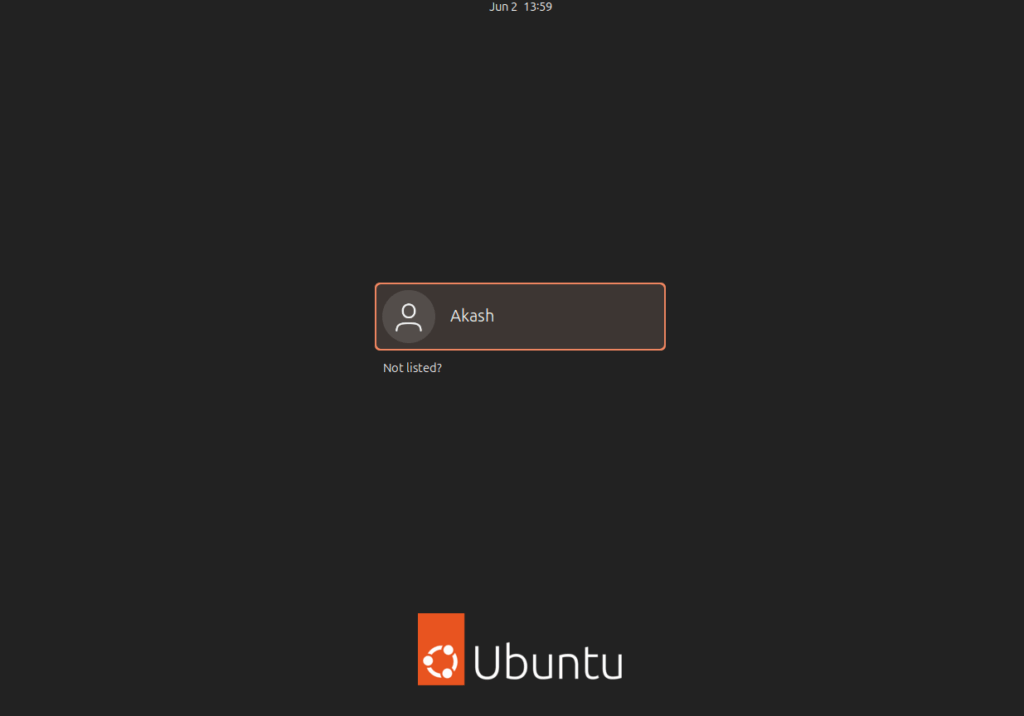
After restarting the system, We will get our user’s lock screen that we have created earlier, We can enter after entering our password.
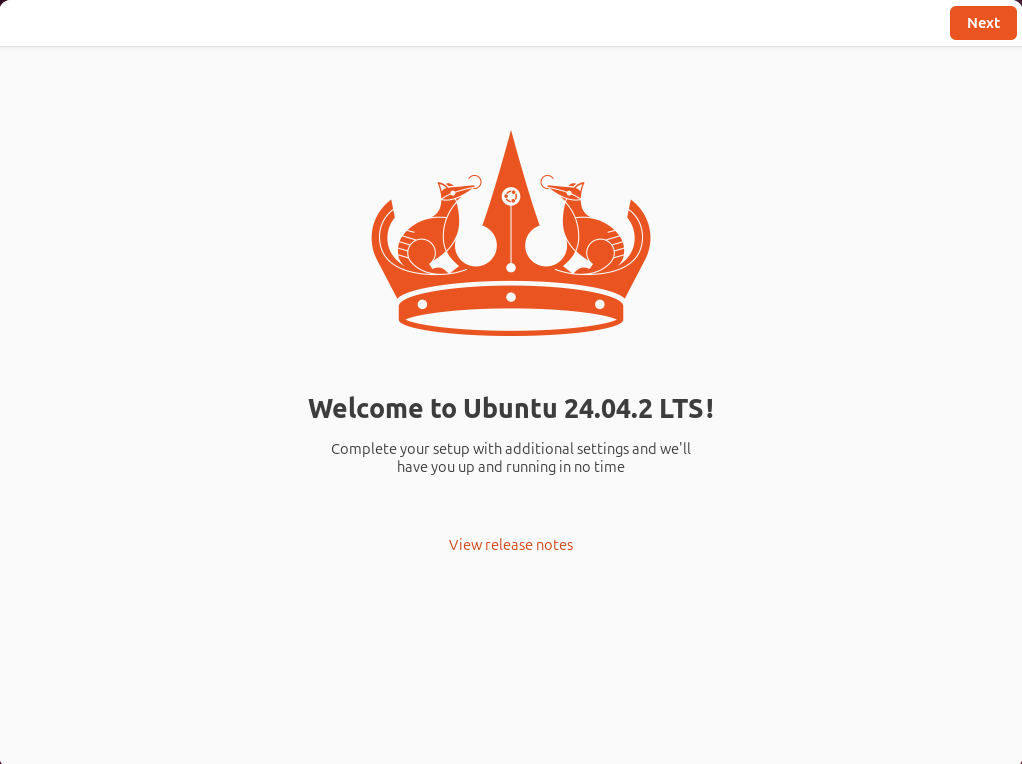
We will get “Welcome to Ubuntu 24.04.2 LTS!” screen.
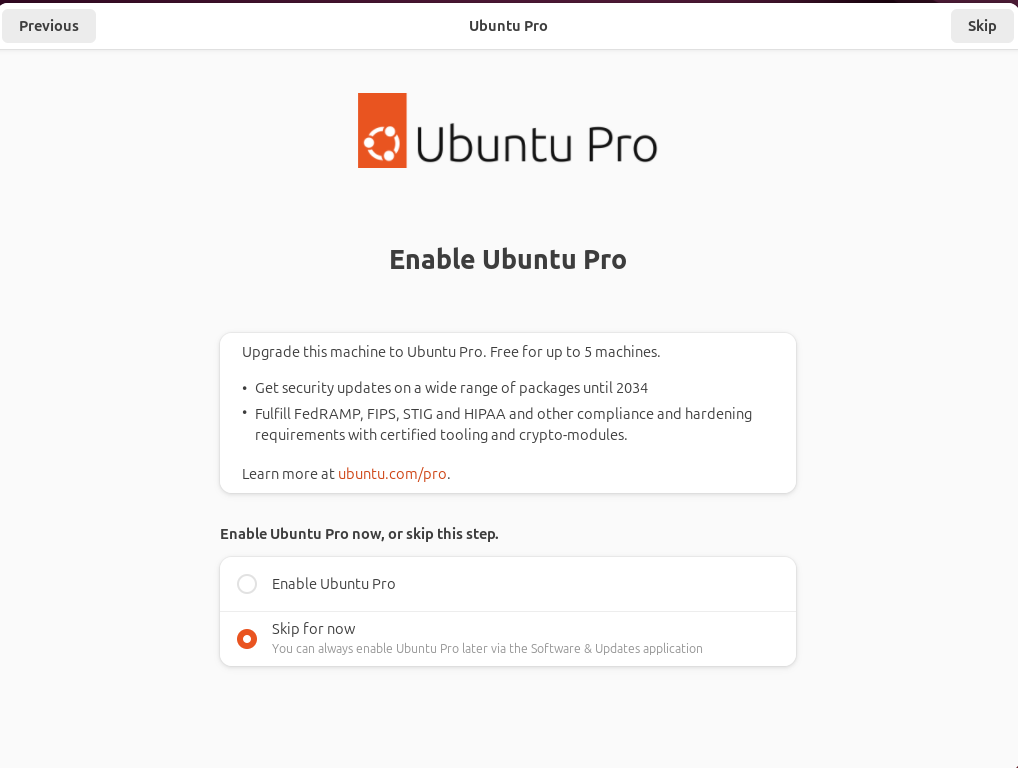
We will get the option to enable Ubuntu Pro but we have to skip that option for now as we will be using Ubuntu only.
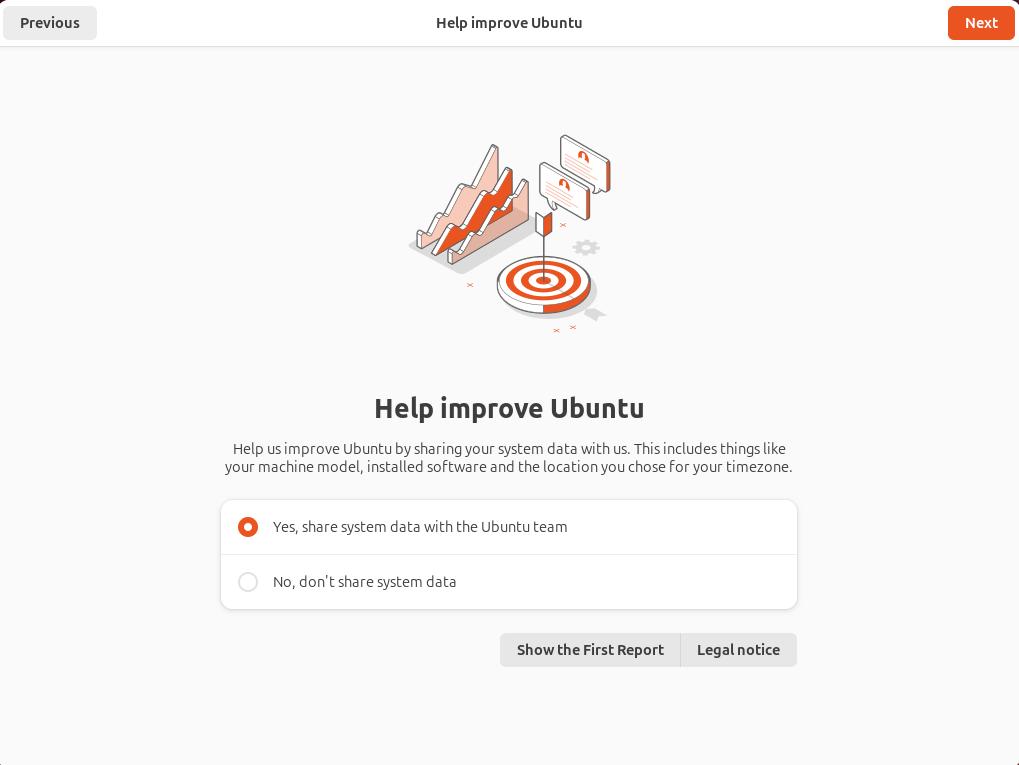
We will get the option for improving Ubuntu so it is your choice to share your system data or not.
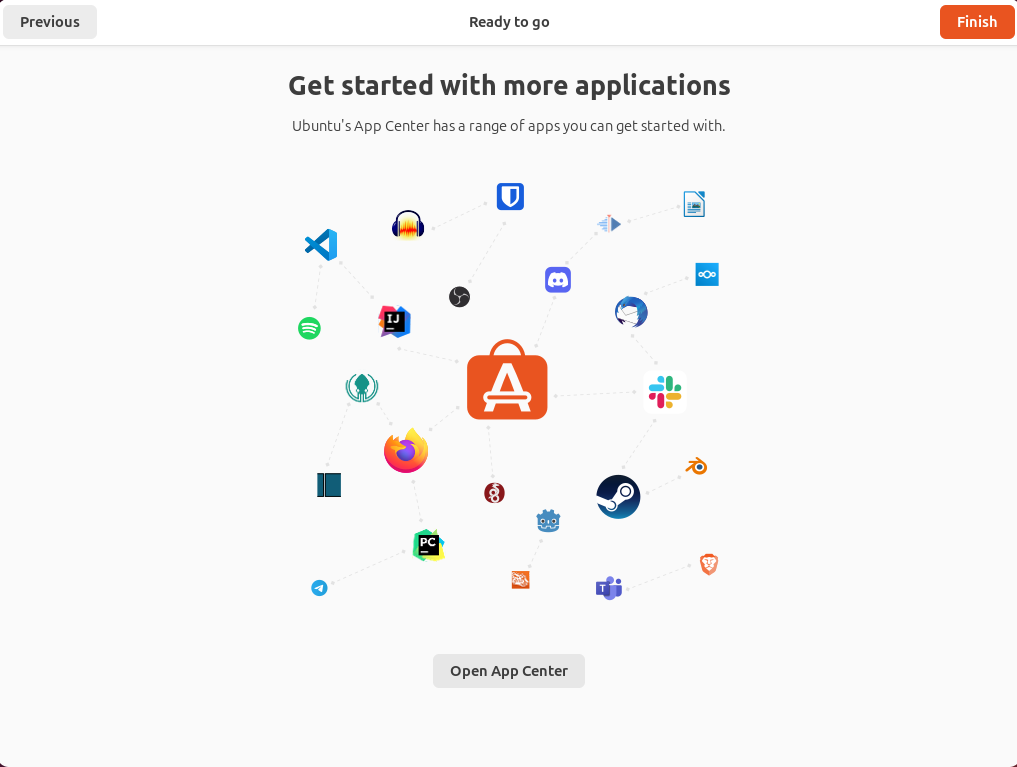
We can install more application in our last step or just click on Finish button.
That’s all for “How to install Ubuntu“.
FAQ on how to install Ubuntu
Q. What should I do after installing Ubuntu?
A. Update the system by sudo apt update && sudo apt upgrade
Install preferred apps
Enable proprietary drivers (e.g., NVIDIA)
Set up backups and security (e.g., firewall)
Q. Do I need internet to install Ubuntu?
A. No, but having an internet connection allows Ubuntu to:
Download updates
Install third-party software (e.g., Wi-Fi drivers, codecs)
Discover more from Root Learning
Subscribe to get the latest posts sent to your email.


Ubuntu chalu karwakar majja aa gay bhaijan
Ubuntu is best, Thanks for covering it.