
This post is for learning how to install CentOS 9 minimal configuration that will install the CLI version of centos with minimum features and softwares. CentOS 9 minimal is the light version of full CentOS 9 version.
We will begin with directly installation of minimal version. For creating the virtual machine, Please read – how to setup your own centos server
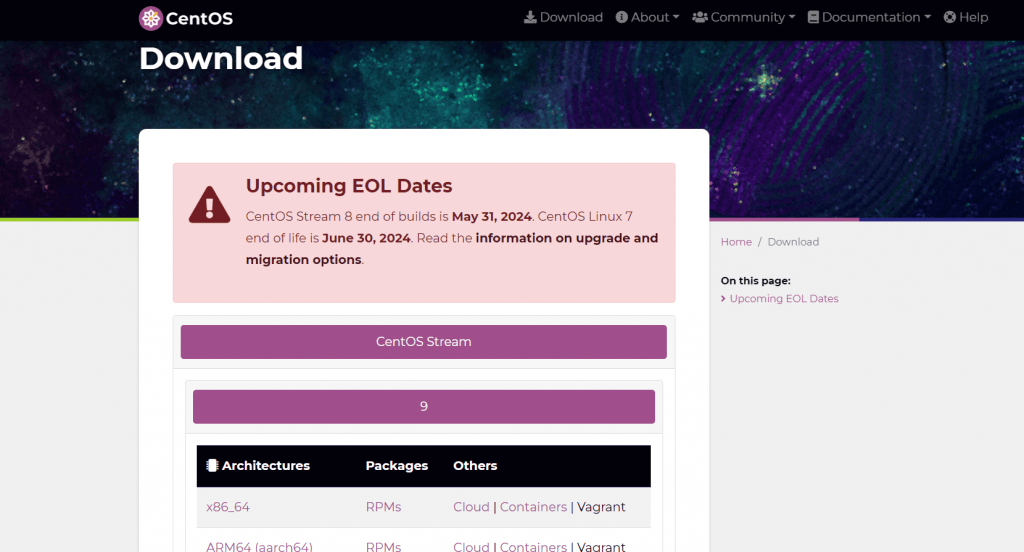
Let’s start now with this amazing post that will help you to configure your server with minimum softwares that you actually need. Search on Google for CentOS 9 iso download and click on CentOS official website.
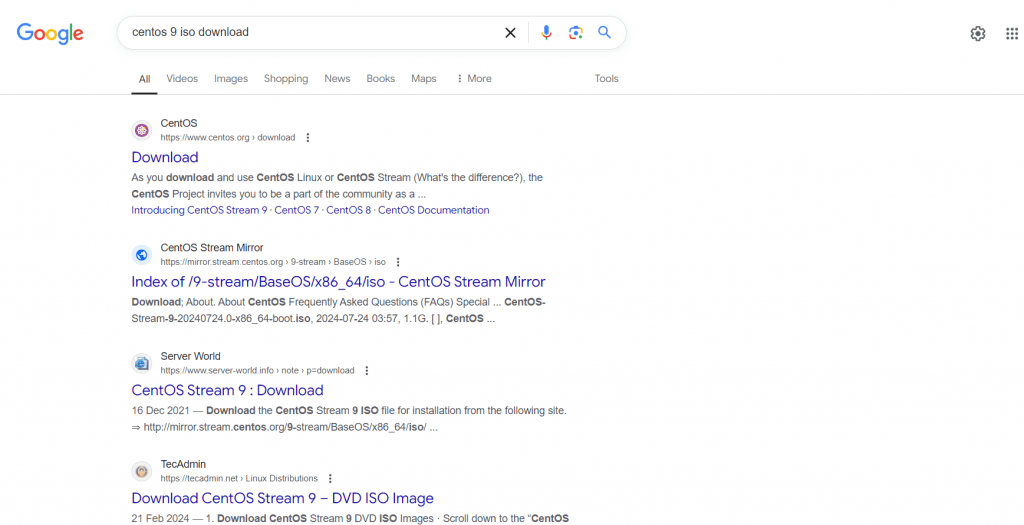
Click on first link to download an ISO file that is x86_64 for your creation of virtual machine. Wait for Downloading to be over and then open VMware Workstation. If you don’t know how to setup VMware Workstation on your system. Please learn that from here.
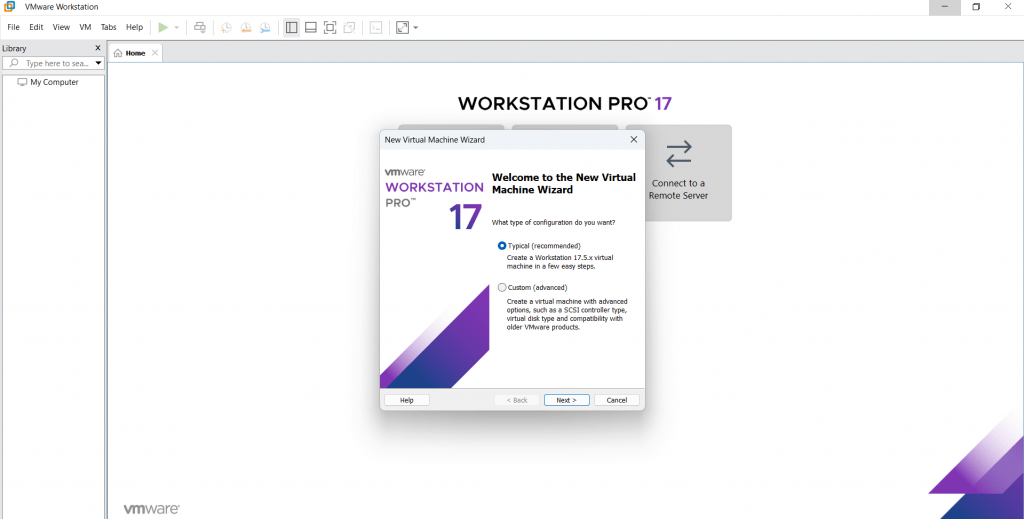
Now in VMware Workstation, we have to click on Create a New Virtual Machine.

Now you can see the message window of Welcome to the New Virtual Machine Wizard to be appear on the screen.
For the new users, I will recommend to go for the default settings provided my VMware Workstation. So Click on Next by choosing default option ‘Typical (recommended)’.
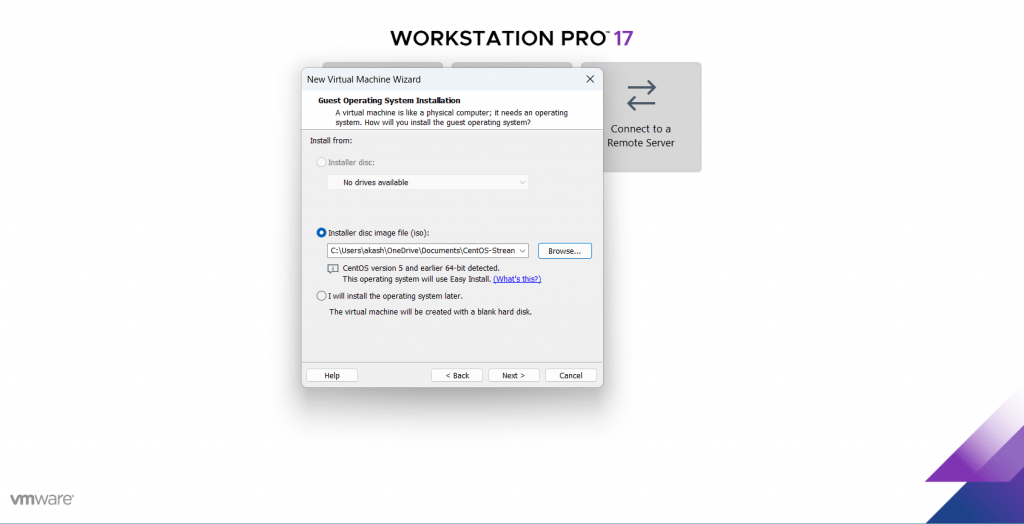
For the next option, Please select the Centos 9 iso file that you have downloaded earlier by clicking on the ‘browse’ button on Installer disc image file (iso): and click on Next.
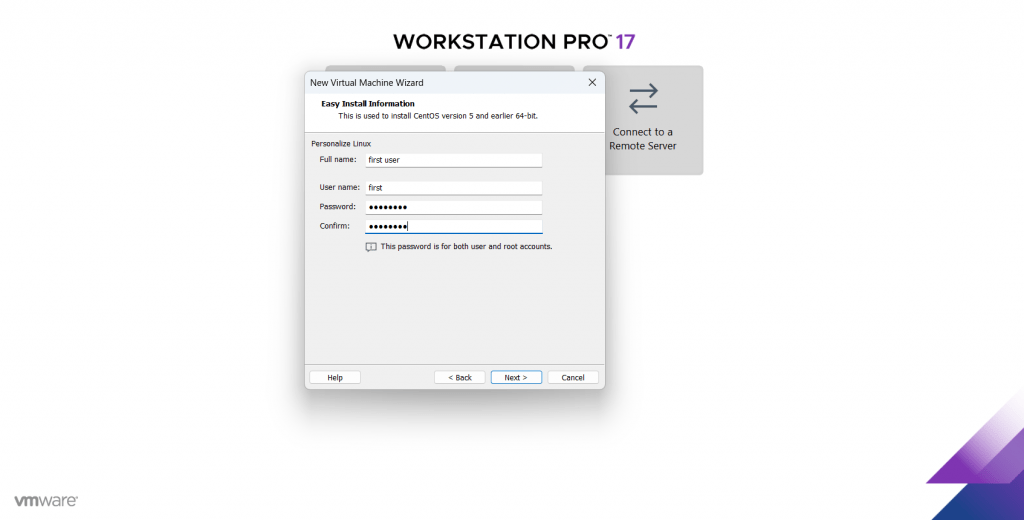
Next, Write the Full name, User name, Password of your choice and click on Next.
Now, Write the name of your choice that you want to give to your machine and also select the Location path of its installation and for its files by clicking on “Browse”. Default location is recommend for the virtual machine.
click Next after doing that.

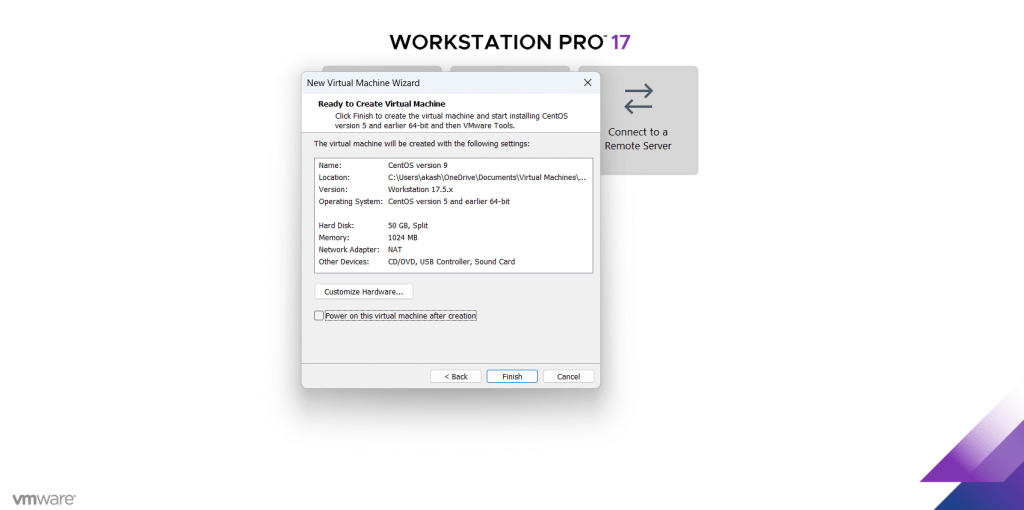
Next give the hard disk size in (GB) to your virtual machine and also keep selecting the default option for hard disk that is “Split virtual disk into multiple files”.
Recommend disk size is 50GB according to me but it is all about your choice to increase or decrease your hard disk size.

Last step for Wizard is to untick the button of “Power on this virtual machine after creation” and click on Finish.
You will get your screen like this before we will start editing few things for smooth working of our Centos 9 minimal server.
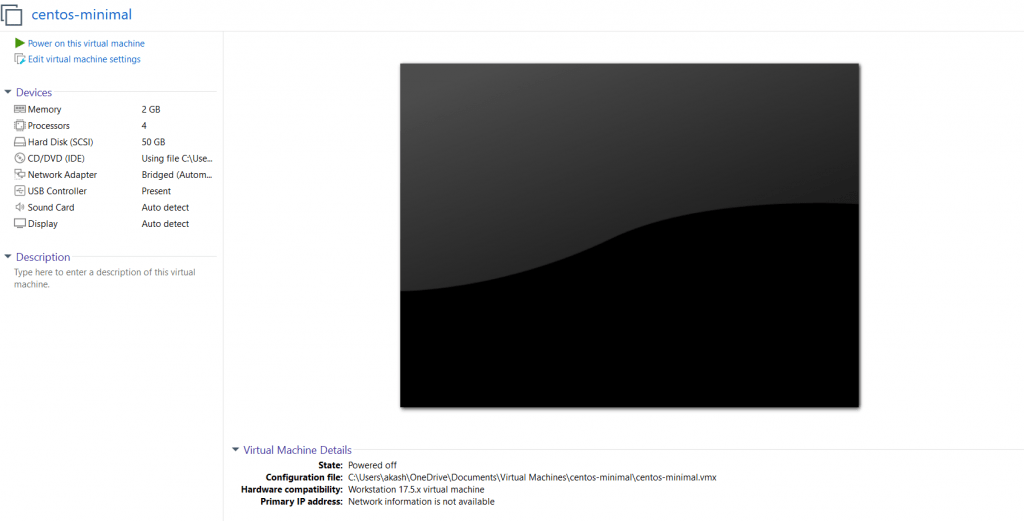
Let’s start editing our virtual machine settings by clicking on “Edit virtual machine settings”.
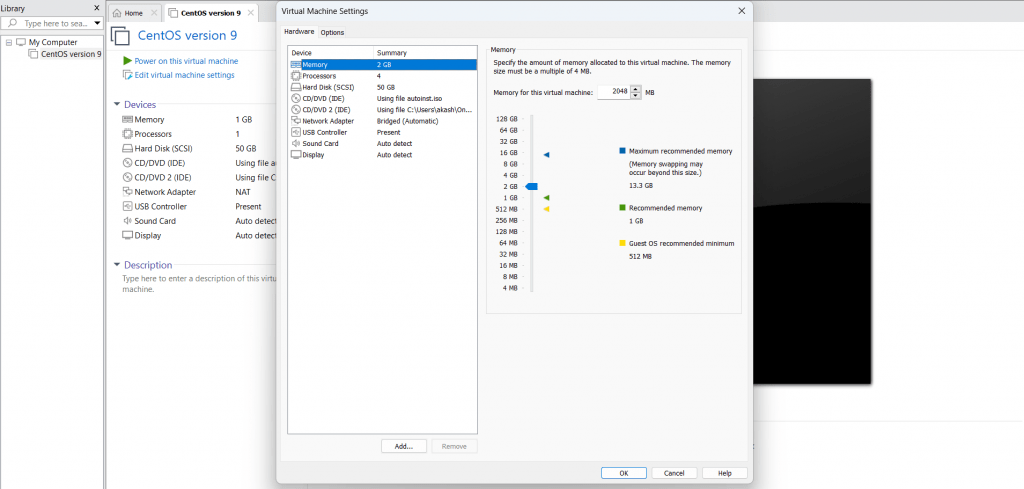
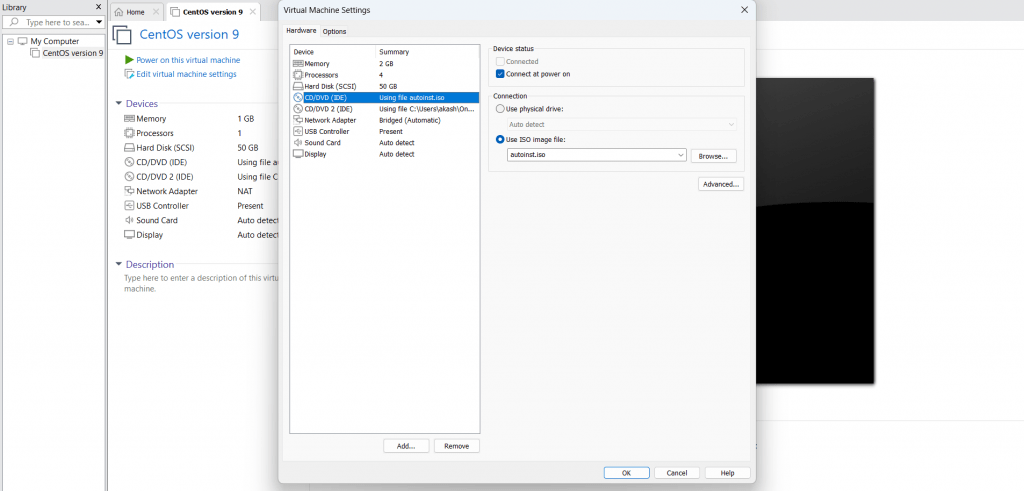
Now, we will start making changes that would be making Memory as 2 GB (2048 mb),Processors also 4 but you can select 2 also according to your base system and Network adapter as bridged. You can see all the changes in picture given below.
Next, We have to delete autoinst.iso from CD/DVD option to customize our Centos 9 minimal server at the time of installation. We can do that by selecting the CD/DVD – autoinst.iso and click on Remove at the bottom of the menu. Click on OK after removing that.
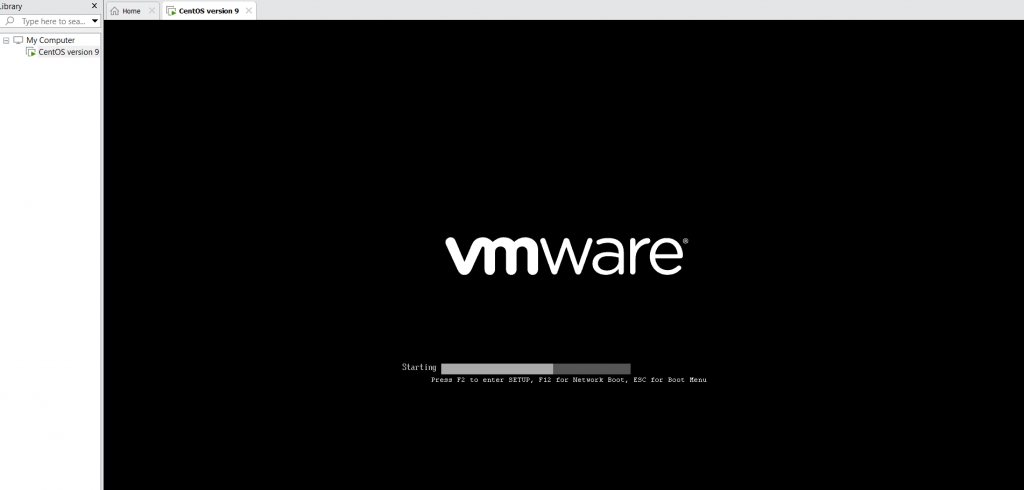
Click on “Power on this virtual machine” for starting the Centos 9 minimal server of your own and also to start customizing it as per your need.
Now, You will get the screen with 3 options in which you have to choose “Install CentOS Stream 9” by clicking on the screen to get inside the VMware screen from the base system and use the up arrow key to select that and press enter.

After clicking on Install CentOS Stream 9 option, Some OK for drivers and softwares will come and you have to wait for it to finish. After sometime you will see “WELCOME TO CENTOS STREAM 9″ and you have to choose the language you want your server to work with. Press Continue after selecting it.

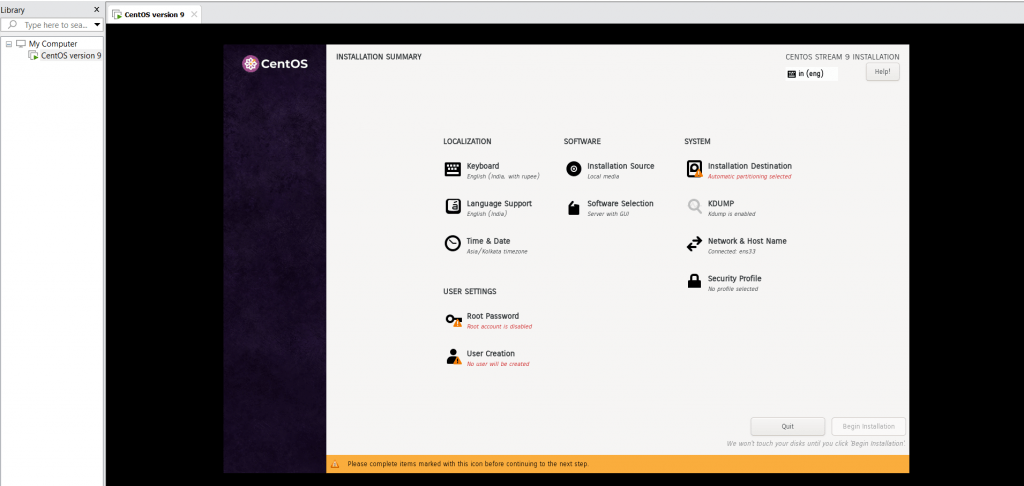
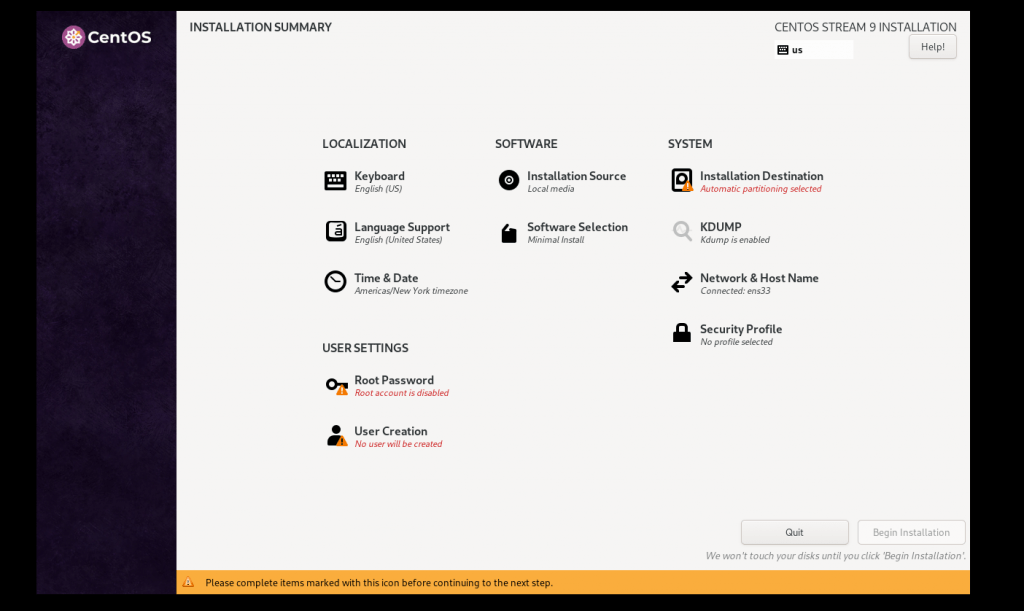
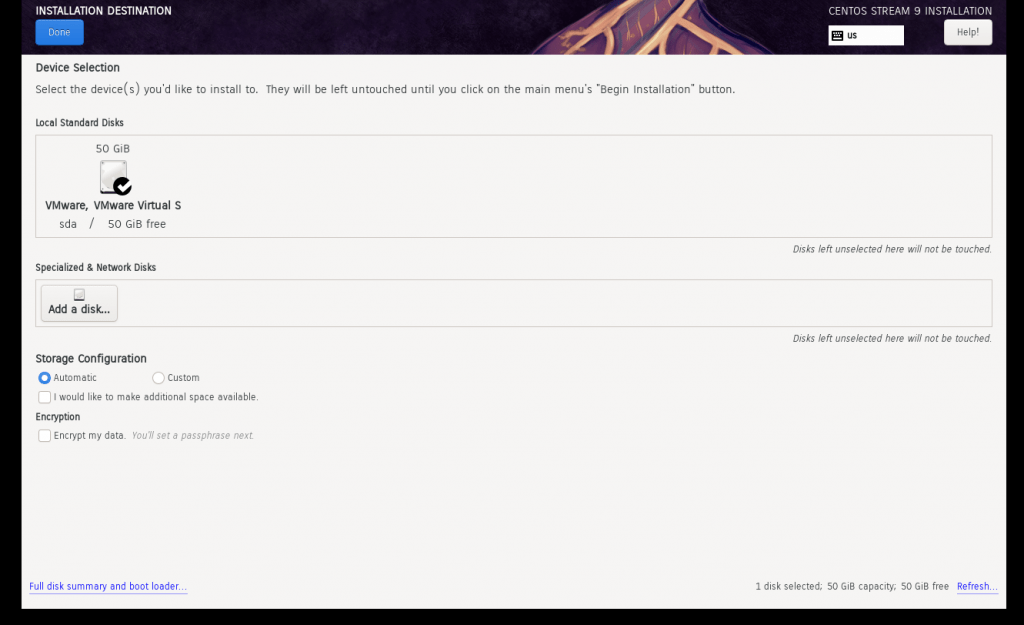
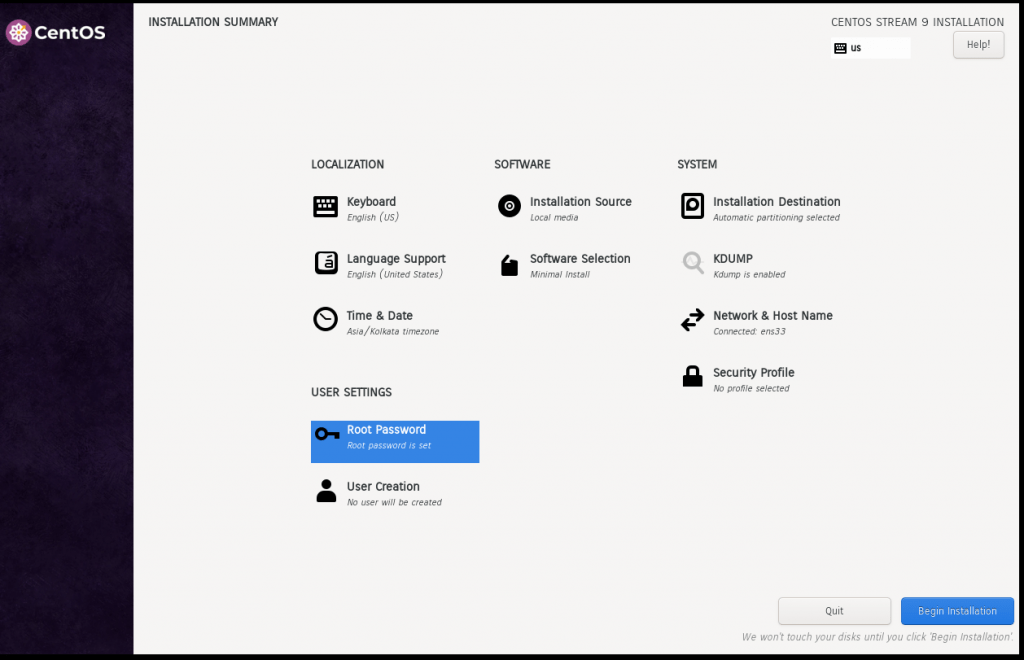
Next, You will see the “INSTALLATION SUMMARY” screen. You can customize all the options you want but necessary options to start the installation are Installation Destination, Root Password and User Creation(Optional).
For minimal install of Centos 9, We have to also change the Software Selection that has Server with GUI by default.
Click on Software Selection for changing the server to minimal and you will get the screen shown below.

Select Minimal Install from the left hand side under Base Environment. You can also choose Additional Software for Selected Environment. I will not choose any additional software for my machine but you can select according to your need.
Click on Done on the top left corner after selecting your options.
Let’s start with Installation Destination by clicking on it. As we know we have created a hard disk of 50 GB on VMware and this option is just confirming that from us. So, We need to click on Done at top left corner of the screen.
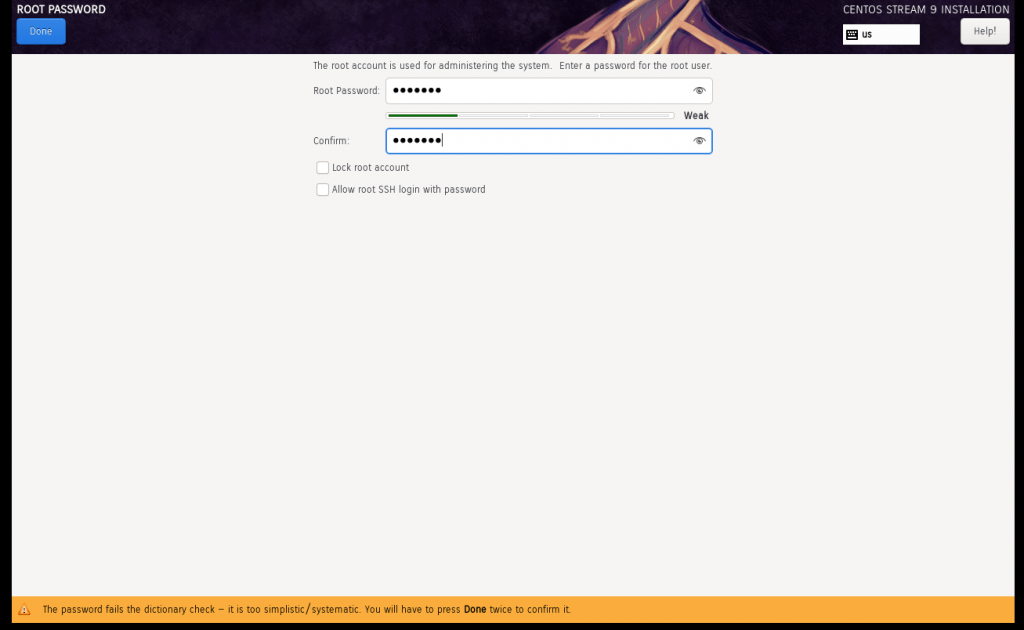
Next, We have to click on Root Password and provide a password to our root account that is administrator account in Linux. Click on Done after confirming your password from top left corner.
If the root password is weak then you have to turn it into a strong password or you have to click two times on Done button.
User Creation is optional so we are avoiding it for now. Click on Begin Installation at bottom right corner to start installing OS on your server.
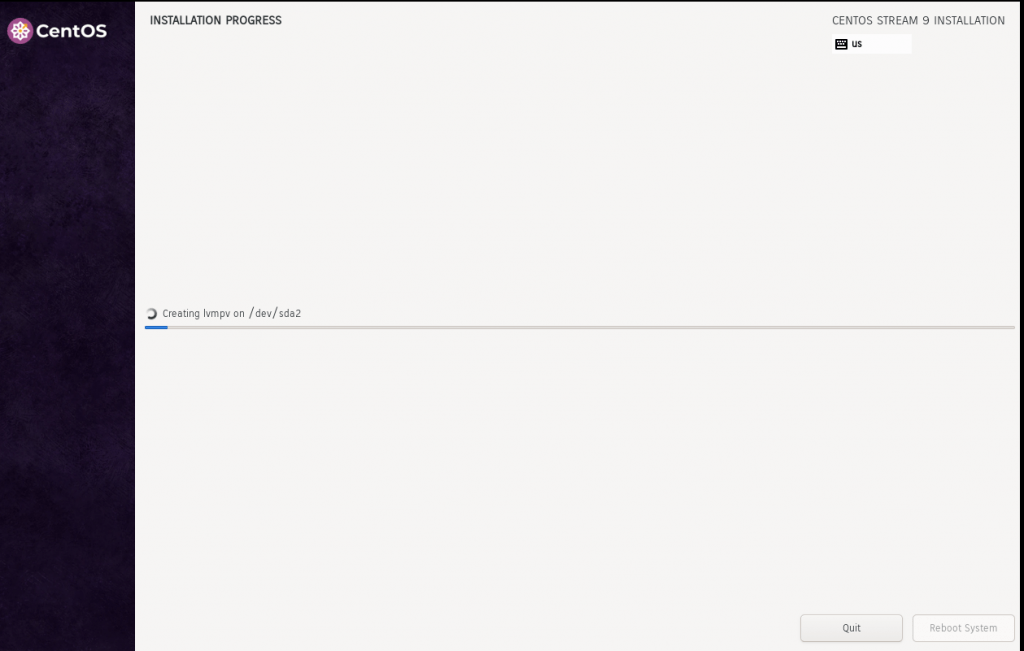
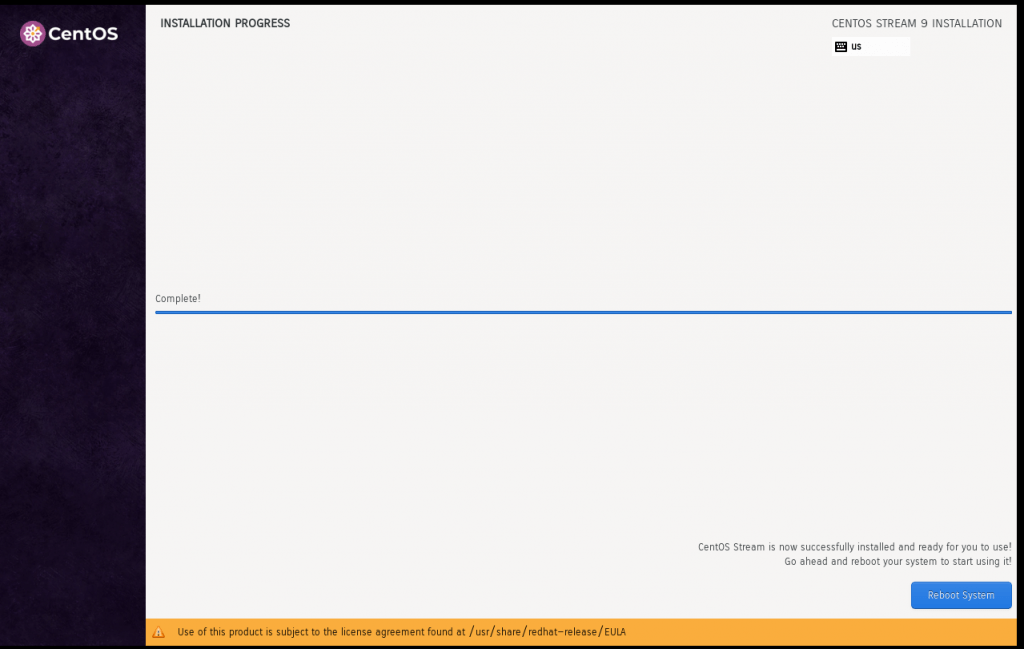
You will get the screen below while installation is in progress of Centos 9 minimal.
After installation would be done, You have to click on Reboot System button at bottom right corner.
After Rebooting, You will get your Centos 9 minimal server started with the display of “CentOS Stream 9”.
You can enter your user name under localhost login and then enter your password, You would be successfully logged in the server.

I hope you have learned from our post. Please do comment and share with your friends and family.
Table of Contents
FAQ on how to install CentOS 9 minimal
Q. What is CentOS Stream 9 Minimal Server?
A. CentOS Stream 9 Minimal Server is a streamlined version of CentOS Stream 9 designed to provide a minimal environment for server deployments. It comes with only the essential packages required for a basic server setup allowing you to build and customize the system according to your specific needs.
Q. How is CentOS Stream different from CentOS Linux?
A. CentOS Stream is a rolling-release distribution that sits between Fedora and RHEL (Red Hat Enterprise Linux). It provides a preview of what the next minor release of RHEL will look like. CentOS Linux on the other hand was a downstream rebuild of RHEL and it followed the RHEL release cycle.
Q. What are the advantages of using CentOS Stream 9 Minimal Server?
A. 1. Lightweight: Reduced footprint with only essential packages installed.
2. Customizable: Allows for building a tailored environment by installing only the packages you need.
3. Up-to-Date: Provides a continuous stream of updates and features ahead of RHEL, offering newer software and improvements.
Q. What packages are included in the Minimal Server installation?
A. The Minimal Server installation includes the basic set of packages required for a functional server. This typically includes the Linux kernel, essential system utilities and basic networking tools. It does not include graphical user interfaces or additional software that might not be necessary for server operations.
Q. What is the default user and password?
A. During installation, you will be prompted to create a root password and optionally create a regular user account. There is no predefined default password.
Q. How do I update CentOS Stream 9 Minimal Server?
A. You can update your system using the package manager dnf. To check for updates and apply them use:
sudo dnf update
Q. How can I install additional software on CentOS Stream 9 Minimal Server?
A. Use the dnf package manager to install additional software. For example, to install the vim text editor, you would run:
sudo dnf install vim
Q. How can I secure my CentOS Stream 9 Minimal Server?
A. To enhance security:
1. Regular Updates: Keep the system updated with dnf update
2. Firewall: Configure and enable firewalld to restrict incoming connections.
3. SELinux: Ensure SELinux is enforcing (sestatus command).
4. SSH Security: Configure SSH to use key-based authentication and disable root login if possible.
Q. Can CentOS Stream 9 Minimal Server be used for containerized applications?
A. Yes, CentOS Stream 9 Minimal Server is suitable for containerized applications. You can install container engines like Docker or Podman to manage and run containers.
Discover more from Root Learning
Subscribe to get the latest posts sent to your email.


I’m really impressed with your writing abilities as smartly
as with the layout on your blog. Is this a paid theme or
did you customize it yourself? Either way stay up the nice quality
writing, it’s uncommon to look a great blog like this one today.
Previously I didn’t know how to do it by myself
Now I can do. I will refer my friends too for your post.
Bhaijan apka content aur faq dono boht achey hay
Good post or bhi thoda minimal OS pr bnao posts.
Can you please make it same for CentOS 10?
This is one of the most helpful post in the internet👍🏼👍🏼
Great post!!!!
Fantastic content
Your writing feels like it’s opening a window into a world I didn’t know I needed to see.