One of the most important habits of any computer user is making regular backups. Unexpected issues—like system crashes, corrupted updates, or accidental file deletions—can cause major headaches. Thankfully, Linux Mint comes with a powerful tool called Timeshift, designed specifically to protect your system from such problems.
Timeshift works by taking snapshots of your system at different points in time. These snapshots allow you to restore your Linux Mint installation to an earlier working state without affecting your personal files. It’s like a safety net that ensures you don’t lose hours of work or end up reinstalling the entire operating system.
In this guide, we’ll explain what Timeshift is, why you should use it, and provide a step-by-step tutorial on creating and restoring backups in Linux Mint.
What is Timeshift in Linux Mint?
Timeshift is a backup and restore utility developed for Linux distributions. Unlike traditional backup tools that copy your personal documents, pictures, and videos, Timeshift focuses on the system files, configurations, and settings.
That means if your Linux Mint installation breaks due to a bad update, driver issue, or software misconfiguration, you can roll back the system to a previous snapshot. Your personal data in /home remains untouched (unless you explicitly configure Timeshift to include it).
Key Features of Timeshift
- System Snapshots: Create snapshots of system files and settings.
- Automatic Scheduling: Configure daily, weekly, or monthly backups.
- Restore Functionality: Quickly return Linux Mint to a working state.
- Multiple Storage Options: Save snapshots to internal or external drives.
- Incremental Backups: Only new changes are saved, reducing storage usage.

Installing Timeshift in Linux Mint
Most editions of Linux Mint come with Timeshift pre-installed. To check, search for Timeshift in the application menu.
If it isn’t installed, you can easily add it from the terminal:

Once installed, launch it from the menu and provide your password when prompted.
Setting Up Timeshift for the First Time
When you open Timeshift for the first time, you’ll be greeted by a setup wizard. Here’s how to configure it:
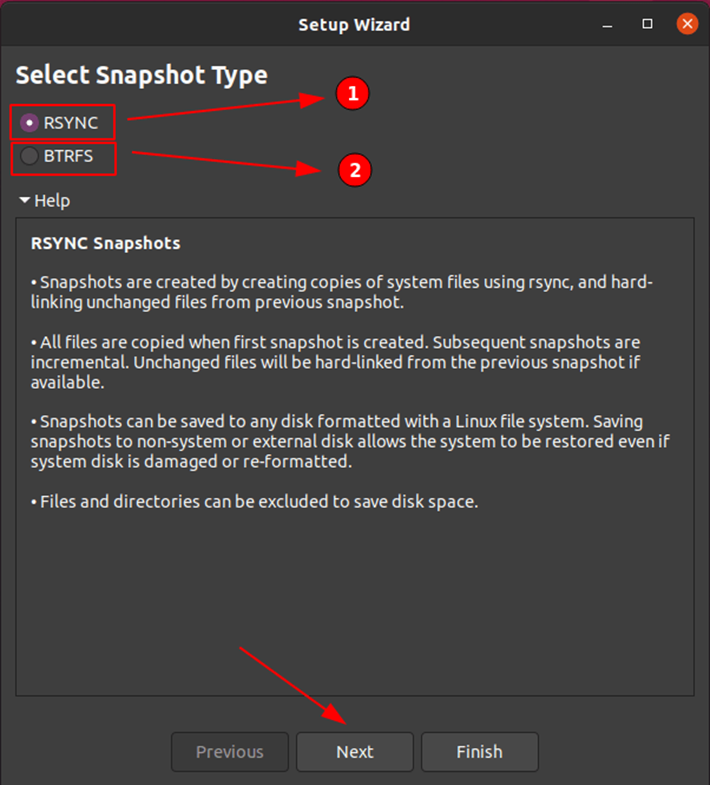
Step 1: Choose Snapshot Type
Timeshift offers two snapshot types:
- RSYNC – Most commonly used. Creates incremental snapshots by copying files.
- BTRFS – Used if your system partition is formatted with the BTRFS filesystem.
For most Linux Mint users, RSYNC is the recommended option.
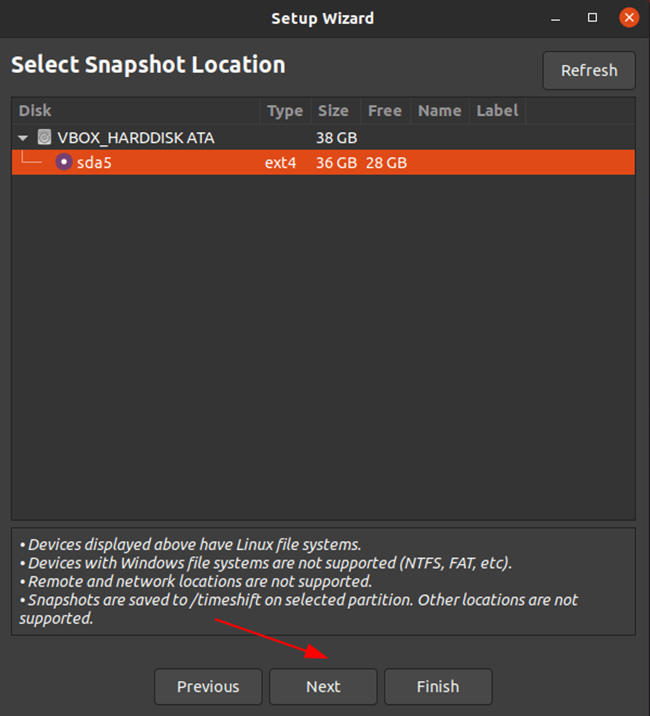
Step 2: Select Snapshot Location
Choose where to store snapshots. You can select:
- Internal drive (not the same as root partition for safety).
- External USB or hard drive.
- Secondary partition.
It’s best to use an external drive or a different partition so that snapshots aren’t lost if the main system drive fails.
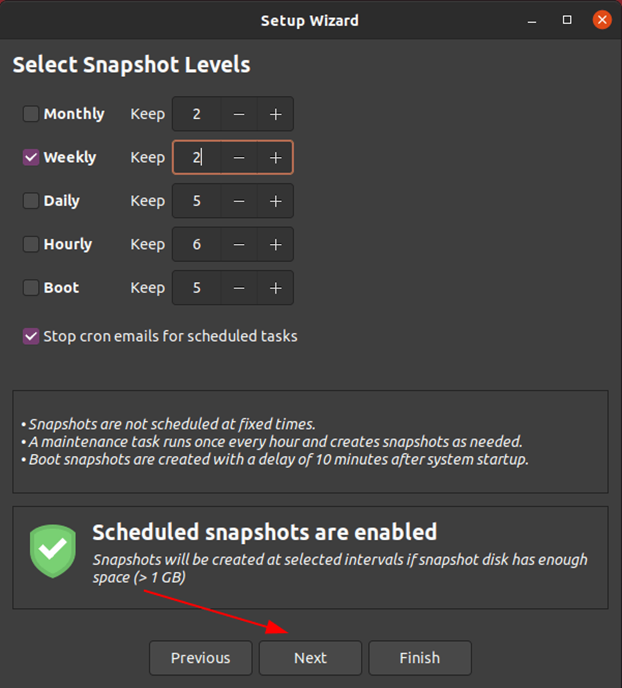
Step 3: Configure Snapshot Levels
Decide how often Timeshift should create snapshots. Options include:
- Hourly
- Daily
- Weekly
- Monthly
- At Boot
For most users, daily and weekly snapshots are enough.
Step 4: Choose User Data (Optional)
By default, Timeshift excludes personal files from /home. If you want your documents, downloads, and photos included, you can configure it here—but keep in mind that this increases backup size.
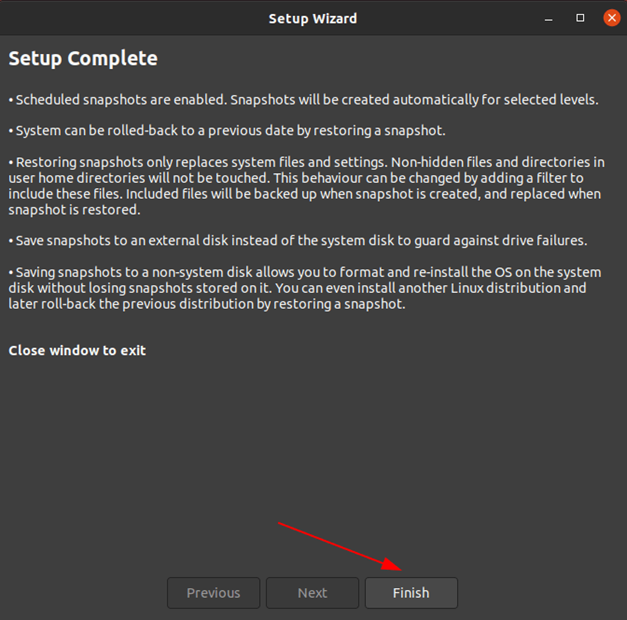
Step 5: Finish Setup
Click Finish, and Timeshift will be ready to create your first snapshot.
Timeshift Main Window
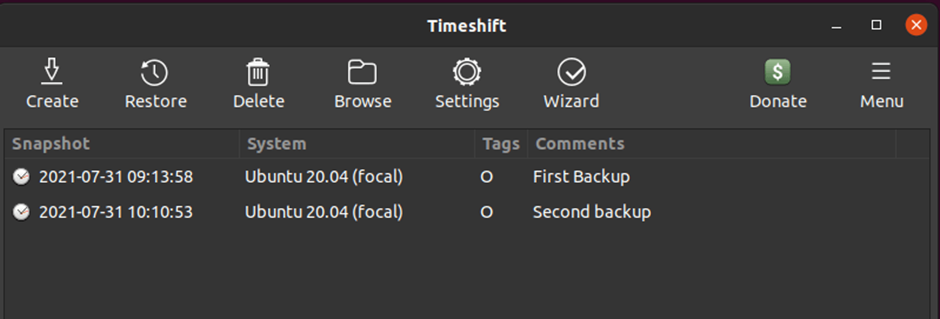
Once the setup wizard is completed, the main menu will be displayed as shown in the below image.

As you can see, there are a few options in the main window. All are self-explanatory. Here is the brief description of what each option does:
- Create – Take snapshots.
- Restore – Restore selected snapshot.
- Delete – Remove selected snapshot.
- Browse – Open the file system where the backup is stored.
- Wizard – Run the initial setup wizard again.
Creating Snapshots in Linux Mint with Timeshift
- Open Timeshift from the menu.
- Click Create.
- Wait for Timeshift to complete the process (time depends on system size).
- Once done, the snapshot appears in the list with the creation date and time.
Restoring Snapshots in Linux Mint
If your Linux Mint system breaks or you want to undo changes, restoring snapshots is straightforward.
Step 1: Launch Timeshift
Open Timeshift from the menu or terminal
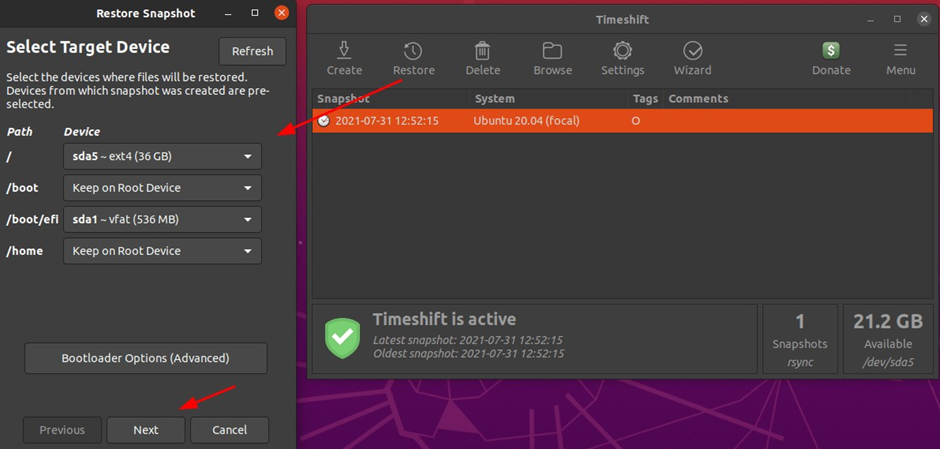
Step 2: Select a Snapshot
You’ll see a list of available snapshots with their timestamps. Choose the one you want to restore.
Step 3: Click Restore
Click Restore and follow the on-screen instructions. Timeshift will replace your system files with those from the snapshot.
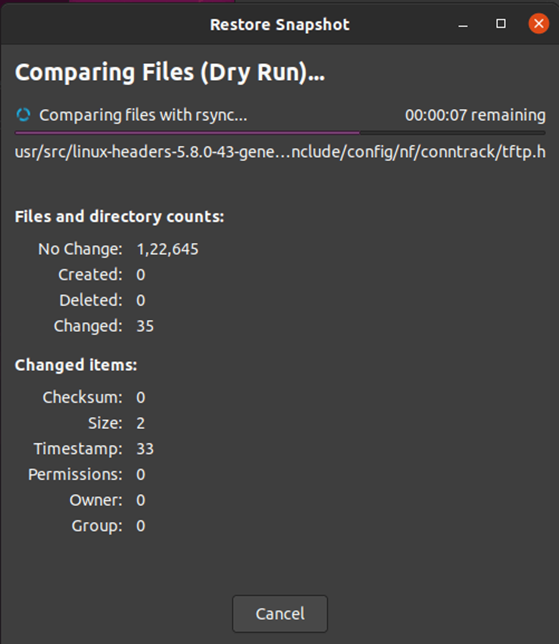
Step 4: Dry Run Comparison
In this next step, Timeshift will perform a dry run to compare the snapshot copy and current system files and directories.
Step 5: Confirm Actions
Once the dry run is completed, it will show you the list of files and directories to be restored and the list of files and directories to be deleted (i.e. the files and directories which are not in the current backup copy you are trying to restore).
Review the list of changes to be made and click Next to confirm:
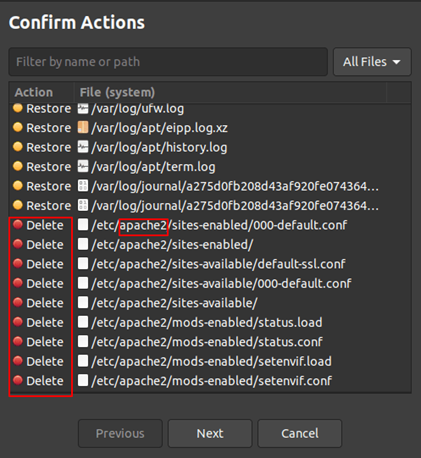
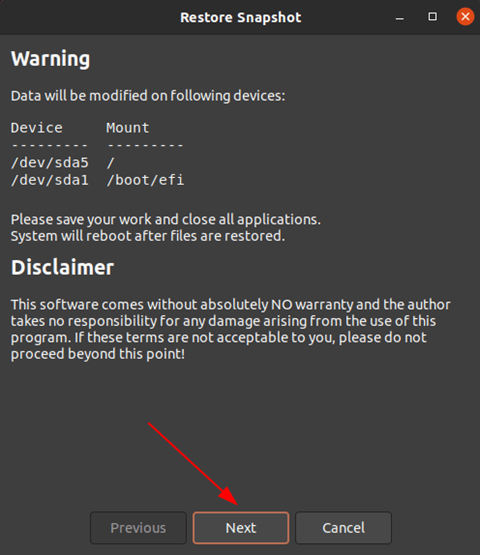
In the next window, TImeshift will display a warning message. Click Next to restore the snapshot:
Timeshift will restore the snapshot in a couple minutes.
Best Practices for Using Timeshift
- Use an External Drive: Store snapshots on an external drive to protect against disk failures.
- Set Regular Schedules: Daily or weekly snapshots provide the best balance.
- Clean Old Snapshots: Delete older snapshots periodically to save space.
- Exclude Personal Data if Using Cloud Storage: Back up personal files separately using tools like Google Drive or Nextcloud.
- Test Restore Occasionally: Try restoring a snapshot once in a while to ensure backups work correctly.
Advantages and Limitations of Timeshift
Advantages
- Easy to use with a graphical interface.
- Restores the system quickly.
- Works seamlessly with Linux Mint’s Update Manager.
- Supports automatic backups.
Limitations
- Doesn’t focus on personal data (documents, pictures).
- Can consume significant storage if snapshots aren’t managed.
- Performance may slow slightly if snapshot location is low-speed media.
Common Issues and Fixes
- Snapshots Not Created Automatically:
Check if Timeshift is enabled in Settings → Schedule. - Not Enough Disk Space:
Move snapshots to a larger partition or delete old ones. - Restore Fails from GUI:
Try restoring via terminal with: sudo timeshift –restore
Backing up your system is one of the smartest steps you can take as a Linux user. With Timeshift in Linux Mint, creating and restoring backups becomes effortless, even for beginners. Whether you face a bad update, a misconfigured setting, or a system crash, Timeshift ensures you can get back on track within minutes.
By setting up automatic snapshots, storing them on an external drive, and occasionally testing restores, you guarantee that your Linux Mint installation remains safe and reliable.
Timeshift isn’t just a backup tool—it’s peace of mind for every Linux Mint user.
FAQs on Timeshift in Linux Mint
1. Does Timeshift back up my personal files in Linux Mint?
No, not by default. Timeshift focuses on system files. You can configure it to include /home, but for large data, use other backup tools.
2. How much space do I need for Timeshift snapshots?
A snapshot usually takes 1–2GB initially, then smaller space for incremental changes. The exact size depends on how many system changes you make.
3. Can I restore Timeshift snapshots on another computer?
No, Timeshift is system-specific. Use it only for restoring on the same Linux Mint installation.
4. How is Timeshift different from Clonezilla?
Timeshift creates incremental system snapshots, while Clonezilla clones entire drives. Timeshift is faster for everyday backups.
5. Can Timeshift replace cloud backups?
No, Timeshift doesn’t sync files online. Use it alongside cloud services for complete protection.
Stay updated—follow us for more tips at rootlearning.in.
Discover more from Root Learning
Subscribe to get the latest posts sent to your email.