Have you ever wondered how companies and brands have their own email server from their domain, like Google.com, Microsoft.com, and Amazon.com, will be in every Domain aspect.
It makes you think about how it occurs and what the secret lies in having your own email server.
Let’s walk through this guide to create an email server in Ubuntu- even if you’re a beginner.
Let’s set up your own email server on Ubuntu
Why should you Build Your Own Email Server?
Running your own mail server gives you complete control over your domain or work. It’s ideal for small businesses, developers, and website owners who want professional email hosting.
- Your email privacy
- Unlimited accounts for your domain
- Brand identity for your company or startup
- Cost savings over third-party email services
Benefits of Running Your Own Email Server on Ubuntu
Enhanced Privacy: All emails are stored securely and safely on your Ubuntu server, and no third-party access or data tracking.
Professional Branding: Every message sent from your domain, like @designbyk.com, strengthens your business identity and trust.
Administrative Control: Manage configurations, user accounts, and security policies directly through Ubuntu.
Complete Data: You can manage your own backups, saved emails, and message delivery, giving you clear control over everything.
Flexible & Personalized: Easily expand to add new users, domains, or mail features as your business grows.
Cost-Effective: No monthly fees, only free open-source tools on your Ubuntu server.
What You’ll Need
Before we start, make sure you have these requirements.
If you are a beginner installing Ubuntu Server, these are some versions of Ubuntu that are recommended: 20.04 or 22.04
You can set it up on AWS, Digital Ocean, Google, or your VPS.
Then, have a registered domain name
Let’s start with the Step-by-Step Guide
First, open the terminal and log in to the Ubuntu server
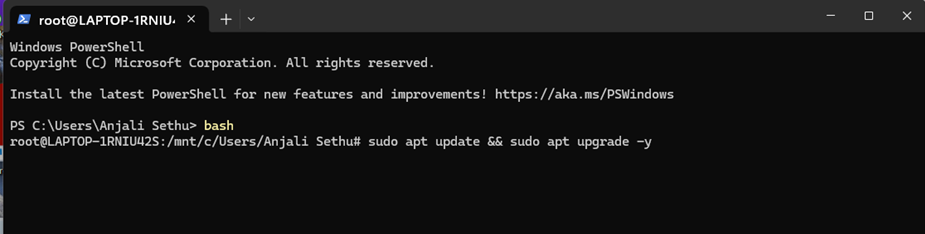
Step 1: Update & upgrade your system
By using this command, just update the system
“sudo apt update && sudo apt upgrade -y”
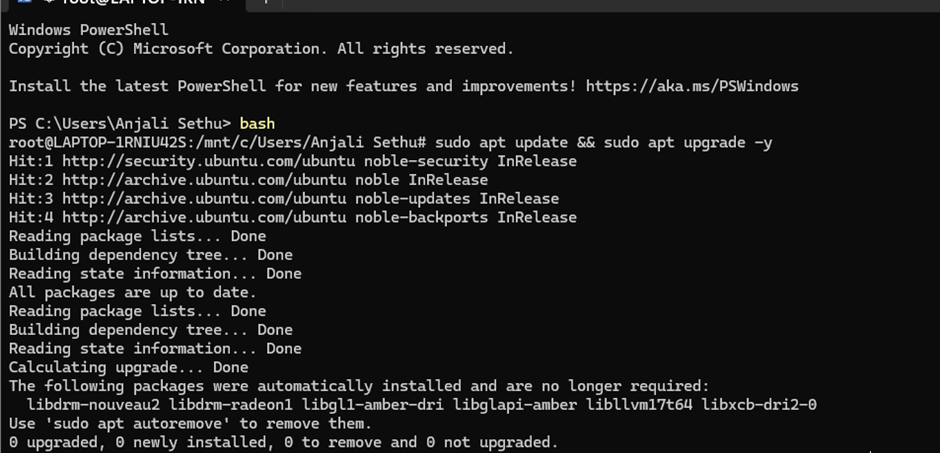
It takes some time to upgrade the system,
Once it is completed.
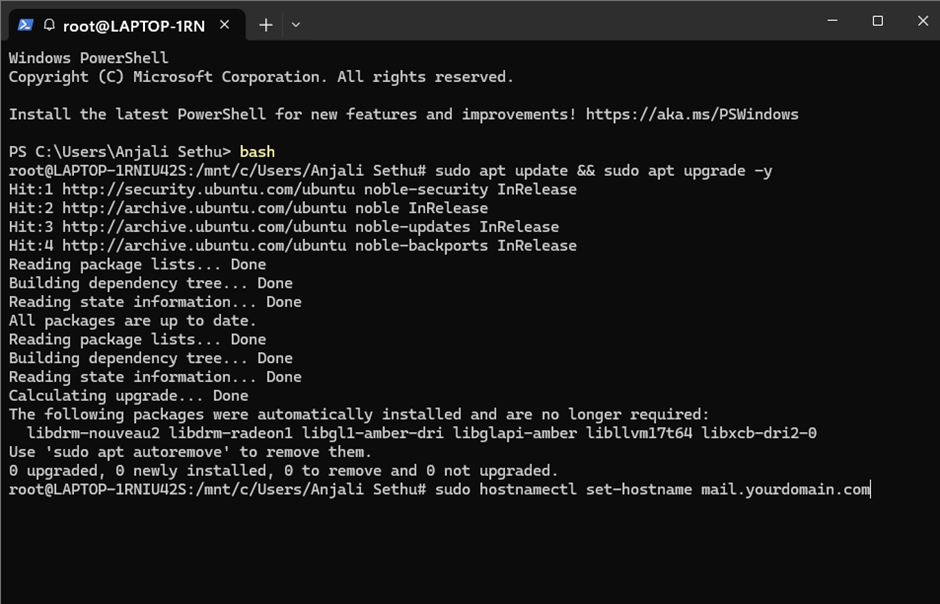
Step 2: Set your Hostname and Domain
If you have created your own Domain name, then set your server hostname.
“sudo hostnamectl set-hostname mail.designbyk.com”
Replace it with your domain name
Then, verify the hostname and edit your host file
Step 3: To verify,
Check the name “hostnamectl”
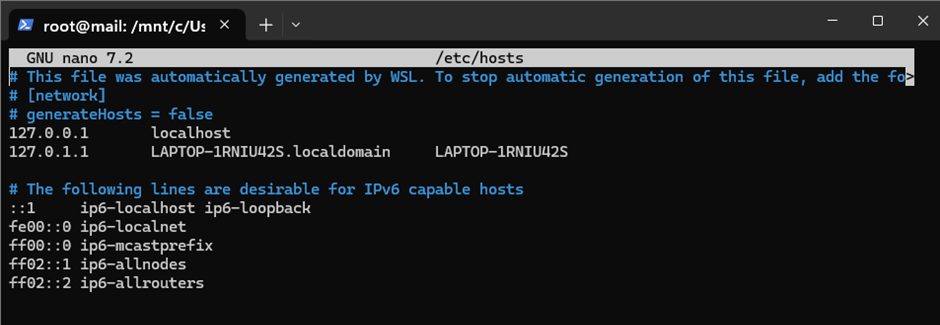
Edit your hostname file and add the line
“123.45.67.89 mail.designbyk.com mail”
with your actual IP address and domain
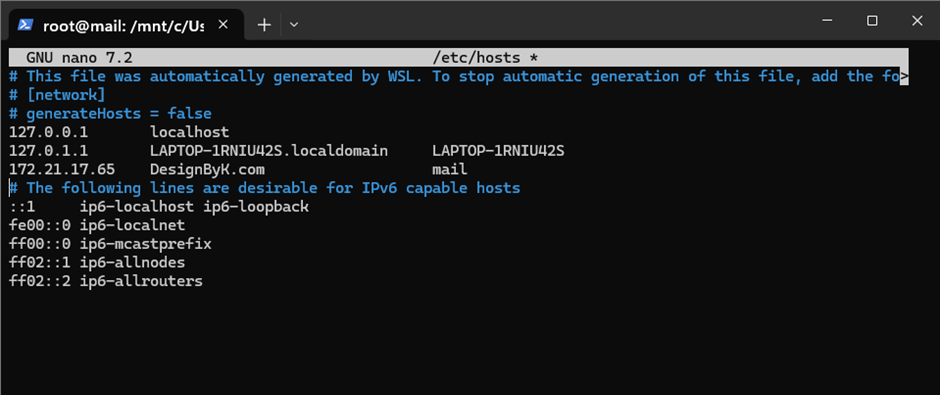
After replacing the lines, press Ctrl+O to save, then
Ctrl+X for exit
Step 4: Install Postfix
Postfix is a mail transfer agent (MTA), a program used on Linux and Unix-like systems to send, receive, and route emails.
Use the command to install Postfix
“sudo apt install postfix -y”
During installation, you’ll be prompted to configure.
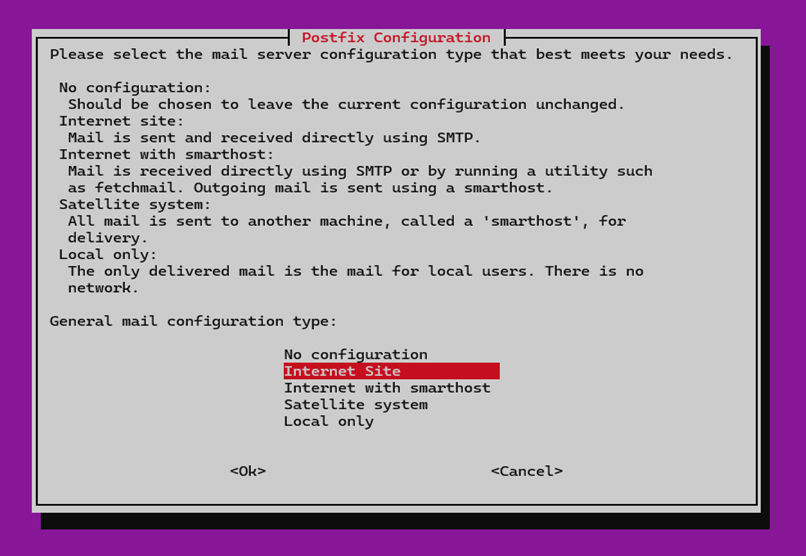
General type of mail configuration, select “Internet Site”, click ok
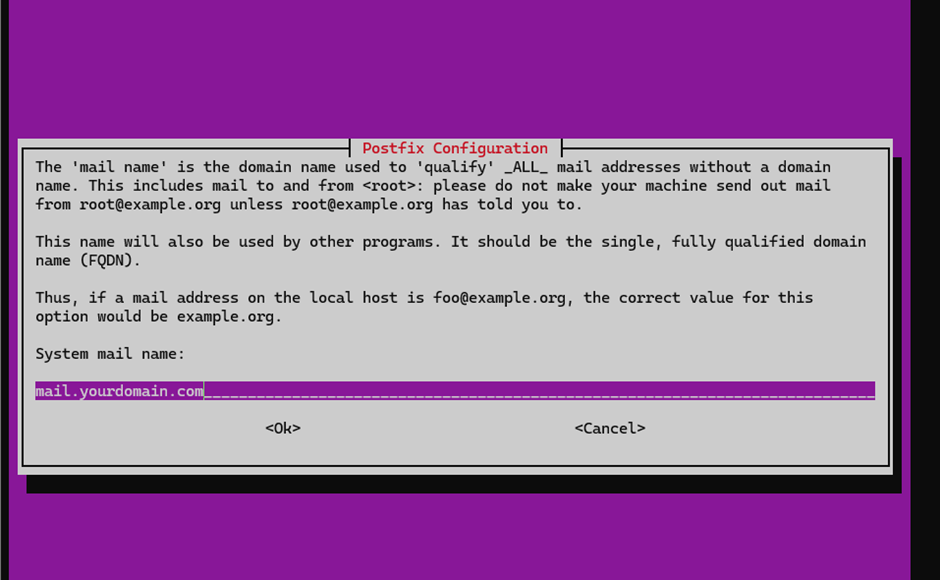
For the System mail name, enter your domain name (e.g., designbyk.com)
Step 5: To reconfigure the Postfix,
Anytime, use the command in line
“sudo dpkg-reconfigure postfix”
then if it is not configured, then,
Add and confirm the lines with your
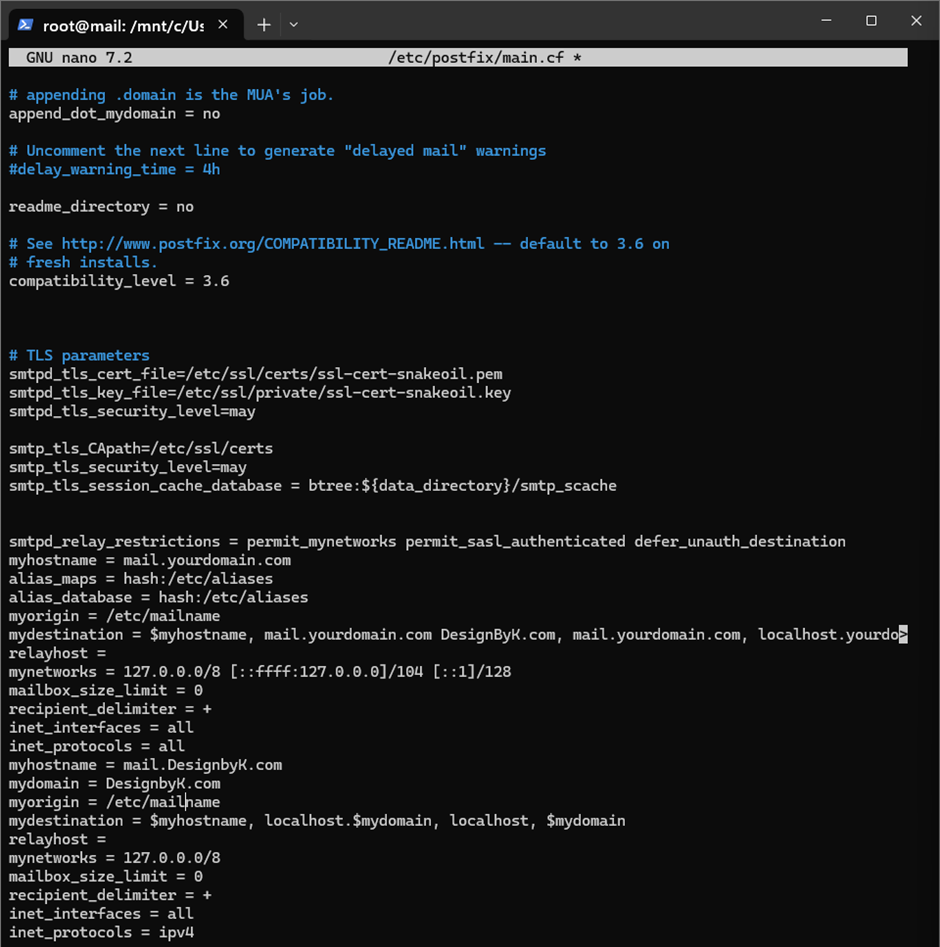
Use the command “sudo nano /etc/postfix/main.cf” and then add your actual domain name
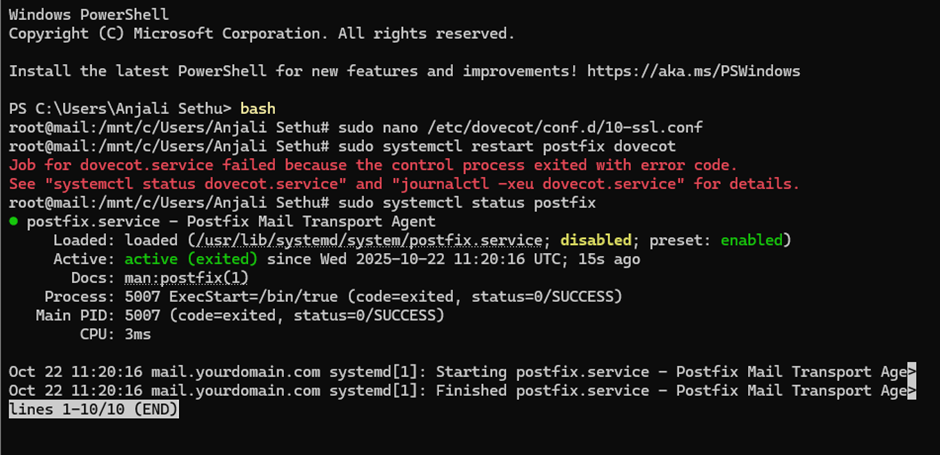
Step 6: Then restart Postfix
with the command
“sudo systemctl restart postfix”
Check the status of Postfix, “sudo systemctl status postfix”, and click Enter

It starts to activate and shows the status.
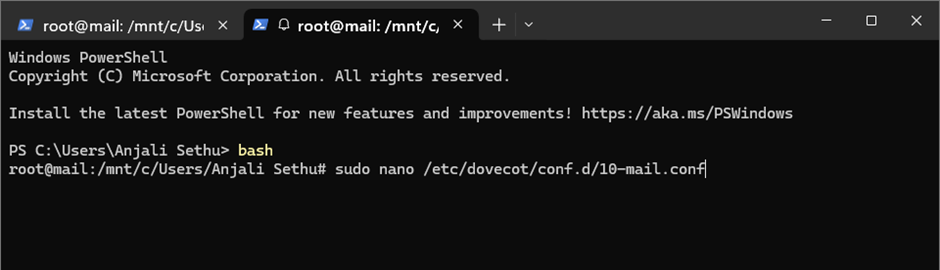
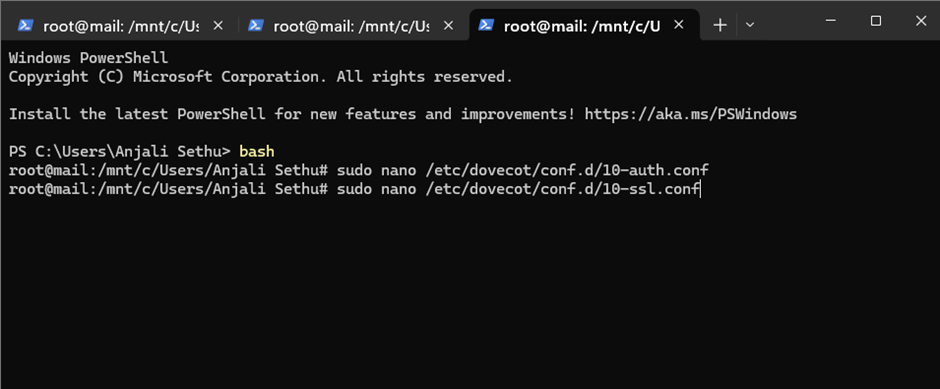
Step 7: Configure Dovecot
Dovecot is for receiving the mail. Let’s set up with the format of maildir and SSL,
and use the command to open Dovecot. configuration
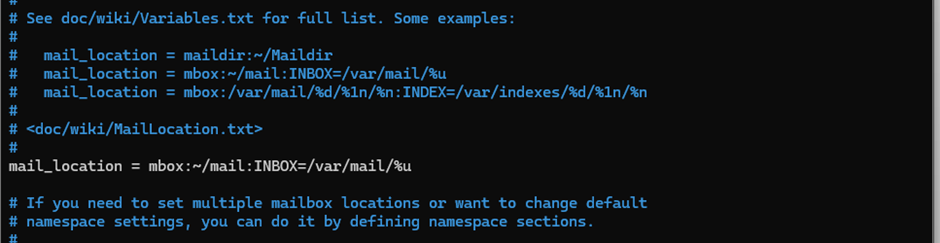
Press “Enter”, it will move on to the page of configuration, and find these lines
“#mail_location =”
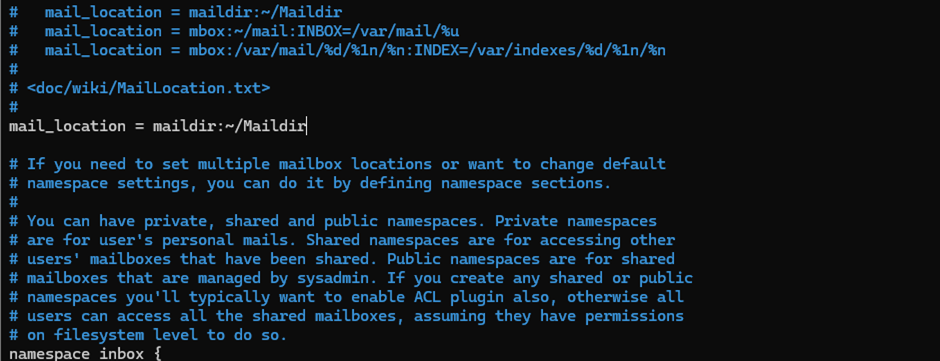
Step 8: Mail. Directory
change it into these lines of command in Maildir
“maildir:~/maildir”
Press Ctrl+O to save, and
Ctrl+X to exit.
Step 9: status check
It helps to direct all the stored mail inside the maildir folder in each user’s home directory
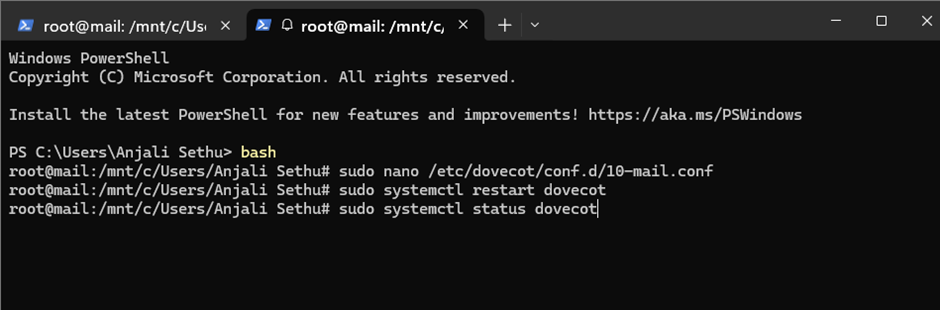
Once the directory has changed, then restart it and check the status
Step 10: Add SSL (Let’s Encrypt)
By adding SSL, when you visit and send an email, information such as your username, password, and other personal data travels securely through the network.
use the command
Find the line as “ssl = yes” and change it to “required”
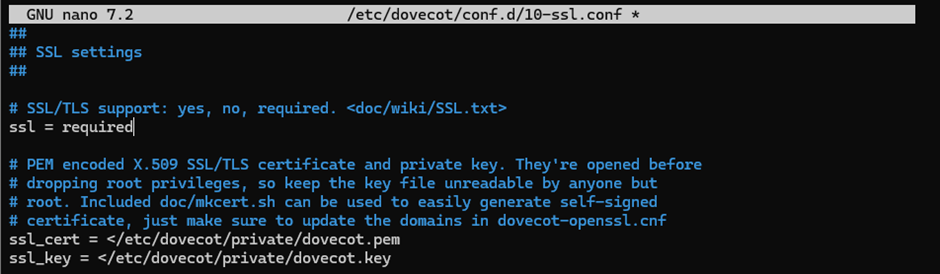
And use the command in lines instead of it.
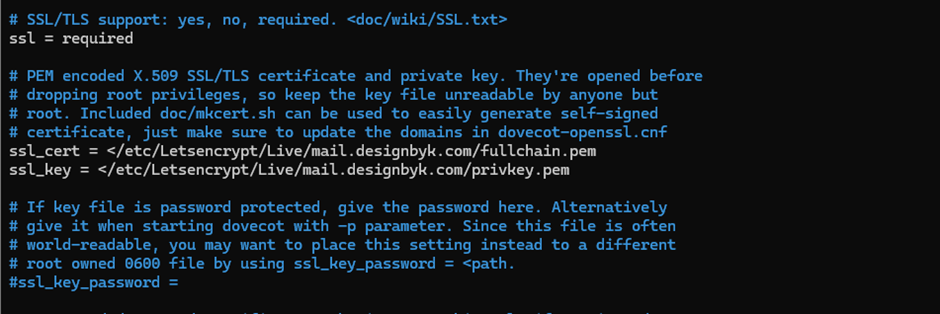
Save and exit the page
Step 11: Restart the SSL, check the status
Step 12: Create a Mail User
Now, create your first mail user account and set the password

Give the details information for the mail user,
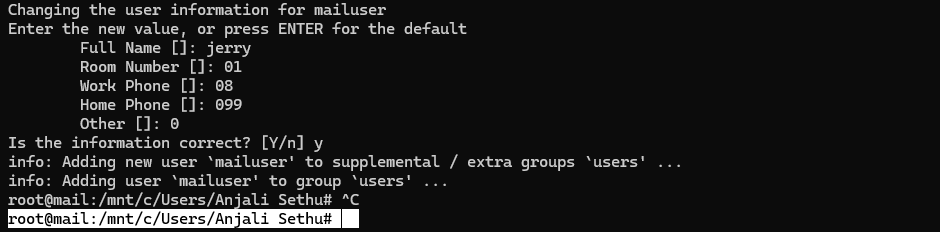
Step 13: User information
Press Enter to default the information of users
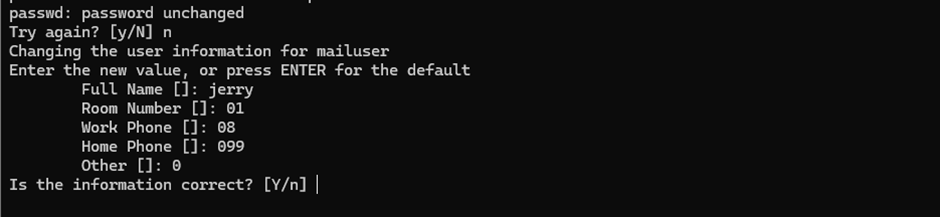
Once the information that you have given is correct,
Then click “y”
Finally, you can test sending and receiving with the mail test
“echo “Hello from your Ubuntu Mail Server!” | mail -s “Test Email” youremail@gmail.com”
If it has arrived, then
your email server is ready!
Conclusion
You’ve successfully set up a basic email server on Ubuntu for your domain, like other companies and brands. you have gone through using Postfix for sending mail and Dovecot (for receiving mail.
You can create a secure mail user, configure SSL/TLS for encryption, and prepare your Maildir for the inbox.
It’s ready for real-world use and testing
Start Building Your Own Email Server Today!
Take control of your communication.
Follow these steps, set up your Ubuntu mail server, and send your first email from your own domain
It’s easier than you think!
Frequently Asked Questions (FAQ)
1. What is an email server, and why do I need one?
An email server sends, receives, and stores your emails, giving you full control and a professional domain-based address.
2. Do I need a domain name to create my own mail server?
Yes, a domain name like designbyk.com is required to set up custom emails such as info@designbyk.com.
3. Can I use my personal computer as an email server?
You can, but it’s not recommended to use a VPS or cloud server for better uptime and reliability.
4. Is it safe to host my own email server?
Yes, if secured with SSL, SPF, DKIM, and a firewall to protect against spam and attacks.
5. Why are my emails going to the spam folder?
This happens if SPF, DKIM, or DMARC records are missing or if your IP is blacklisted.
6. Can I create multiple email accounts on one server?
Yes, you can host multiple addresses like info@, support@, and sales@ under one domain.
7. How can I access my emails after setup?
Use Roundcube Webmail, an email client (like Outlook), or mobile apps via IMAP/SMTP.
Table of Contents
Discover more from Root Learning
Subscribe to get the latest posts sent to your email.