Yum Configuration is a term that is used for configuring the yum. In easy language, To install anything in our Centos Linux system we have to use yum and for that we have to install the yum.
Yum is the main software to install any other software and in the minimal installation yum has to be configured separately. In this post, We will learn how to configure yum locally in your Centos system.
How to do Yum Configuration?
For doing Yum Configuration, We have to setup the repos of yum in repo list. It is not that difficult as it sounds. Lets begin the process now.
Before we will start, I will let you know that Yum Configuration is needed only in minimal versions of CentOS. In graphical versions, Yum always create repo list on its own.
You will get the below error whenever you will try to install anything on a system where yum is not configured. The same error can occur due to no DNS entry in resolve file.

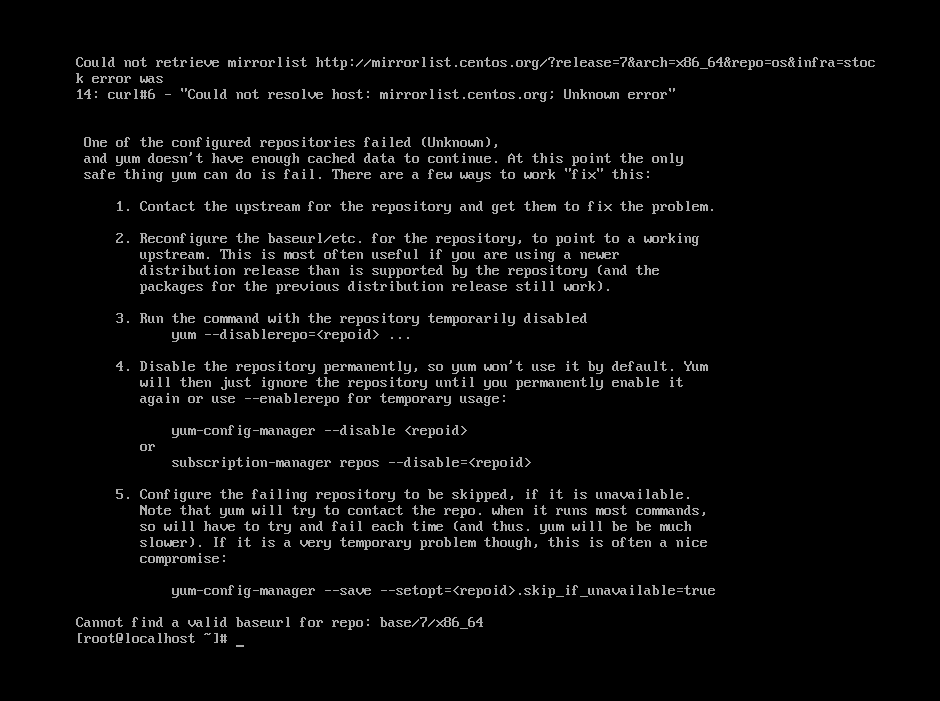
Simple error would be “Cannot find a valid baseurl for repo: base/7/x86_64”.
Let’s start the process. First, We will check the repos of yum in our system by the command “yum repolist”.
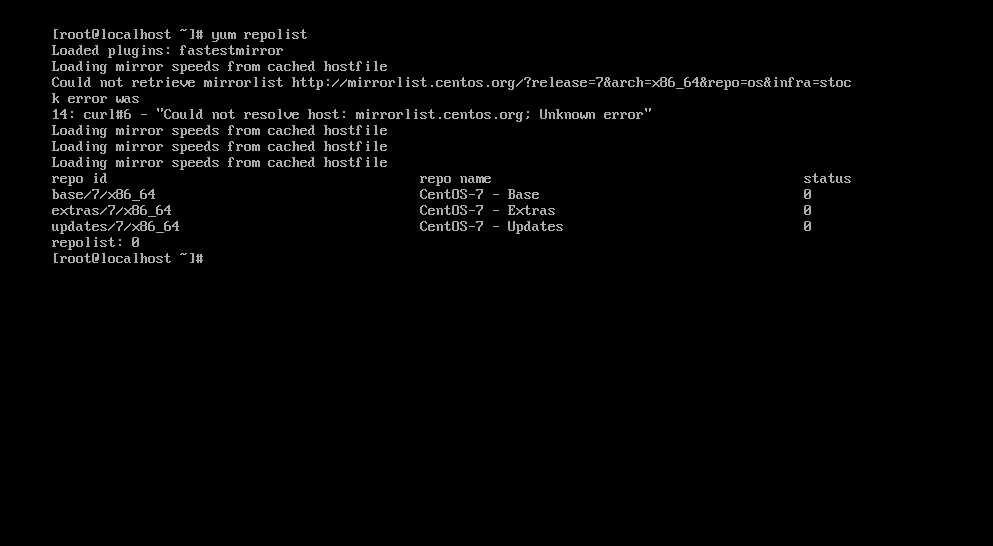
As we can see in the screenshot above that at the last repolist is showing 0 that means there is no yum repo available to install any software in the system. Now, To create the yum repolist we have to go to the repos directory of the yum that is “/etc/yum.repos.d“.

Here we can see all the default yum repos by doing ‘ls‘. If you don’t know the usage of ls, Please click on the link to learn that first.
Before creating a repo file, We have to get our dvd link or path where all the softwares are available in our system. For that, We have to run “df -h” command.
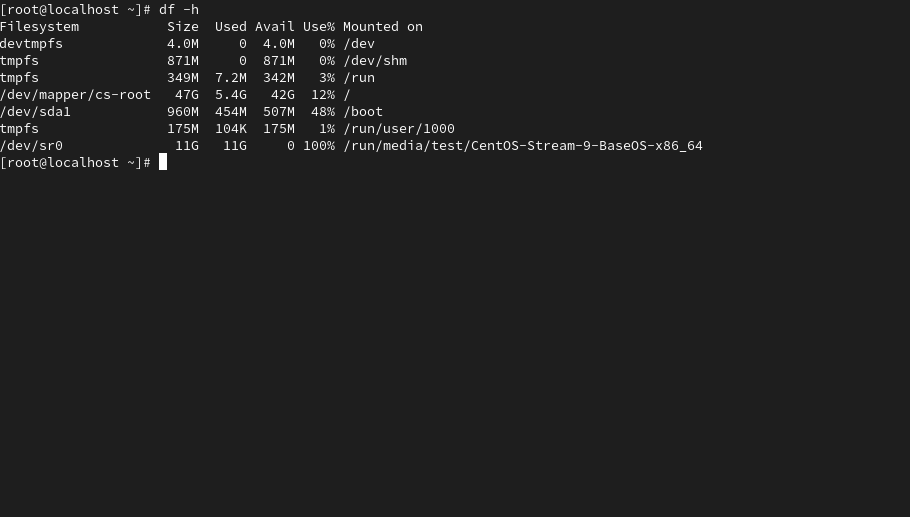
Now, We have to copy the path of the dvd that would be in front of /dev/sr0 filesystem that is “/run/media/test/CentOS-Stream-9-BaseOS-x86_64“. For downloading CentOS iso, Please click on CentOS 9 minimal iso.
Next, We have to create a repo file at “/etc/yum.repos.d” with the extension repo for the file. We will create a repo file with the help of vim with name “linux.repo“. If you don’t know how to use vim editor, Please learn it in a minute from Basic commands for CentOS 9.
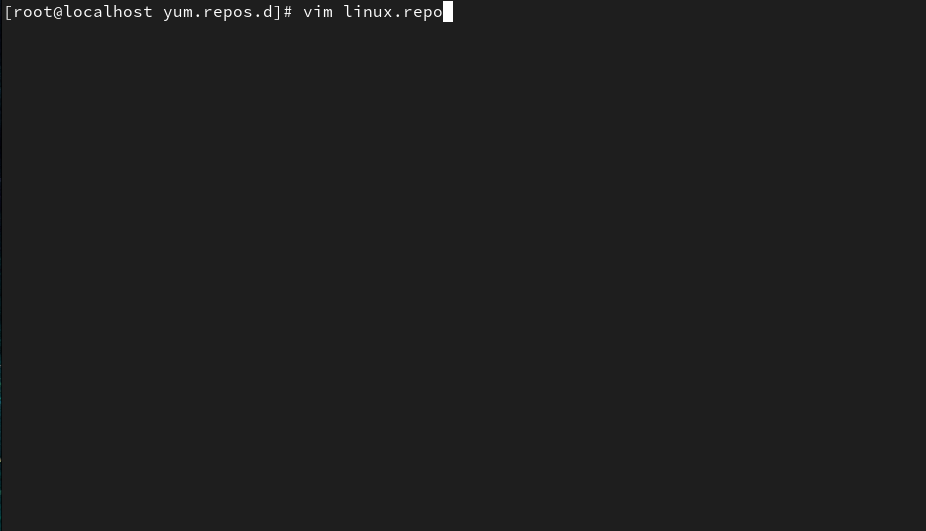
It is time to provide the name, URL and signature check to the file. We will configure the yum with the bare minimum requirements that will help in installing the software. If you want to go for advance entries then comment below and we will create a new post for advance yum configuration.
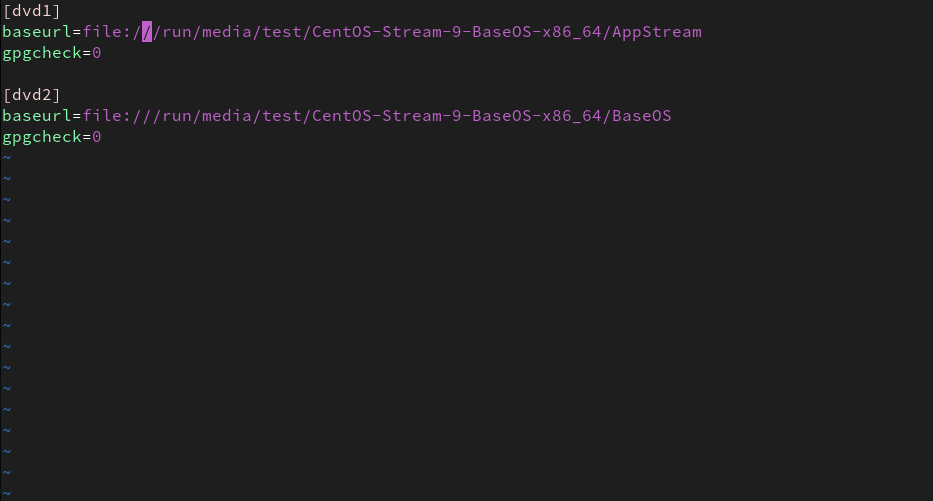
In the above screenshot, This is the content of yum repo file that we have created. There are two URL’s that contain all the softwares with the names AppStream and BaseOS. First, There is name of the repo URL that we have given as ‘dvd1‘ and ‘dvd2‘ respectively. Second field is ‘baseurl‘ that is the link from where the software would be install by yum. We have to put the dvd link we have copied earlier with the format “baseurl=file://‘. Third field is about the signature check from the software authorities and it is written as ‘gpgcheck‘. gpgcheck has two values 0 and 1, Where 0 is disabled for checking and 1 is for enabling the check.
Now, We will check the yum configuration by installing httpd software by yum.
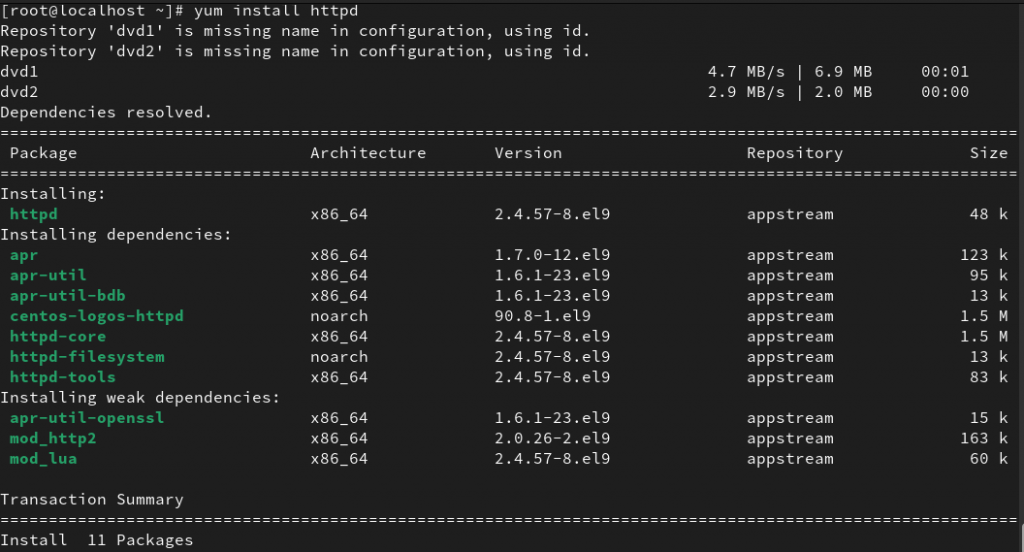
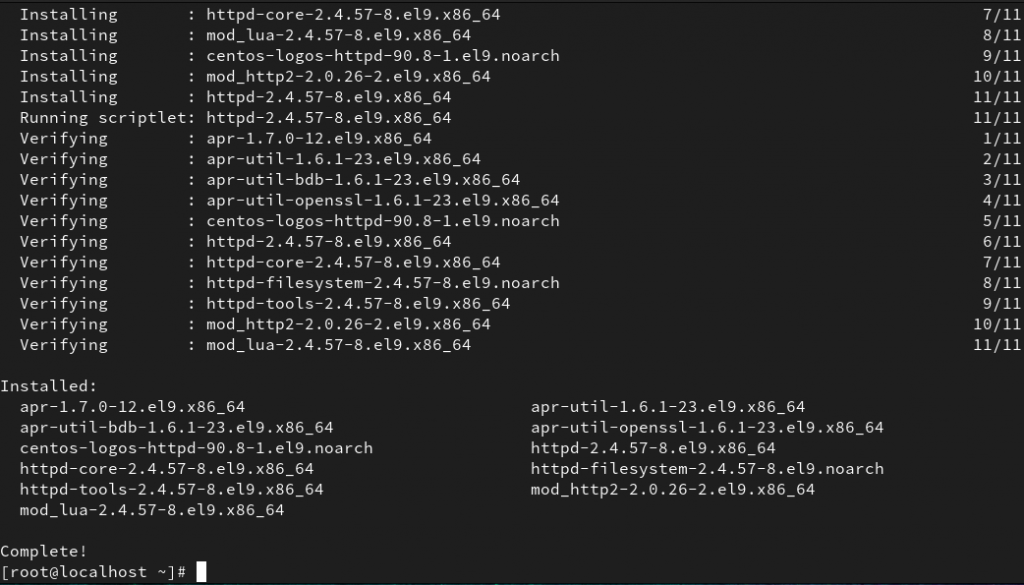
As we can see that httpd software is installed in our system with the help of our repository. That’s how we can do yum configuration for our system.
Q. What is YUM?
A. YUM (Yellowdog Updater Modified) is a package manager for RPM-based distributions like CentOS, Fedora, and Red Hat Enterprise Linux (RHEL). It simplifies the process of installing, updating, and managing software packages.
Q. Where is the yum configuration file located?
A. The main configuration file for yum is located at “/etc/yum.conf".
Q. What are yum repositories?
A. Yum repositories are storage locations where RPM packages are kept. Yum uses these repositories to install and update packages on the system. Repositories can be local or remote.
Q. How can I list all enabled repositories?
A. You can list all enabled repositories using the command:
yum repolist
Discover more from Root Learning
Subscribe to get the latest posts sent to your email.



Bohot mast bhai
I’m extremely inspired together with your writing talents as neatly as with the layout for your blog. Is that this a paid subject or did you modify it your self? Either way stay up the nice quality writing, it is rare to look a great blog like this one nowadays!
Janab post achy hai
Good one to begin Linux 👍🏻
Yum configuration is really important for a beginner who wants to install anything specially in minimal versions of Linux.
I want to know few things more for this topic, how to contact you?