
Today, We will talk about how to create an EC2 instance on AWS Cloud platform in 2025. An EC2 instance (Elastic Compute Cloud instance) is a virtual server in Amazon Web Services (AWS) that provides scalable computing power. It allows users to run applications on cloud-based virtual machines.
Now we have to login our account and if don’t know how to create your AWS account for free then click on the link.
If you already have an AWS account then click on the link to login.
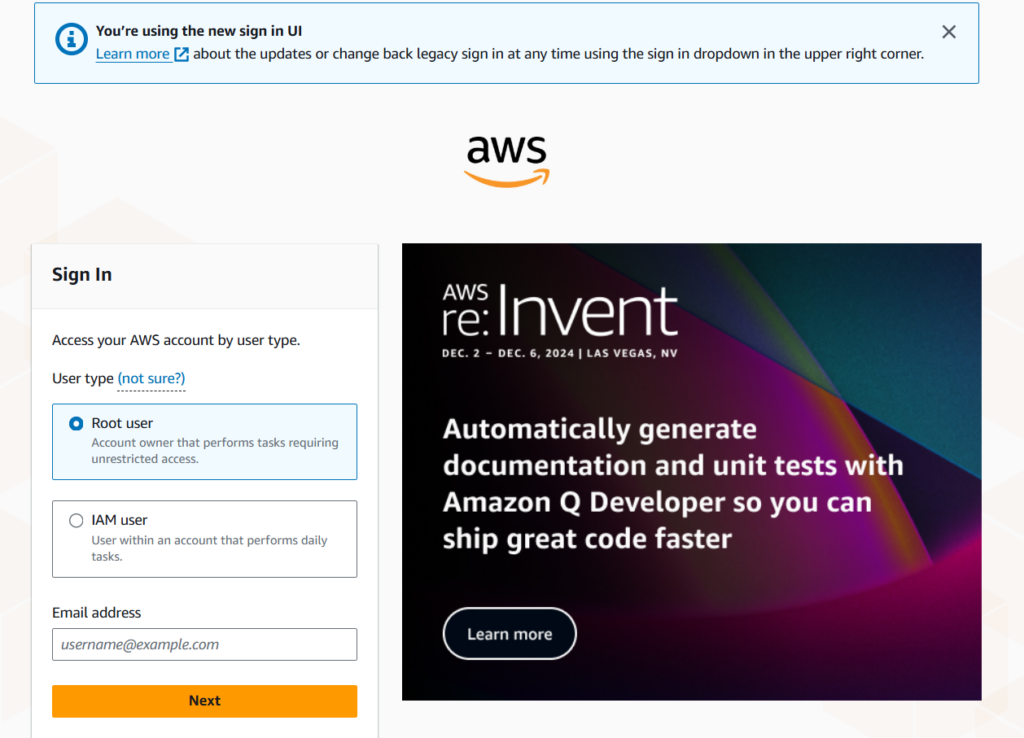
The screenshot above is from the login page of AWS console. You will get the Console Home page of the AWS cloud.
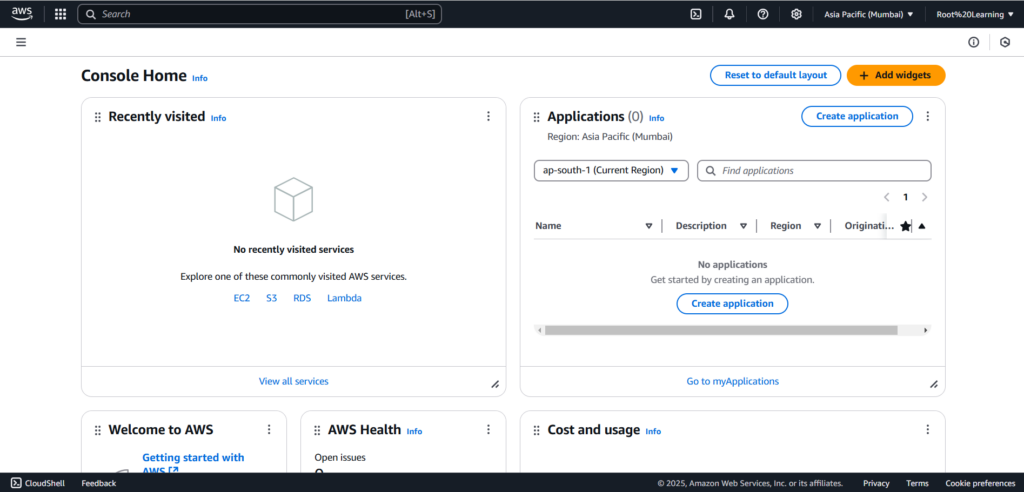
Now we will search for EC2 in the search bar of console home.

After clicking on EC2, It will open EC2 dashboard where we can read more about EC2 instances and its services.
We will click on “Launch instance” to select the configuration of our virtual server.
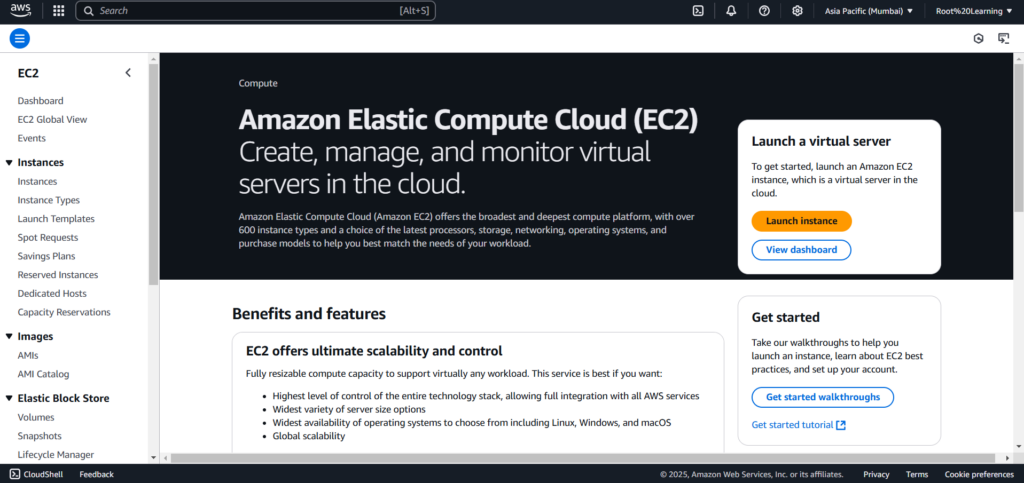
We have to configure our EC2 instance on the given dashboard by selecting our preferences. We are also getting the option to take a walkthrough of the dashboard to understand it better.
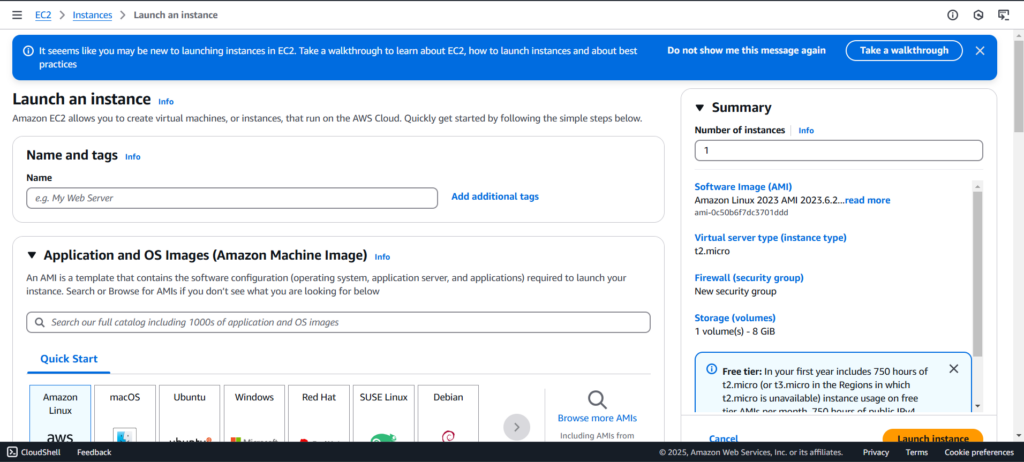
Let’s start with the configuration now, First we will give the name to our Ec2 instance.
I will give “My First Instance” to my EC2 instance.
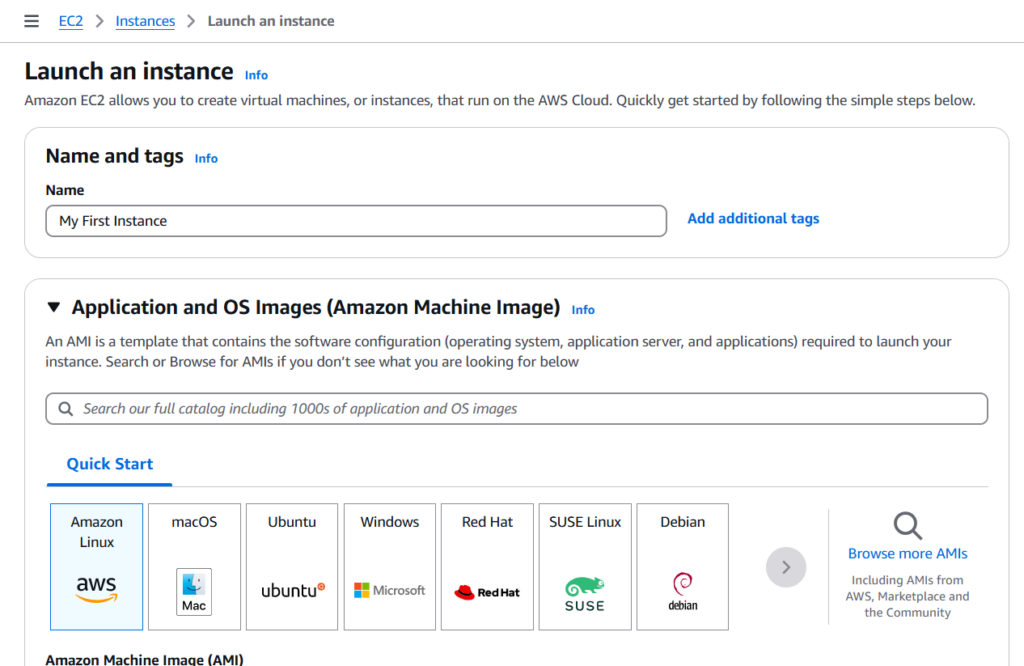
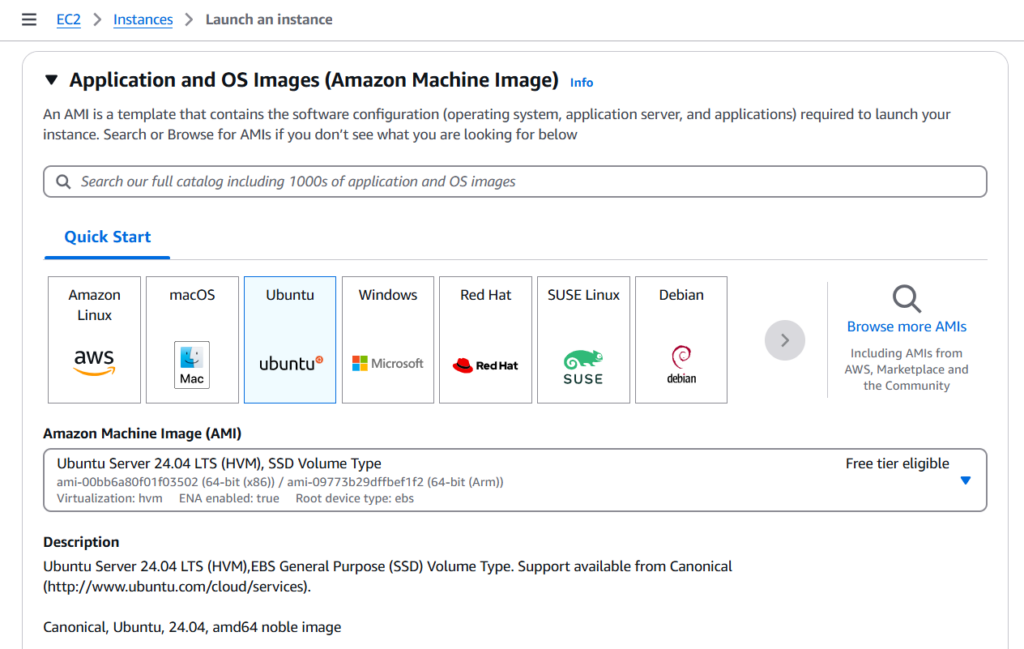
Now we will select the OS for our Instance from “Application and OS Images“. We will select Ubuntu for our instance OS.
We can also check for free tier eligible OS as it is written in front of every free tier eligible OS.
Next we have to select “Instance Type” where we can select our desired hardware requirements like vCPU, Memory etc.
We will go with Free tier eligible “t2.micro” in instance type.

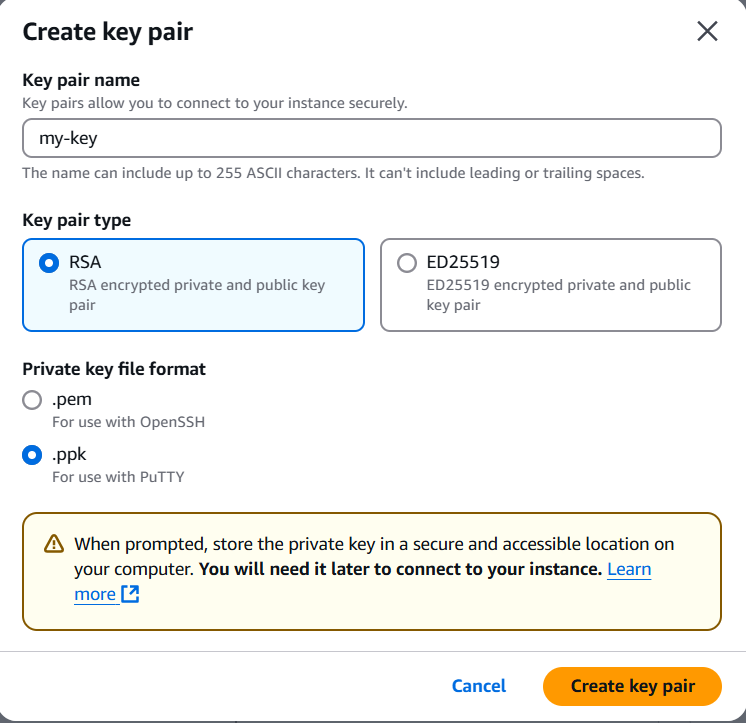
Next we have to create a key pair to connect to our instance after creation. We will click on the “Create new key pair“.

We will get a new menu for creating a key. We will provide the name for the key of your choice and select “.ppk” file type for easy login through putty.
We will click on “Create key pair” for downloading the key pair for our instance. We have to keep our keys on a safe place.
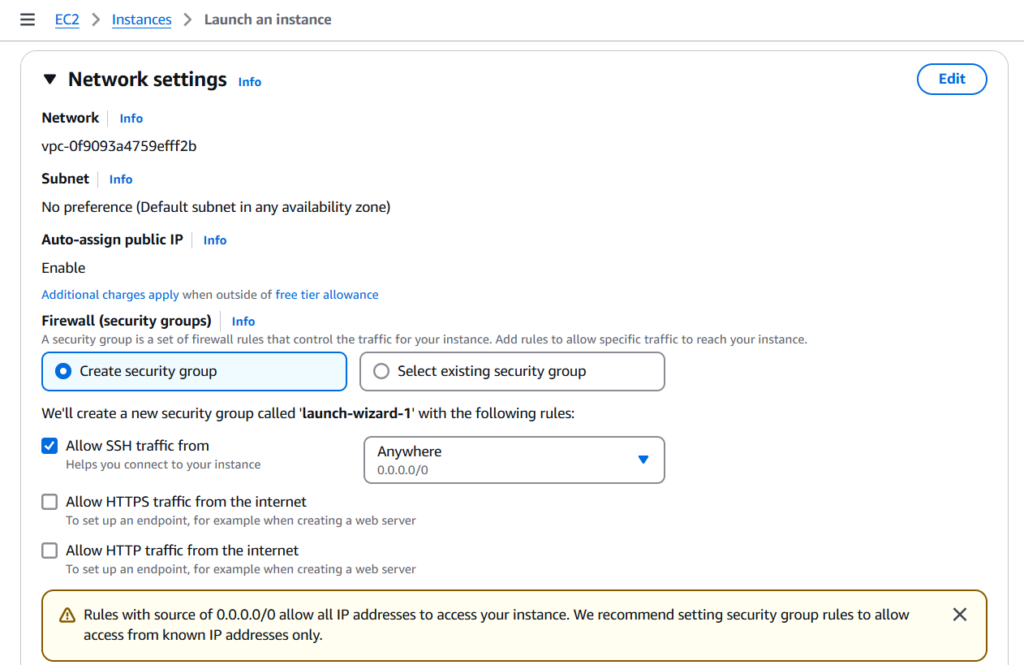
Now we will go for Network settings that includes Network, Subnet, Auto-assign public IP, Firewall (security groups) etc. We will go for default option for everything as we will make another post for fully customizations on instances.
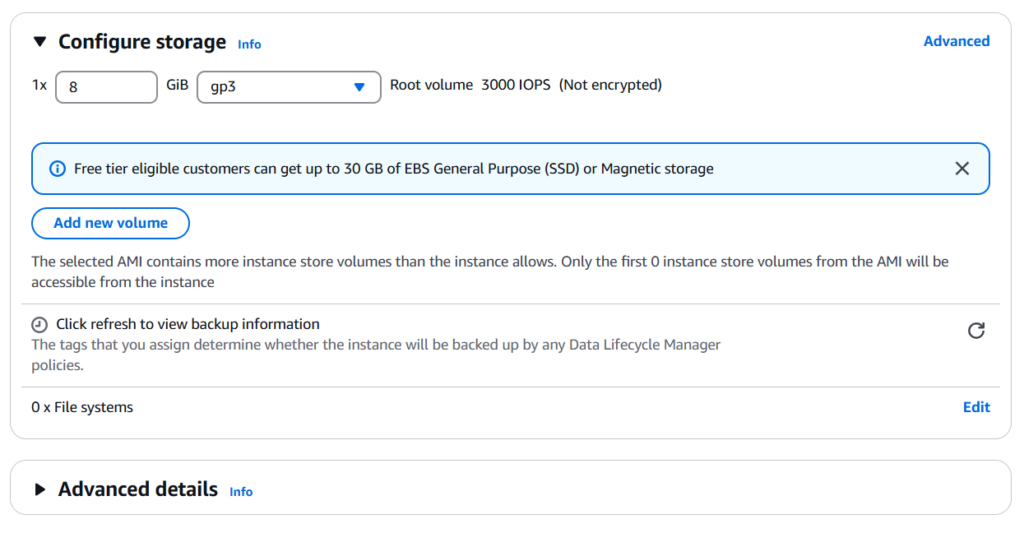
We are just testing the instance so we won’t increase the storage from 8 GiB and go with the default option in “Configure storage”. For Advance details, We will not configure anything and go with the default settings.
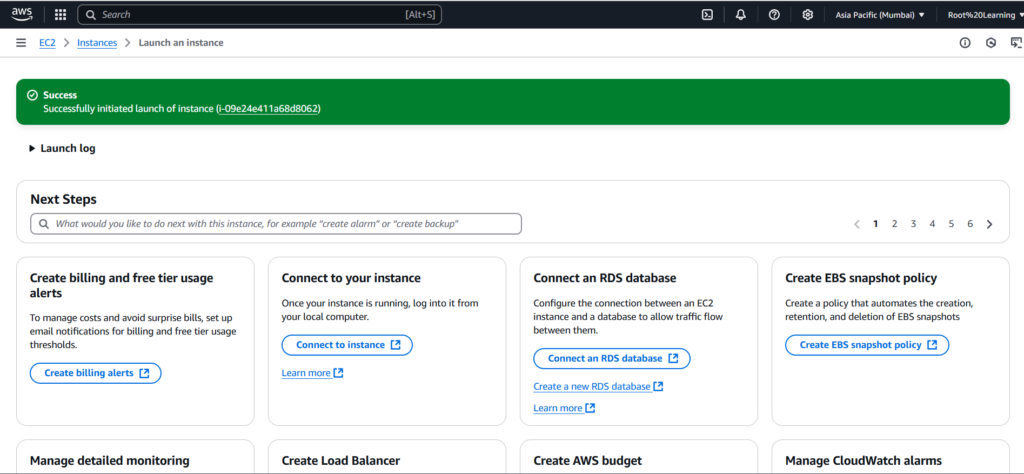
Now we will click on “Launch instance” from bottom left side to start our instance. Our instance will be ready in less than 2 minutes in most of the cases.
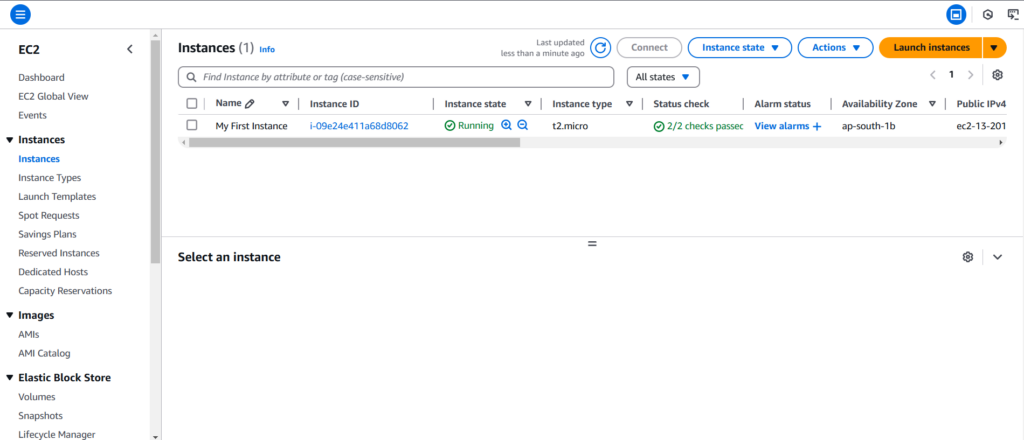
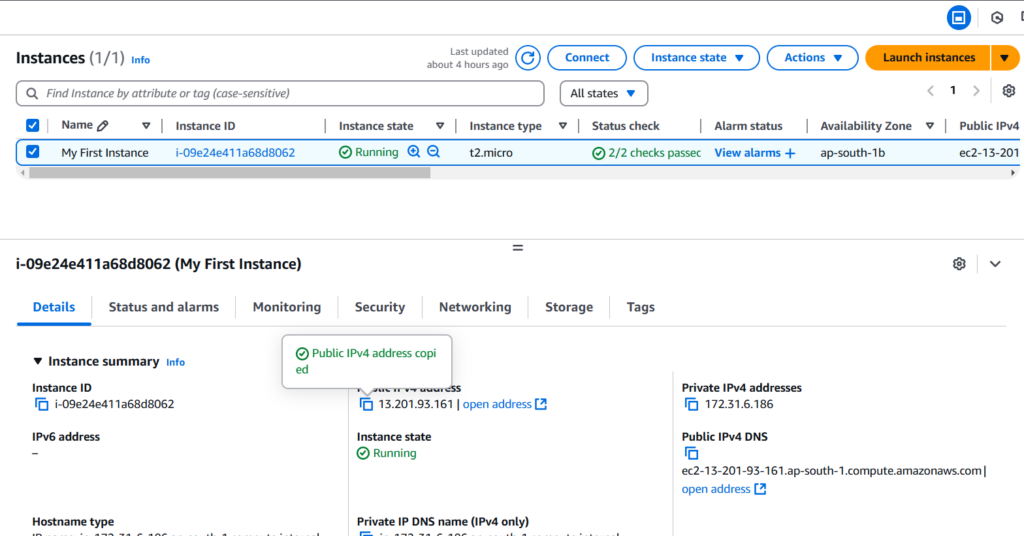
We can check our instance by clicking on Instances. We can access our instance with the help of putty by copying our public IP for accessing the server. We will not access the server in this post.
That’s all for How to create an EC2 instance in AWS.
Table of Contents
FAQ on how to create an EC2 instance in AWS
Q. What is Amazon EC2?
A. Amazon Elastic Compute Cloud (EC2) is a web service that provides scalable computing capacity in the AWS cloud. It allows users to run virtual servers (instances) on demand.
Q. What are the benefits of using EC2?
A. Scalability: Easily scale up or down as needed.
Cost-effectiveness: Pay only for what you use.
Flexibility: Choose from different instance types, operating systems, and configurations.
Security: Integrated security and compliance features.
Q. How do I launch an EC2 instance?
A. You can launch an instance via the AWS Management Console, AWS CLI, or AWS SDK. The process includes selecting an AMI (Amazon Machine Image), choosing an instance type, configuring instance details, and setting up security groups.
Q. What are the different types of EC2 instances?
A. AWS offers various instance types optimized for different workloads, including:
General Purpose (e.g., t3, m5)
Compute Optimized (e.g., c5, c6g)
Memory Optimized (e.g., r5, x2)
Storage Optimized (e.g., i3, d2)
GPU Instances (e.g., p4, g5)
Q. What pricing models are available for EC2?
A. On-Demand: Pay by the hour or second with no long-term commitments.
Reserved Instances: Commit to 1- or 3-year terms for discounts.
Spot Instances: Buy unused capacity at a lower price.
Savings Plans: Flexible pricing model with up to 72% savings.
Discover more from Root Learning
Subscribe to get the latest posts sent to your email.


I’m really inspired along with your writing abilities as neatly
as with the layout to your blog. Is this a paid subject matter or
did you modify it your self? Anyway keep up the nice high quality writing, it’s rare to peer a nice
weblog like this one today.
I’m really impressed along with your writing abilities and also with the format in your blog. Is that this a paid subject matter or did you modify it your self? Anyway stay up the nice quality writing, it’s rare to see a nice weblog like this one these days!
Post achi hai but or aws ki post kbtak aajayegi??
Brilliant writing my friend.
Lajawab bhaijan
Great one..